Our ByteScout SDK products are sunsetting as we focus on expanding new solutions.
Learn More
Important Update
ByteScout SDK Sunsetting Notice
Our ByteScout SDK products are sunsetting as we focus on our new & improved solutions.Thank you for being part of our journey, and we look forward to supporting you in this next chapter!
RPA Tools – Template Scenario 7: How to Add a Text to a Spreadsheet
ByteScout RPA Tools gives you the power to create an application that can perform business automation tasks without human interaction required (aka “robot”).
The RPA Tools builder has a set of pre-built templates. These templates allow you to build a new app with just a few clicks.
We offer this robot to show you how you can add text to a spreadsheet using RPA Tools.
How to create this robot
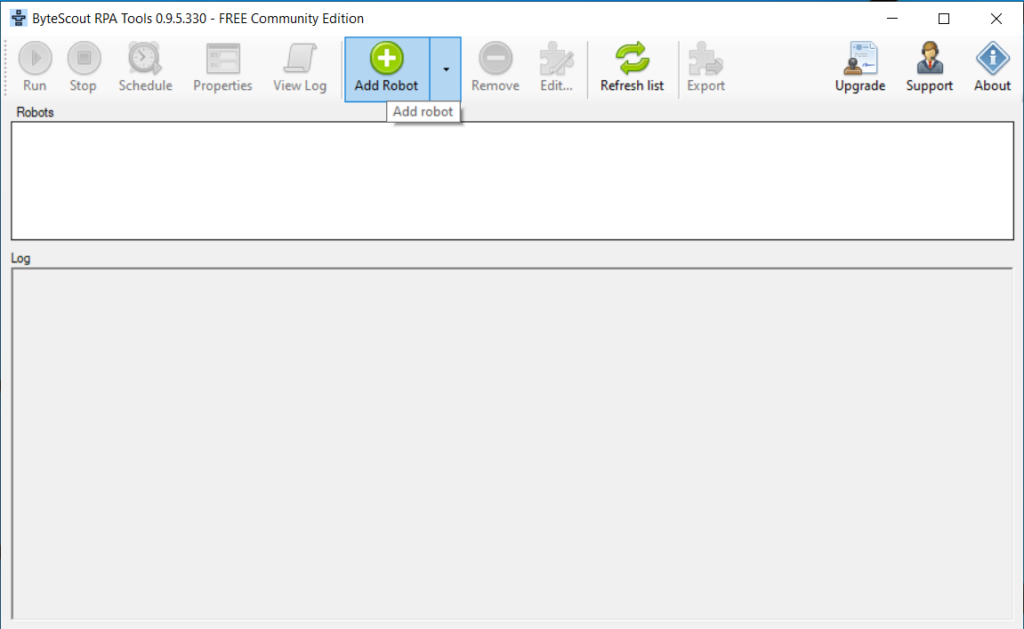
To create this robot, you need to open the RPA Tools application on your computer and press the “Add Robot” button.
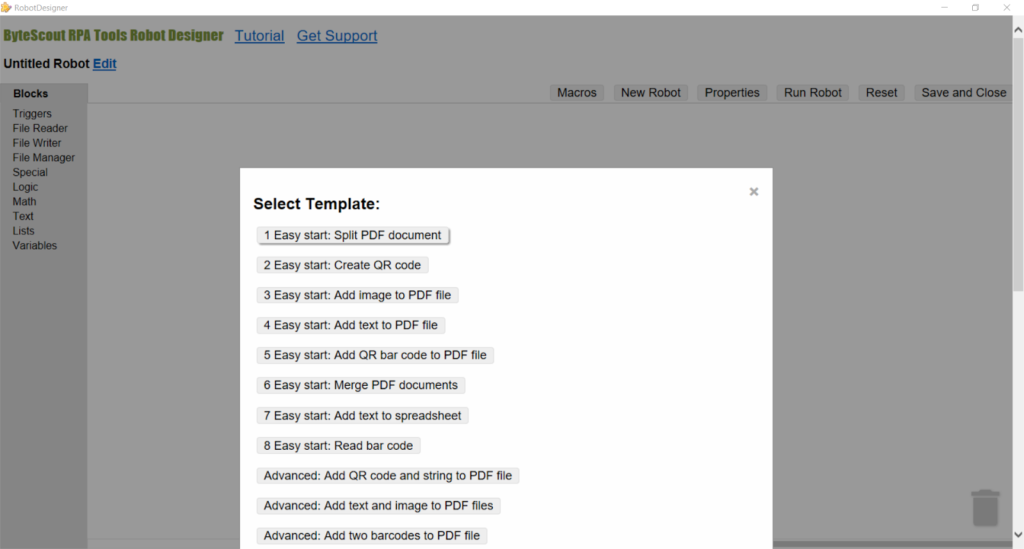
Then you can press the “7 Easy start: Add text to spreadsheet” button in the “Select Template” dialog window.
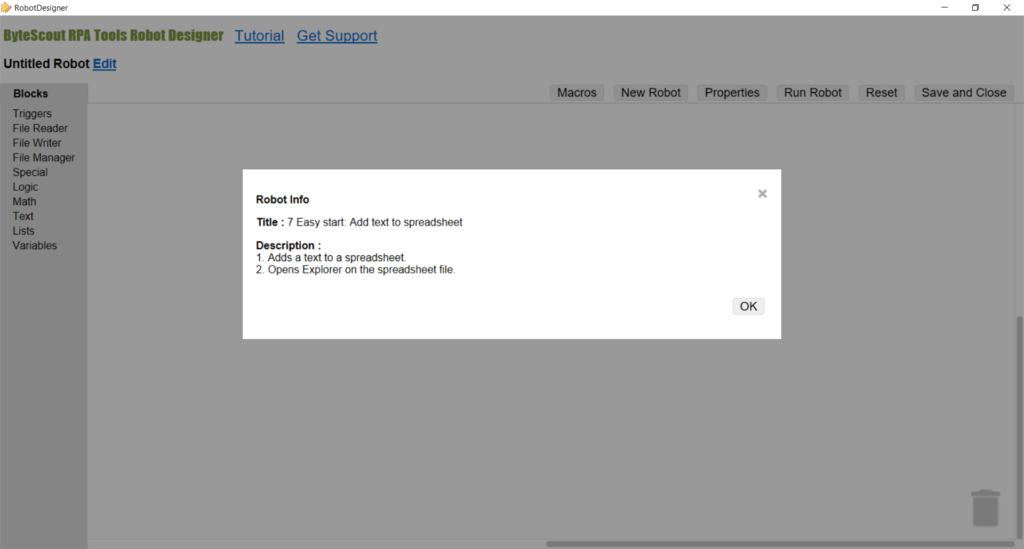
You can see the “Robot Info” informational dialog window. Please press the “OK” button.
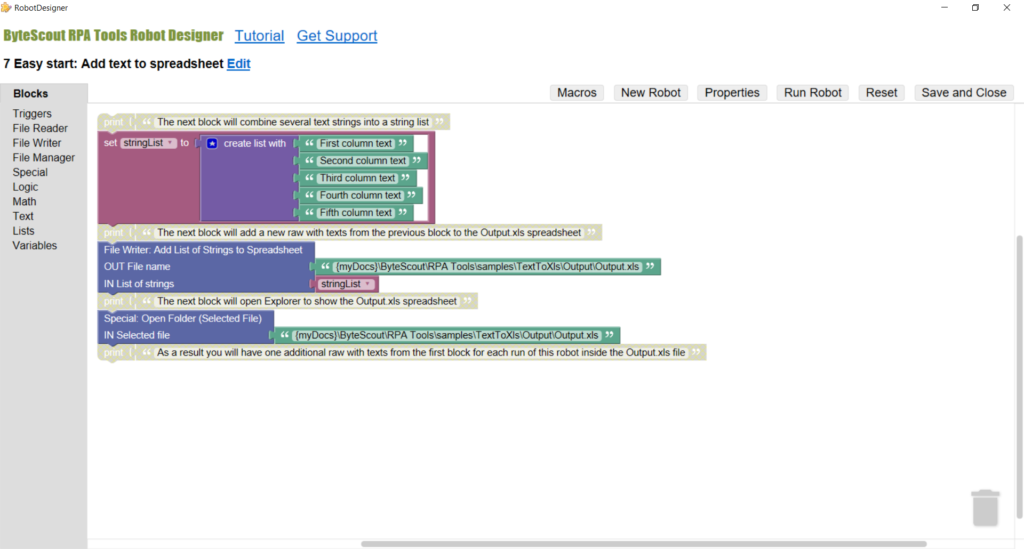
Now you have the robot created and displayed in the Designer.
Robot information
In this case, I would like to begin in the middle part of the robot.
Core blocks
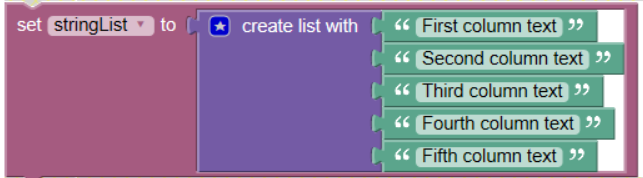
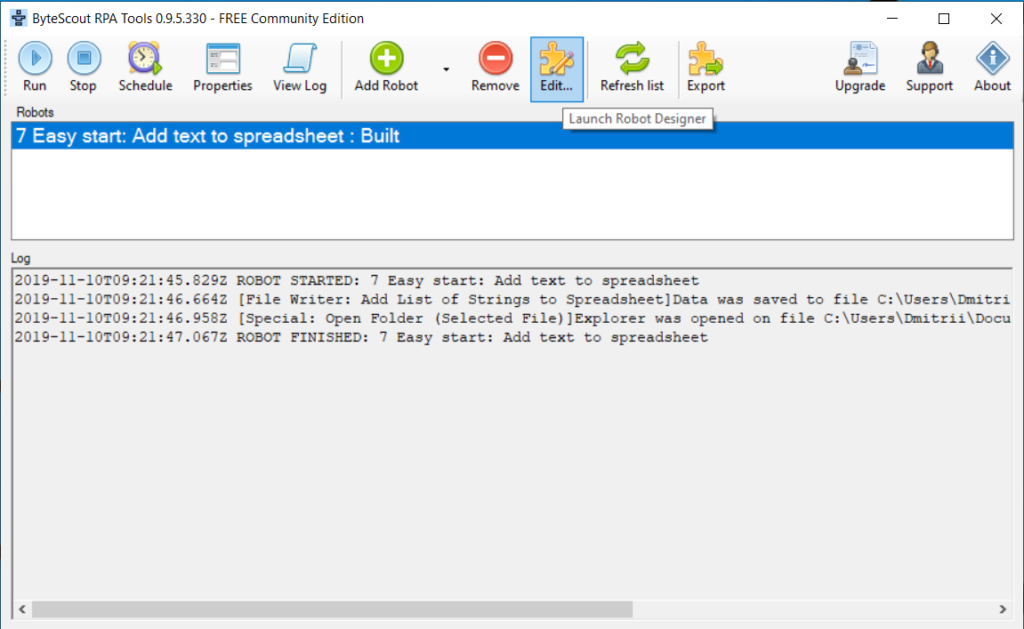
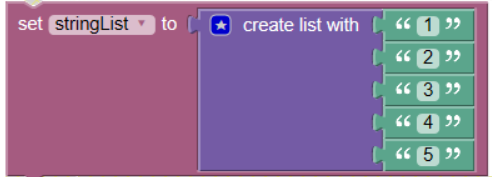
There is a blue block named “File Writer: Add List of Strings to Spreadsheet”.
This block takes a list of strings as an input parameter and makes changes in the output spreadsheet file. You can see that we only pass the name of the list (“stringList”).
That is the reason why we have some supporting blocks.
Because we need a list of strings as an input for the “File Writer: Add List of Strings to Spreadsheet” block, we are creating it. To do so, we use a “create list with” block and five “text” blocks. Also, we used a”set” block to set the name of this list. Thanks to that, we can pass the name “stringList” to the “File Writer: Add List of Strings to Spreadsheet” block as a parameter.
Commenting blocks
We used some of the blocks to make short notes.
The notes are about the actions of the other blocks. As the commenting blocks are disabled, they do not produce any work when the robot runs. Therefore, their only purpose is informing you.
Service blocks
Third, there are some service blocks to show you the resulting file produced by this robot.
We used a blue “Special: Open Folder (Selected File)” block. It opens Windows Explorer so you can see the “Output” folder.
How to run this robot
Now, as you have this robot created and displayed in the Designer, you can save it and close the Designer window using the “Save and Close” button.
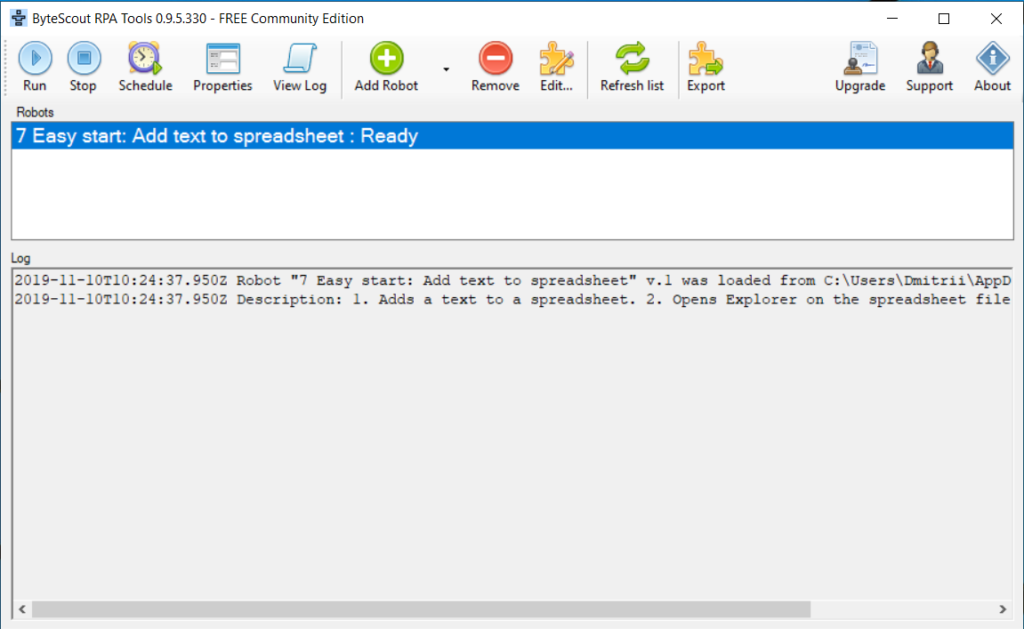
After saving, you can see the robot name in the “Robots” list of the RPA Tools application.
To run the robot, please press the “Run” button.
Results
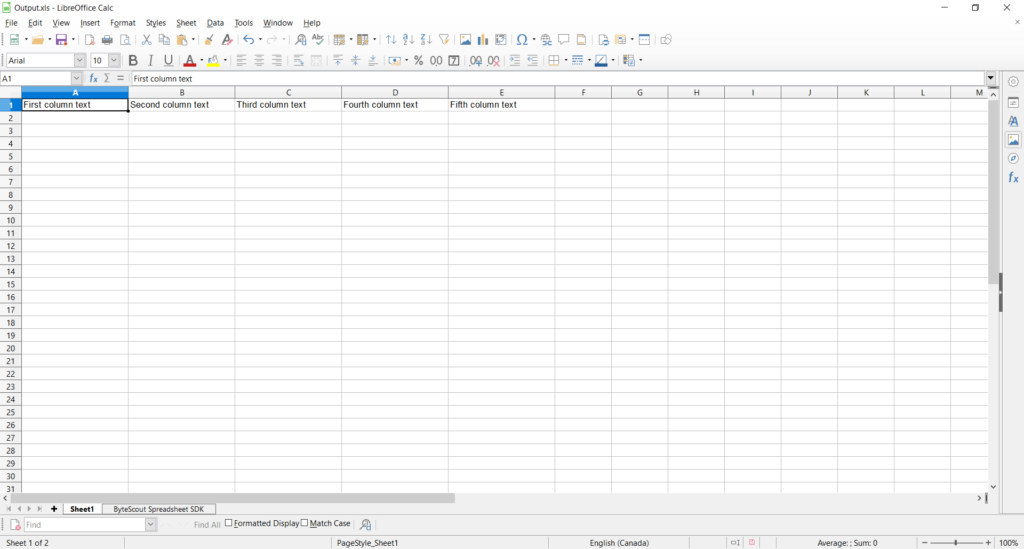
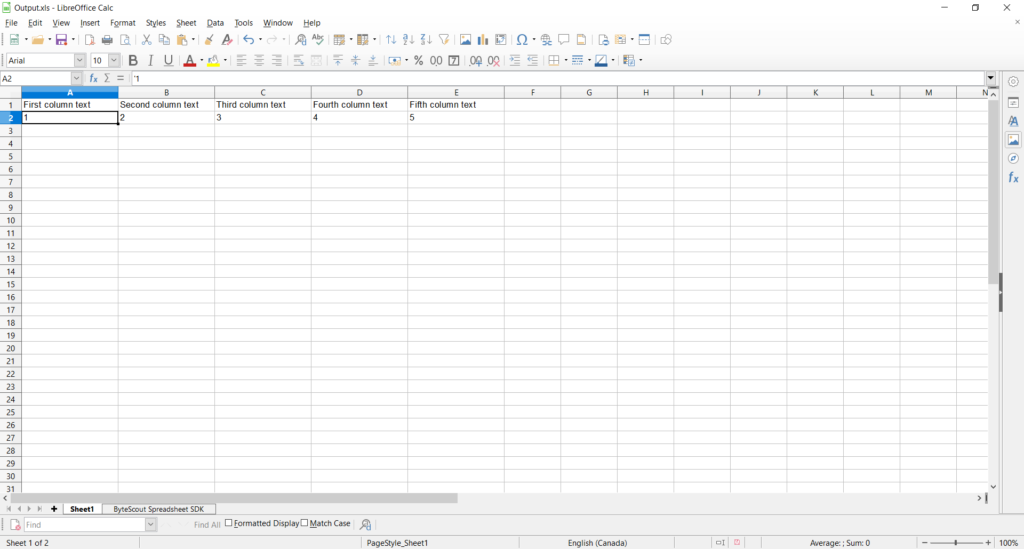
As a result, we have a list of strings put into a spreadsheet.
Each of the strings goes to its column. “First column text” goes to the first row of column A, “Second column text” goes to the first row of column B, and so on.
Now, let me show how we can modify this robot a bit.
Please press the “Edit” button. That moves you back to the Designer.
Here you can click on the text blocks and modify them by entering new text.
Then please press the “Save and Close” button and rerun the robot.
The resulting spreadsheet changed.
You can see that every time you run the robot, it adds a new row to the end.