Copyright protection for digital images can be made using digital watermarking as an effective technology that solves the problem of image copyright using visible digital watermark with overlaid semi-transparent text or image which assures prevention from unauthorized copying.
Adding copyright watermark to the images that you want to share online will identify them as your intellectual property. Copyrighted images will not be stolen and used without your consent. How to put copyright protection watermark on a digital image? This tutorial will teach you how to copyright images.
Bytescout Watermarking Pro is a tool that allows you to add copyright watermarks to your pictures easily. Bytescout Watermarking wizard will lead you through a few easy steps to copyright picture(s). It has built-in set of ready-to-use watermark types with text and logo images support.
The first step of the Bytescout Watermarking Pro wizard is to select images to apply watermarks to. Use Add files button to add image file(s) to the list or simply click on the empty list.
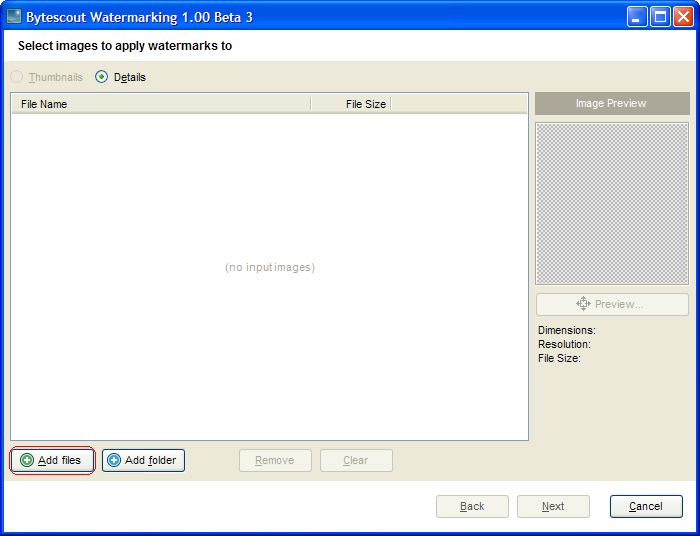
Click Add files button to select image(s) to apply watermarks to
The Select Files window will appear. Choose files to be watermarked and click Open.
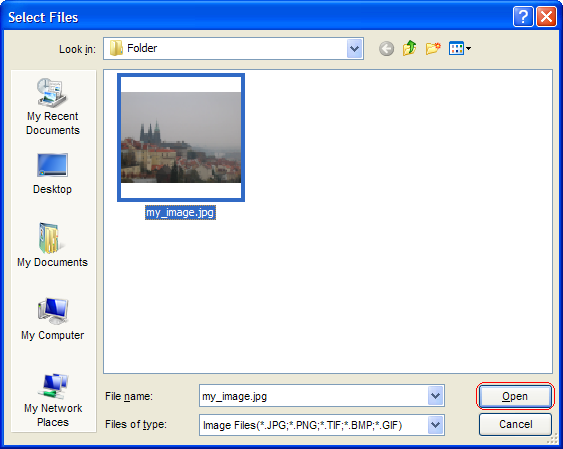
Choose file(s) to open in the Select Files window and click Open
The names of selected files will appear in the list of images.
Click Next button to move to the second step which is to add watermarks.
Choose one of the text watermark types in the left half of the window:
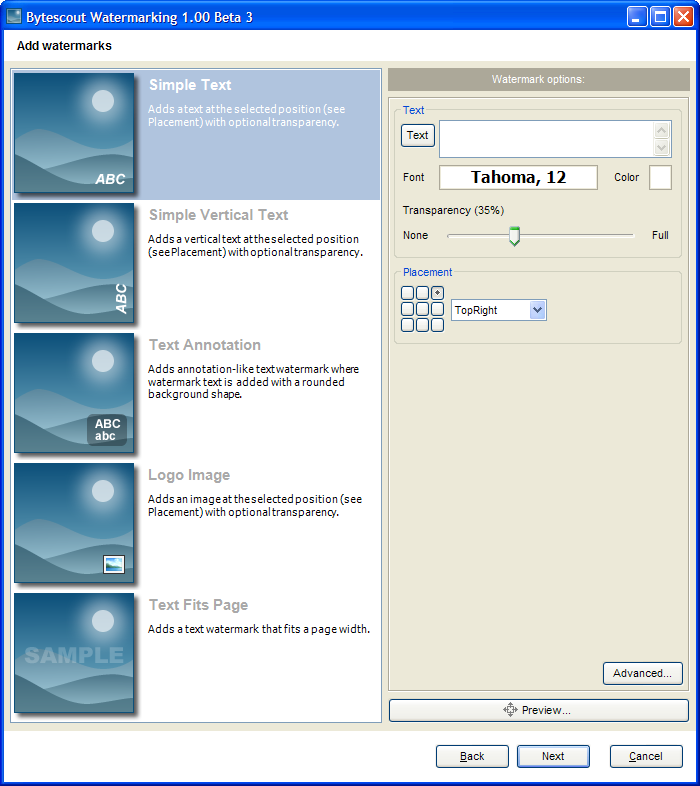
The second step is to choose watermark type and set its options
Then you can enter copyright notice which will be added as a watermark. Type your text into the text editor box.
Bytescout Watermarking Pro allows to add copyright symbols with ease. Click Text button and choose one of symbols (copyright ©, trade mark ™, registered ® or other) in the pop-up window. Click mouse on the selected symbol and it will be inserted into your text:
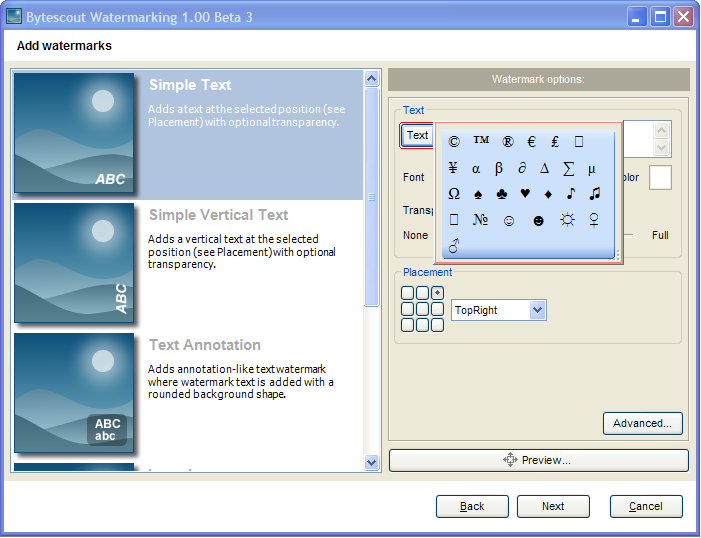
Click Text button and select a symbol to insert into the watermark text
For example, to create watermark “© John Doe, 2008”, you should click Text button, click on the copyright symbol ©, and then enter John Doe, 2008 in the text editor line as shown below:
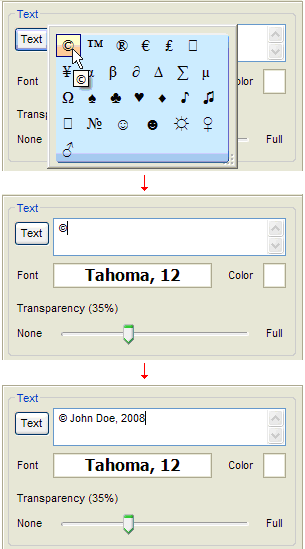
Example of adding symbol and entering copyright text
You can preview watermarked image using Preview button which brings up a full screen preview of your image.
When you are satisfied with the image preview, click Next button.
The third step is Output Options. Set the Output format of watermarked picture(s). You can keep an original format of a file or convert it to another one (JPEG, PNG, TIFF, BMP or GIF). Choose an Output folder, i.e. the folder to save the result file(s) into. Use Browse button to select an output folder or type a path manually. When output options are adjusted, click Start! button to start processing image(s):
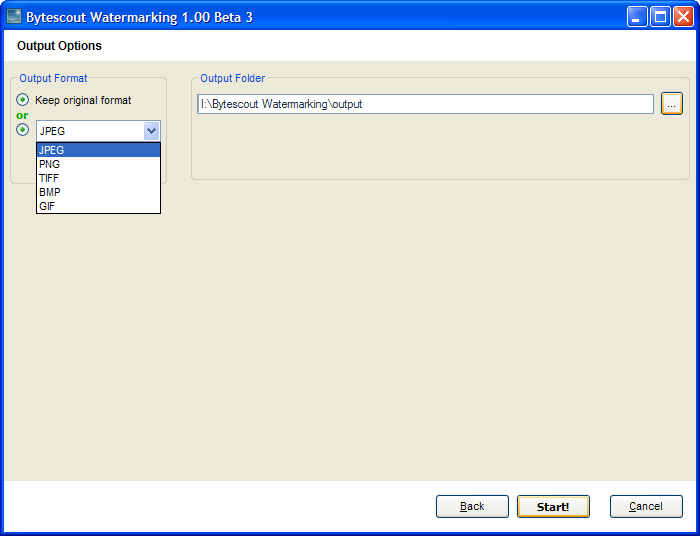
Adjust the Output Options of watermarked images and click Start! button to start
Applying Watermarks is the last step of the wizard. You’ll see the progress bar and current status of image processing. When the status is “Done!”, you can choose one of the next actions: “Explore the output folder to view result images” (default), “Start the wizard again to watermark other images” or “Close the wizard”. After ticking your choice, click Finish button:
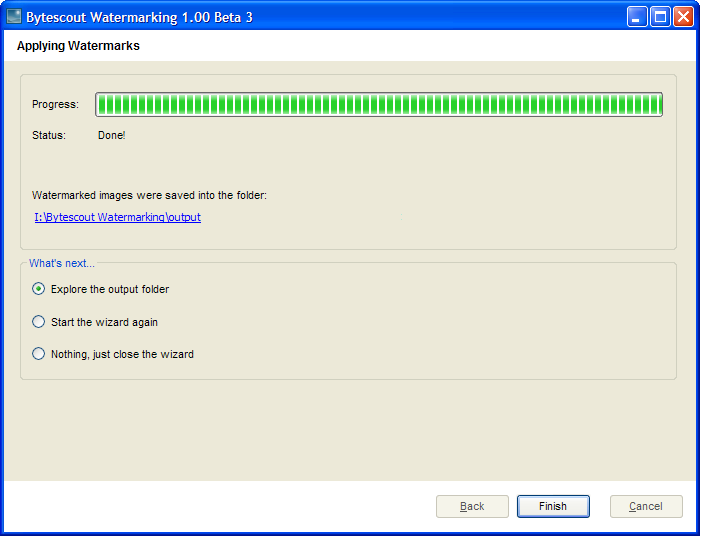
So, watermark is already added to note your copyright for picture. Now the picture can be posted on the Web safely, because the copyright watermark will protect it from unauthorized use. Bytescout Watermarking Pro software makes copyright watermarking easy and quick, and it also allows batch watermarking so that you can process multi-images simultaneously if needed.

Digital picture with a copyright watermark added using Bytescout Watermarking