Stamping photo with their date and time using “DateTime” preset in Bytescout Watermarking SDK for .NET developers
You can also use EXIF macros to watermark images with their extended information. See the macros tutorial
Download source code: watermarkingsdk_filename_preset.zip (370 KB)
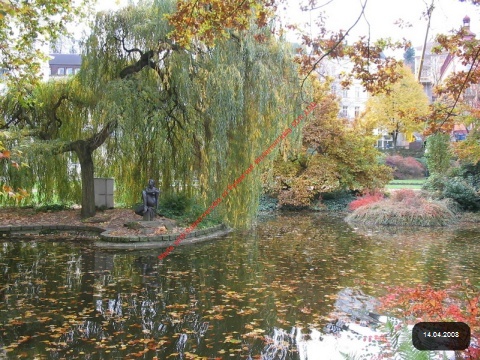
Output image (see date time stamp at the right-bottom corner):
using System;
using System.Diagnostics;
using System.Drawing;
using System.Collections.Generic;
using Bytescout.Watermarking;
using Bytescout.Watermarking.Presets;
namespace Sample
{
class Program
{
static void Main(string[] args)
{
// Create Watermarker instance
Watermarker waterMarker = new Watermarker();
// Initialize library
waterMarker.InitLibrary(“demo”, “demo”);
// Set input file name
string inputFilePath = “my_sample_image.jpg”;
// Set output file title
string outputFilePath = “my_sample_output.jpg”;
// Add image to apply watermarks to
waterMarker.AddInputFile(inputFilePath, outputFilePath);
// Create new watermark
DateAndTime preset = new DateAndTime();
// Add watermark to watermarker
waterMarker.AddWatermark(preset);
// Set output directory
waterMarker.OutputOptions.OutputDirectory = “.”;
// Set output format
waterMarker.OutputOptions.ImageFormat = OutputFormats.JPEG;
// Apply watermarks
waterMarker.Execute();
// open generated image file in default image viewer installed in Windows
Process.Start(outputFilePath);
}
}
}
Download source code: watermarkingsdk_filename_preset.zip (370 KB)
You can also use EXIF macros to watermark images with their extended information. See the macros tutorial
Sorry! This product is not available.
Please click here to visit main page for the list of all available products and solutions.
Product Links: