Our ByteScout SDK products are sunsetting as we focus on expanding new solutions.
Learn More
Important Update
ByteScout SDK Sunsetting Notice
Our ByteScout SDK products are sunsetting as we focus on our new & improved solutions.Thank you for being part of our journey, and we look forward to supporting you in this next chapter!
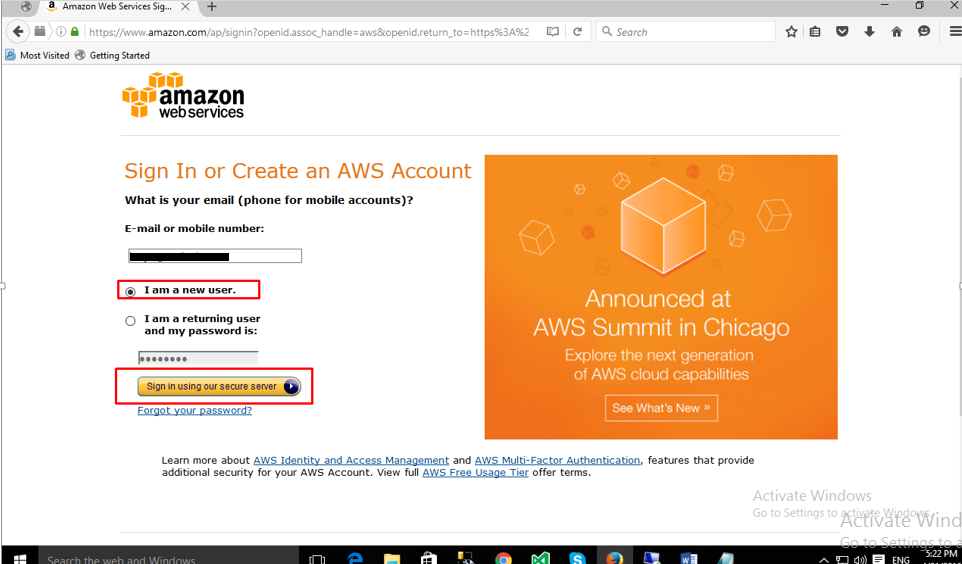
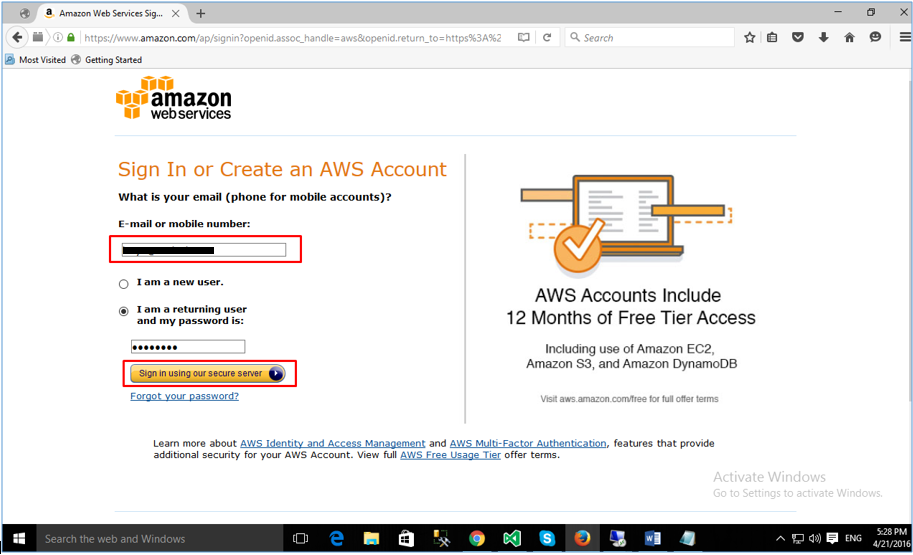
1.1 Enter email and check “I am a new user”. Click “Sign in using our secure server”.
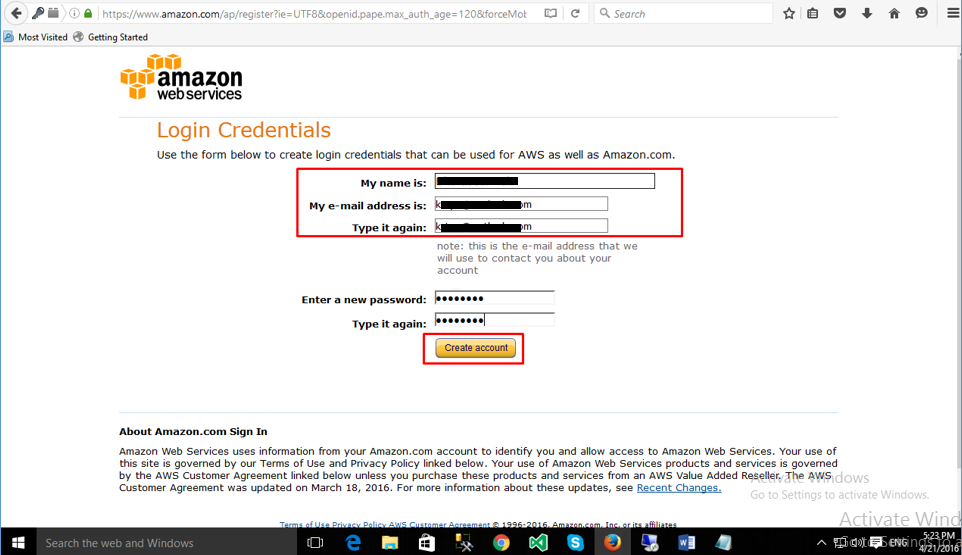
1.2 Fill form below.
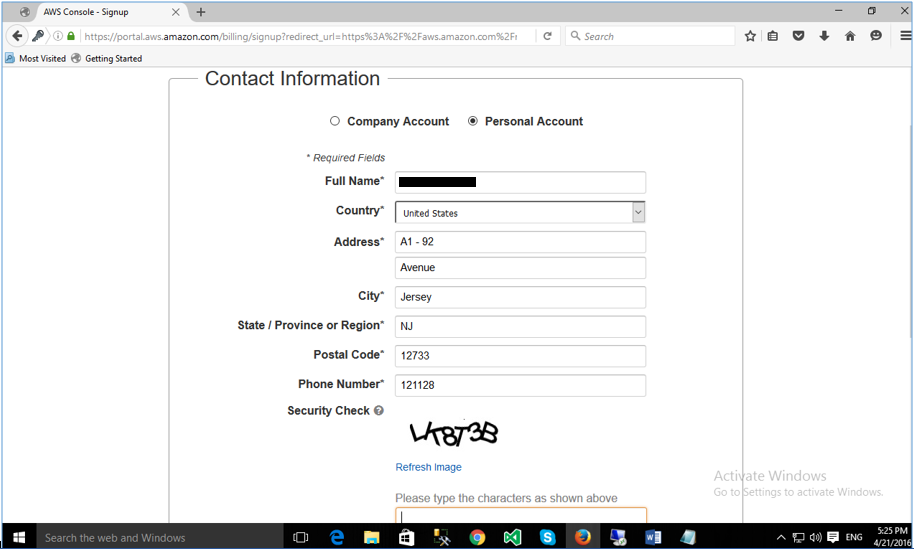
1.3 Fill in your personal or company account details.
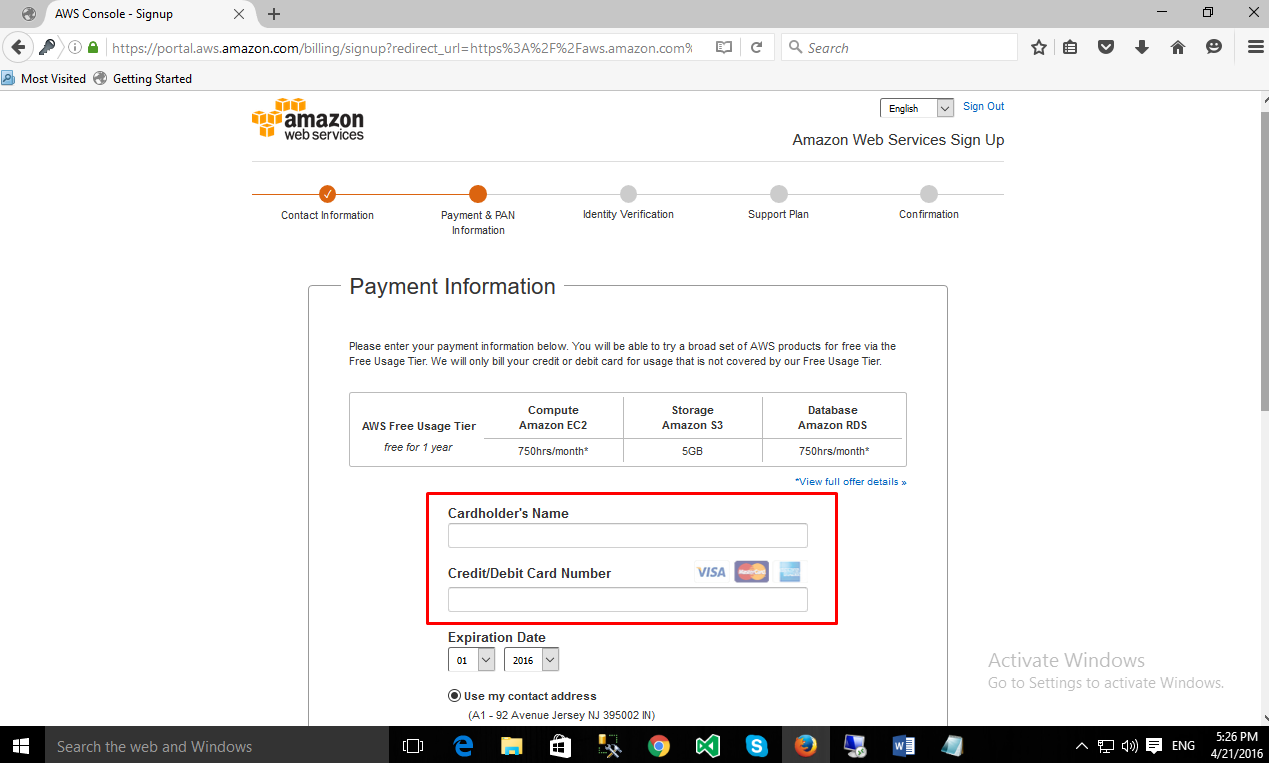
1.4 Enter Credit card details and complete identity verification on the next screen.
1.5 Now go to the AWS Console and log in with your AWS credentials.
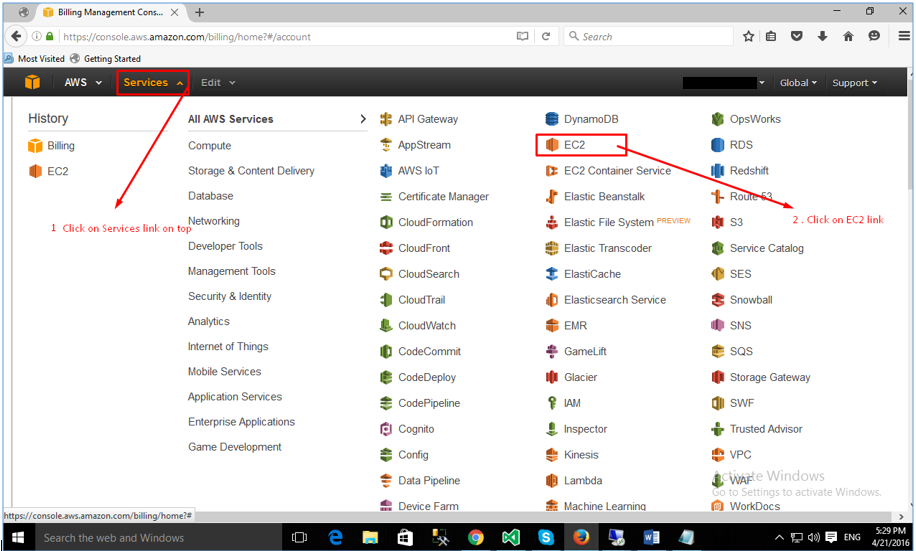
1.6 You can browse console navigating top-side links.
2. Creating and configuring AWS EC2 Instance
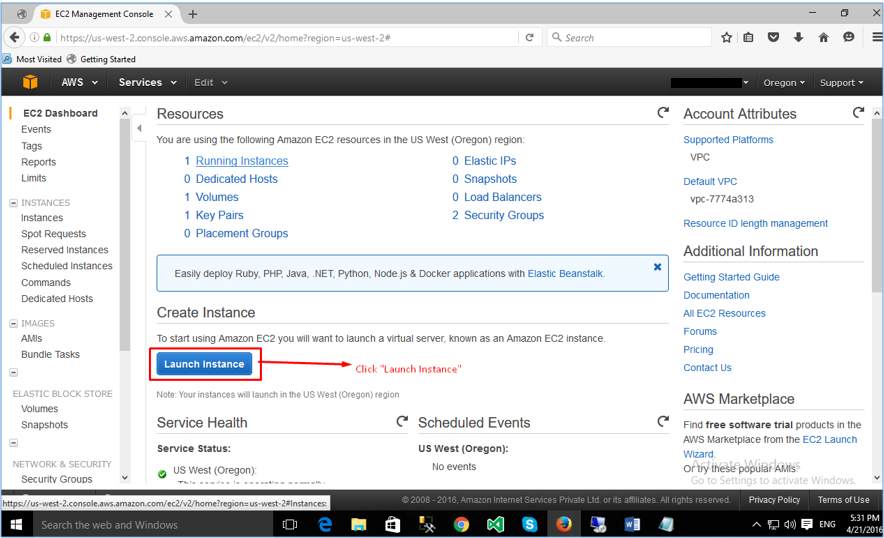
2.1 Click on the “Launch Instance” button.
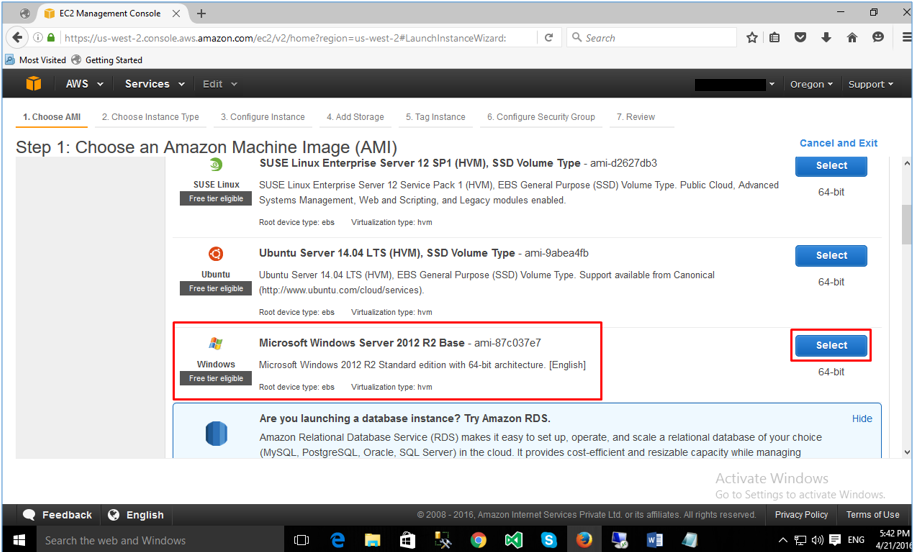
2.2 Select Amazon Machine Image (AMI): Microsoft Windows Server.
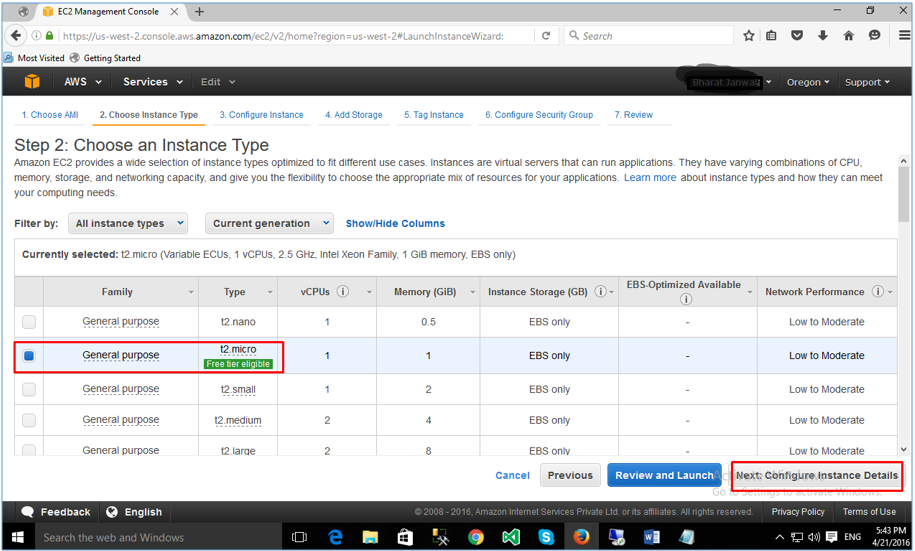
2.3 Choose an Instance type: General Purpose, t2 micro.
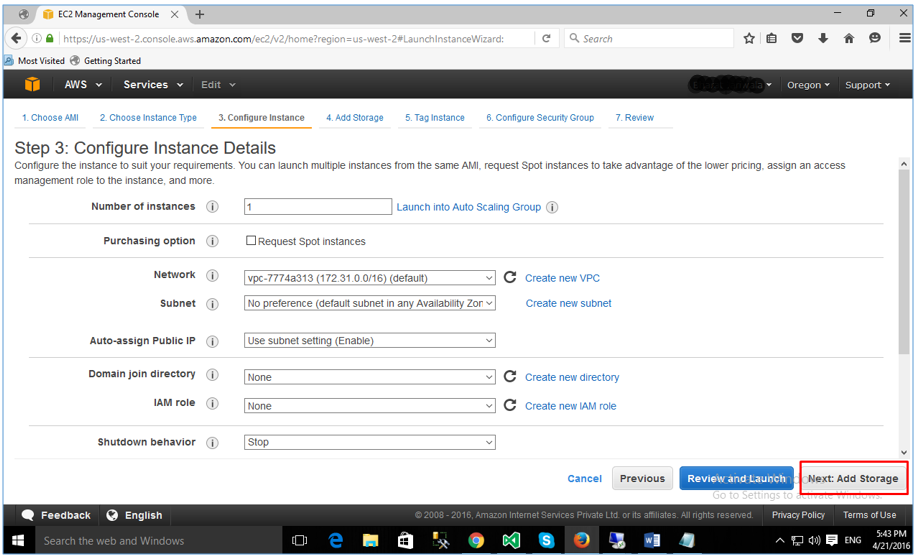
2.4 Configure EC2 Instance Details.
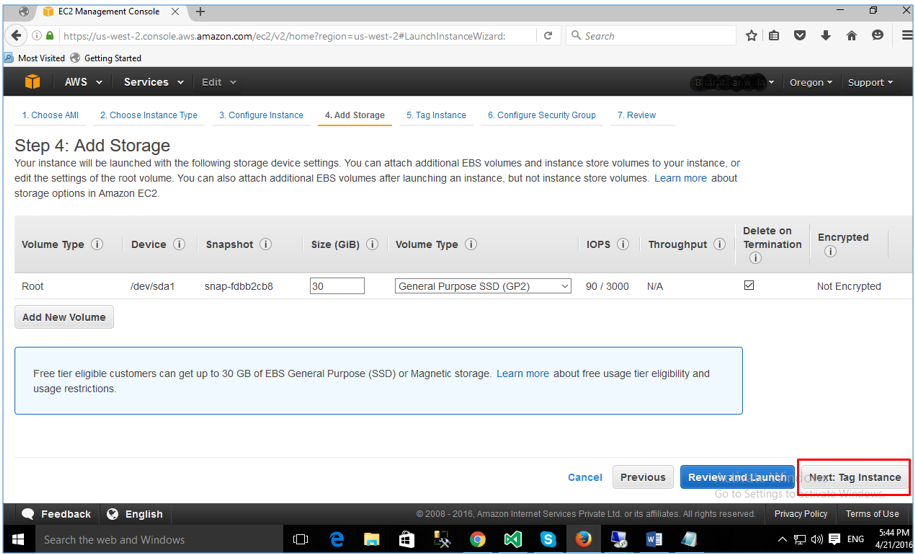
2.5 Add Storage.
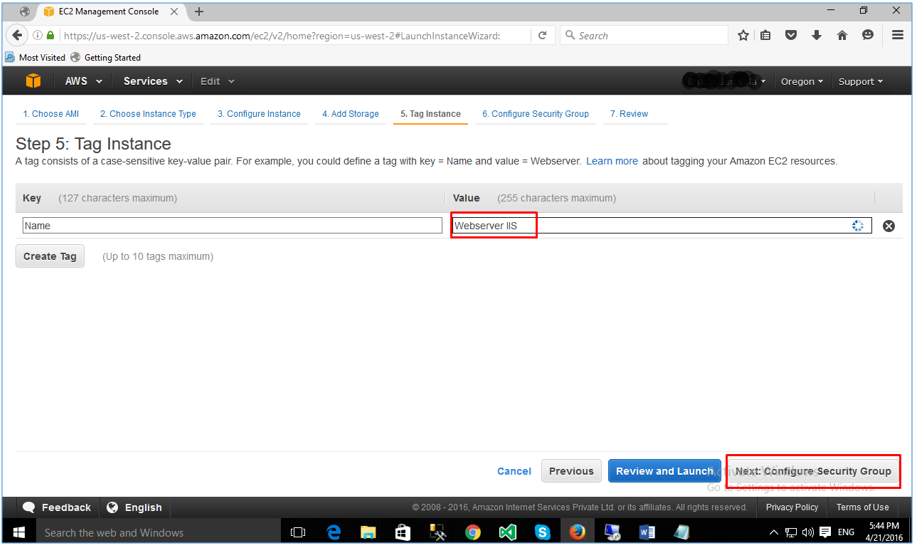
2.6 Tag Instance.
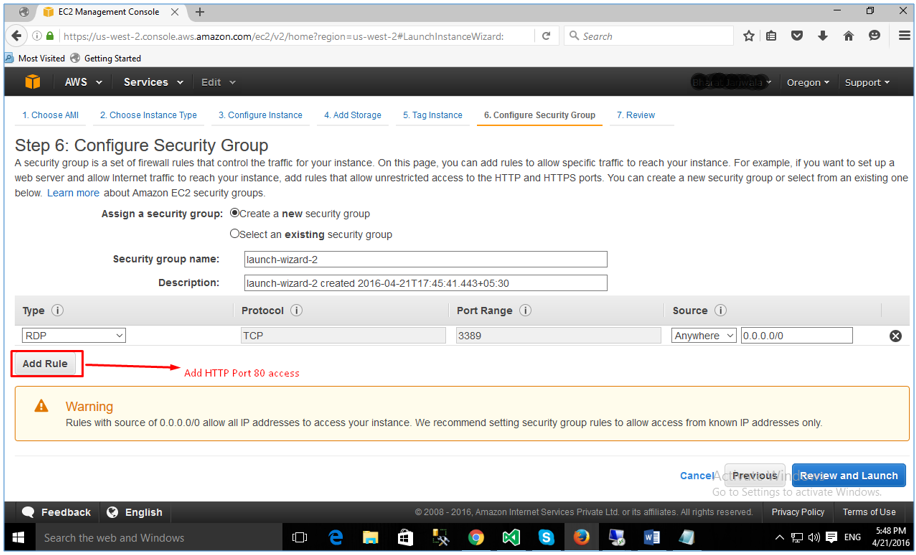
2.7 Configure Security Group.
Add HTTP Port – 80
Add Web deployment port – 8172
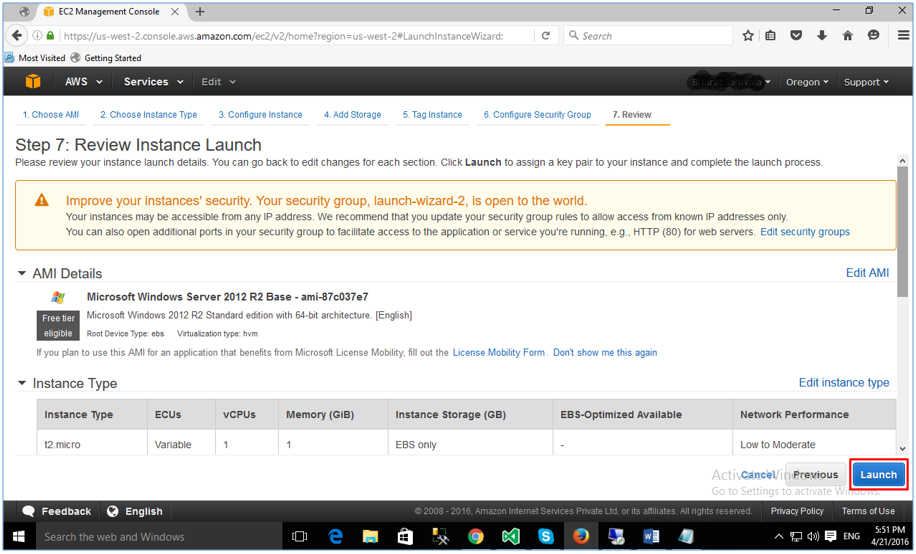
2.8 Review Summary and click “Launch”.
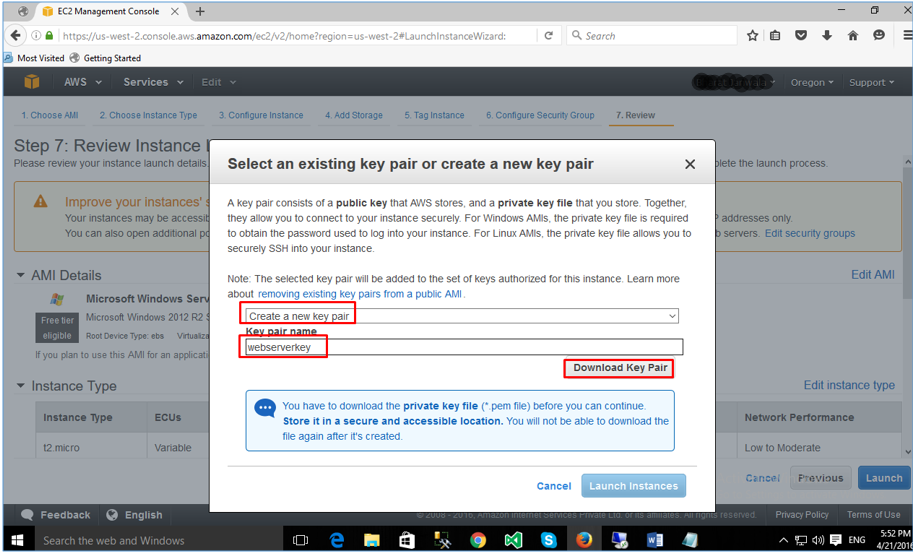
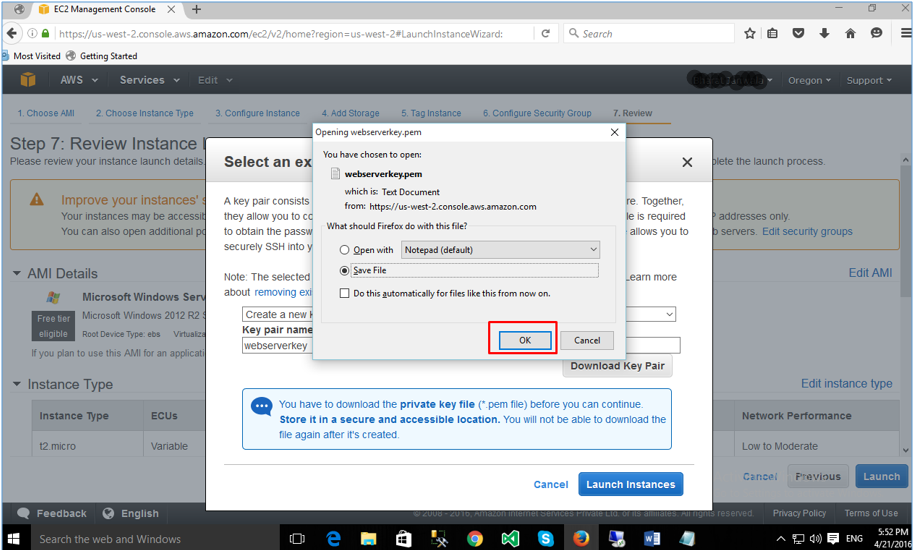
2.9 Create a key pair, download it, and store it in a secure place.
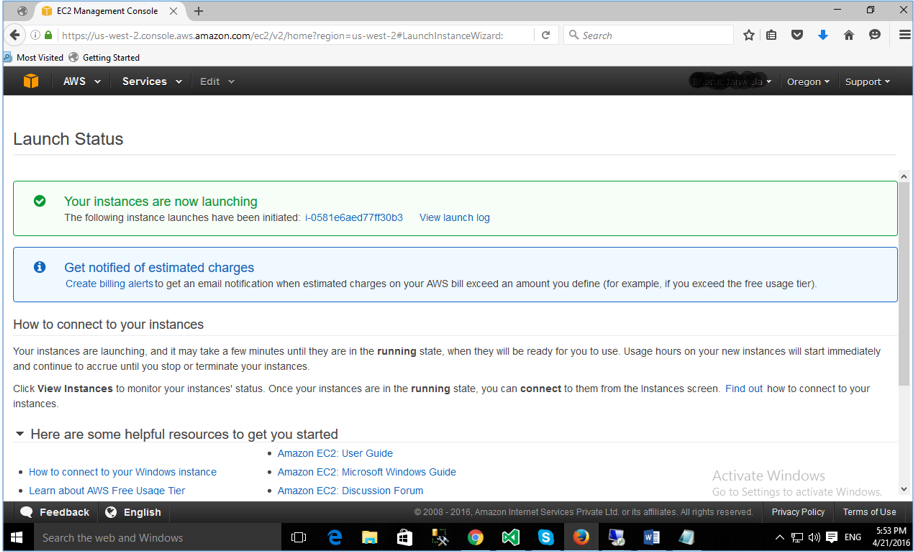
2.10 Launch Status screen. The instance you created is now launching.
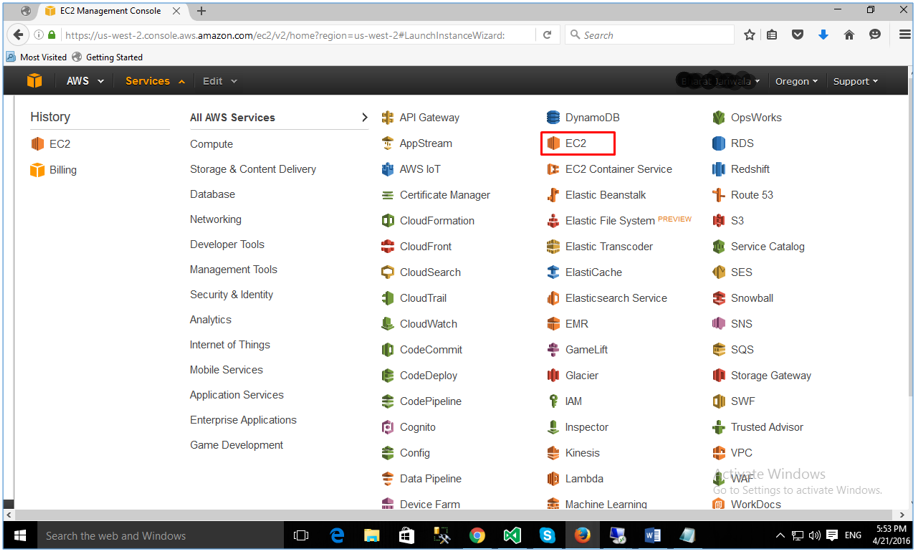
2.11 Now EC2 Instance is ready to use, click on the EC2 dashboard icon.
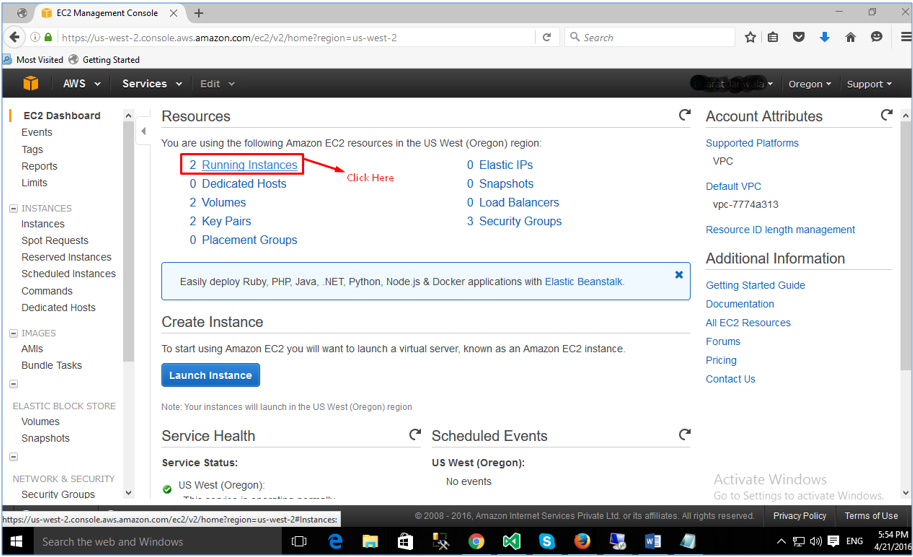
2.12 Then click on Running Instances.
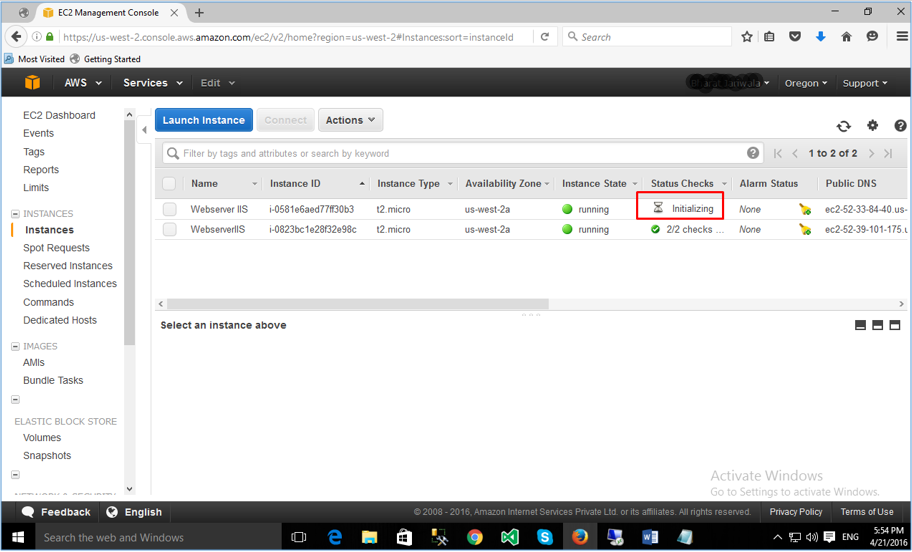
2.13 Here you will see a list of your web servers. Your new IIS web server can be still initializing. We will continue to work with the server in the next section.
3. Connecting to EC2 remote desktop
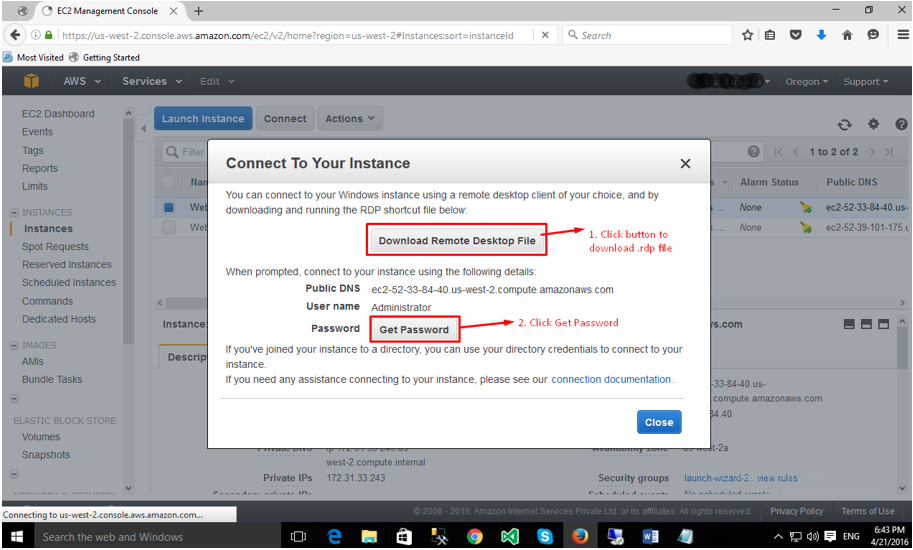
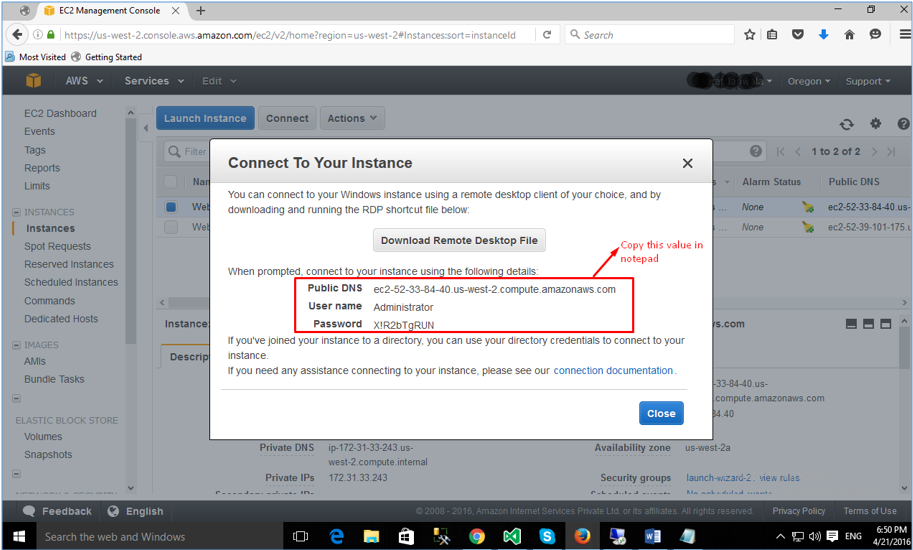
3.1 Now when the server is initialized, you can connect to it. Click “Connect” button to download remote desktop file (.rdp).
3.2 Click “Download Remote Desktop File” to start downloading, then you will need to click the “Get Password” button.
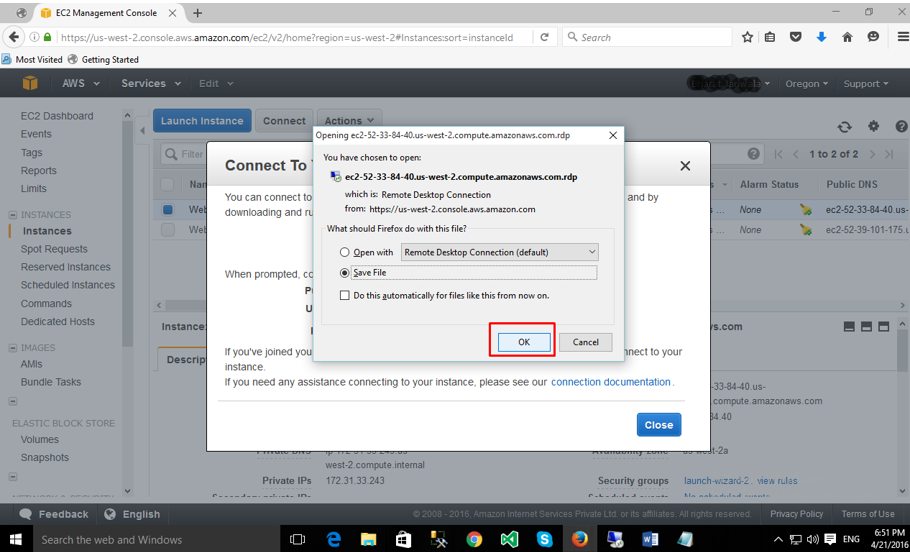
3.3 Click “OK” to save the .rdp file.
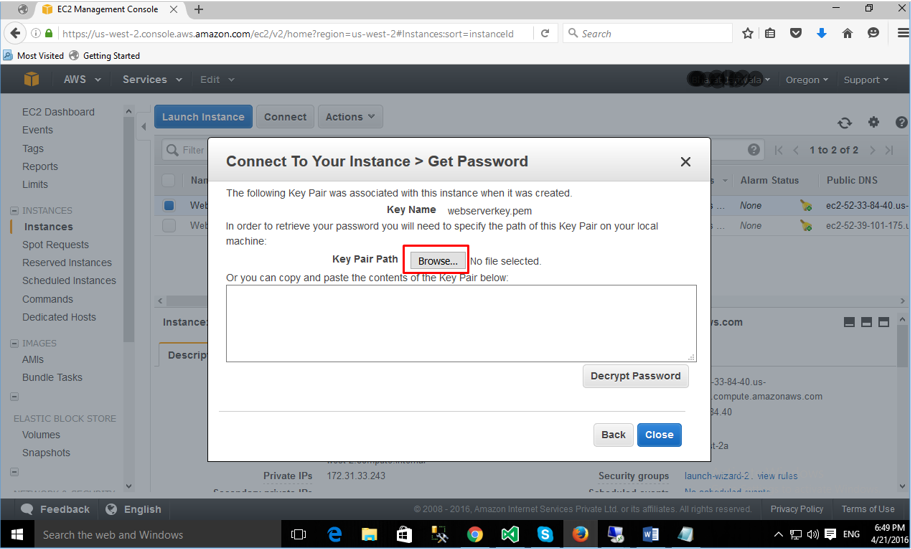
3.4 Now click to “Get Password”, then click “Browse” and choose the folder you’ve saved your Key Pair in step 2.9.
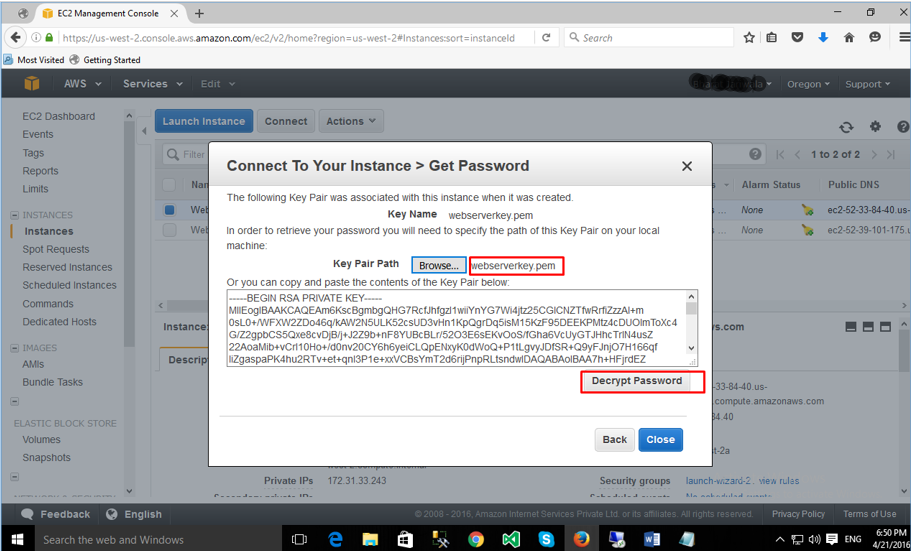
3.5 Click “Decrypt Password”.
3.6 Copy your credentials to notepad.
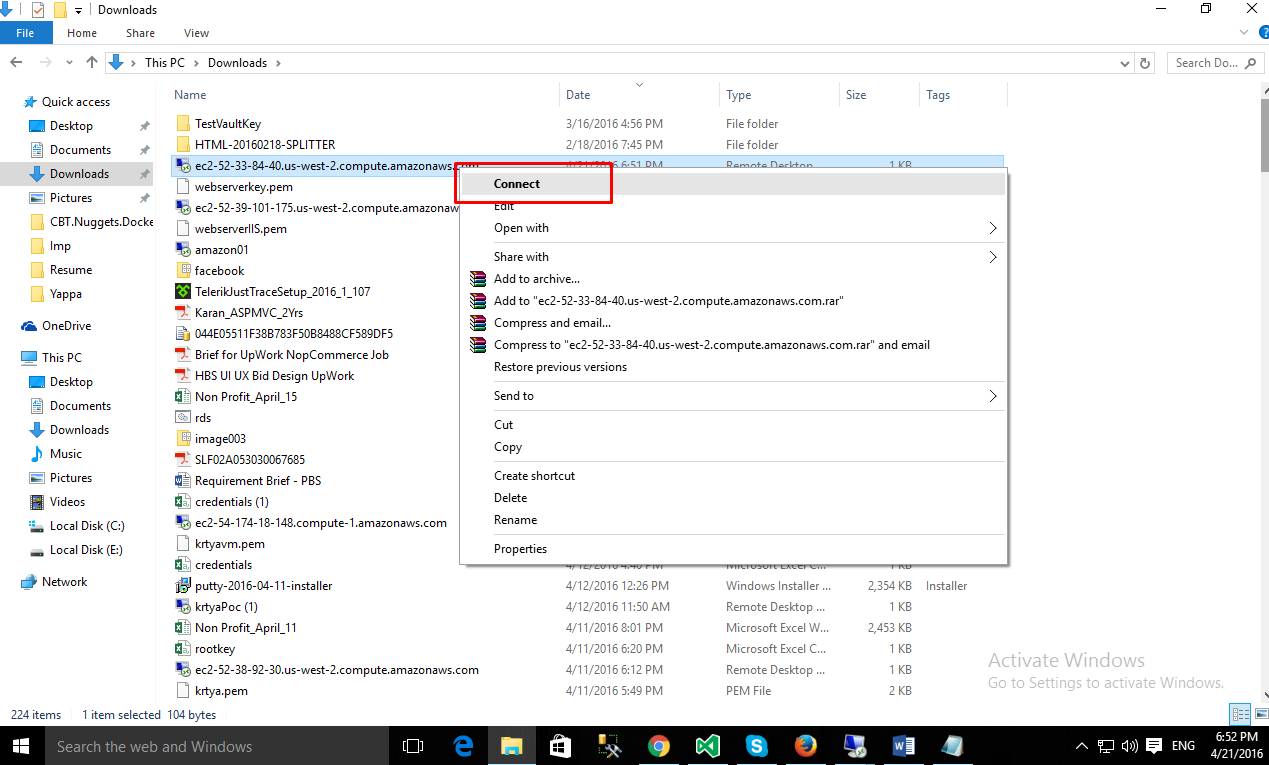
3.7 Right-click on the .rdp file and select Connect.
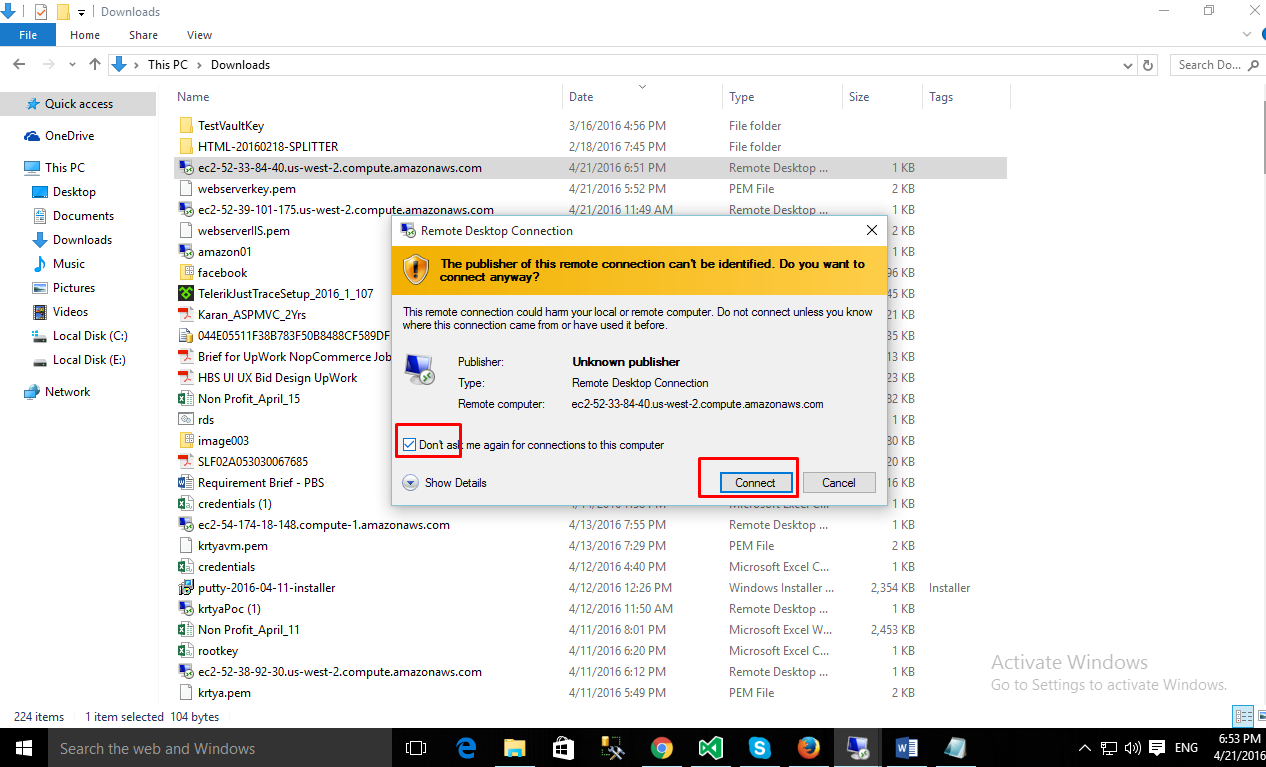
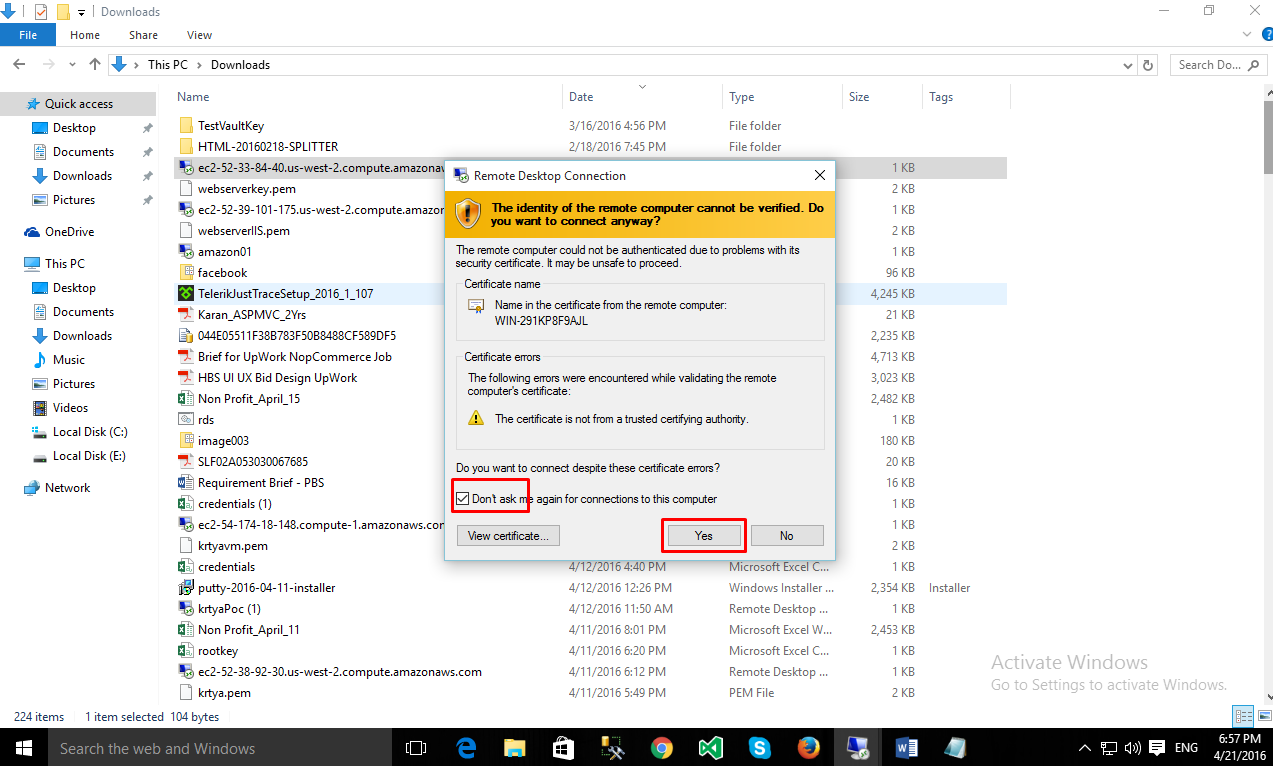
3.8 Now check the “Don’t ask me again” checkbox and click Connect again to allow remote connection.
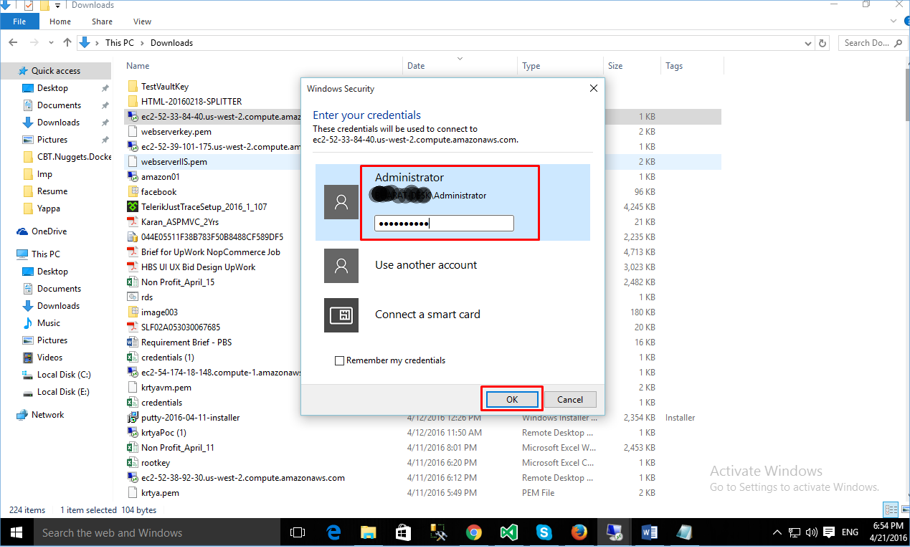
3.9 Enter your credentials.
3.10 Check the “Don’t ask me again” checkbox and click “Yes”.
4. Setting IIS on EC2 Instance
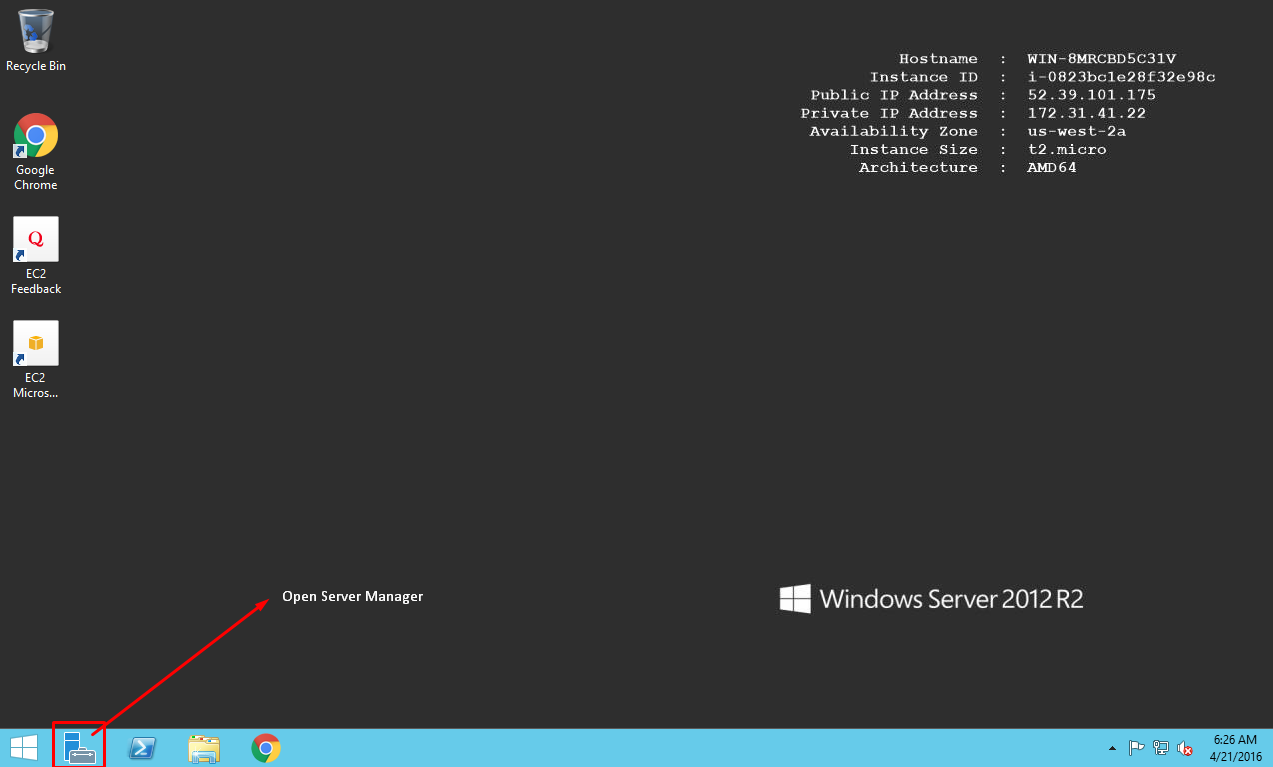
4.1 Open Server Manager by clicking on its icon on the taskbar.
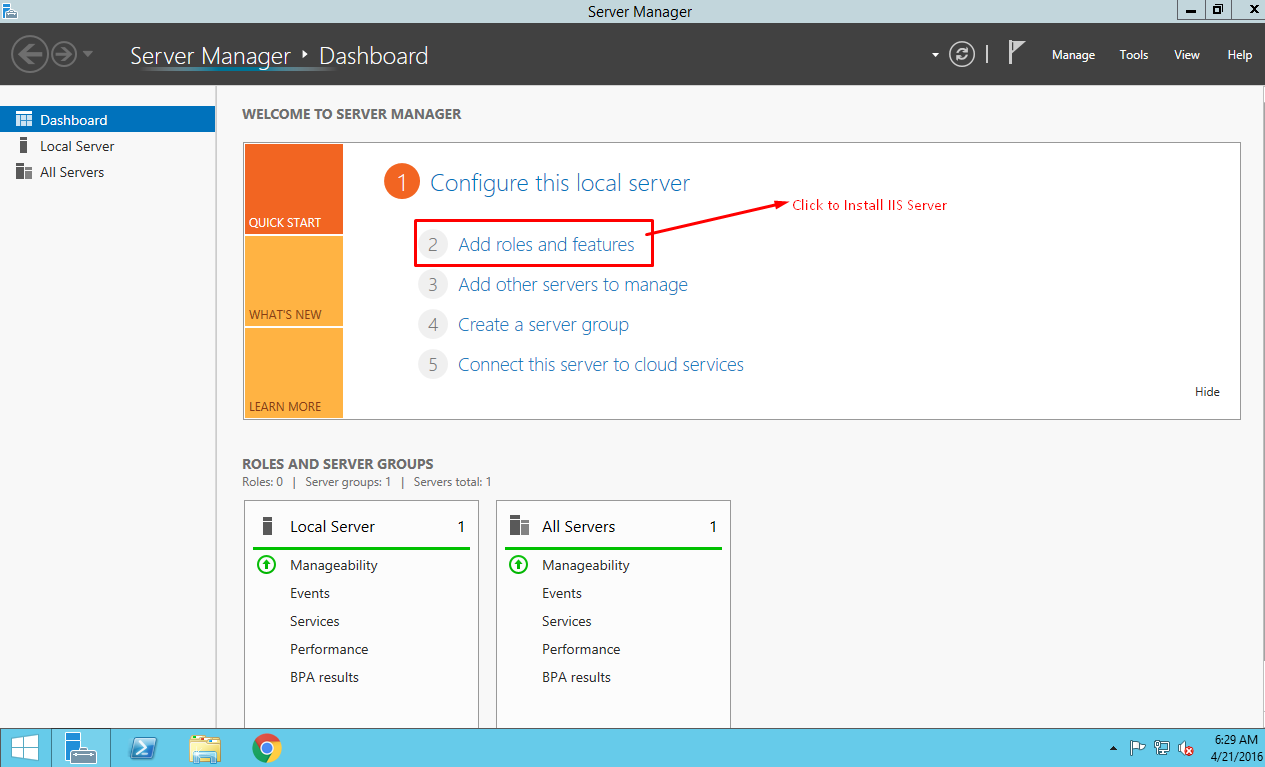
4.2 Click “Add roles and features”.
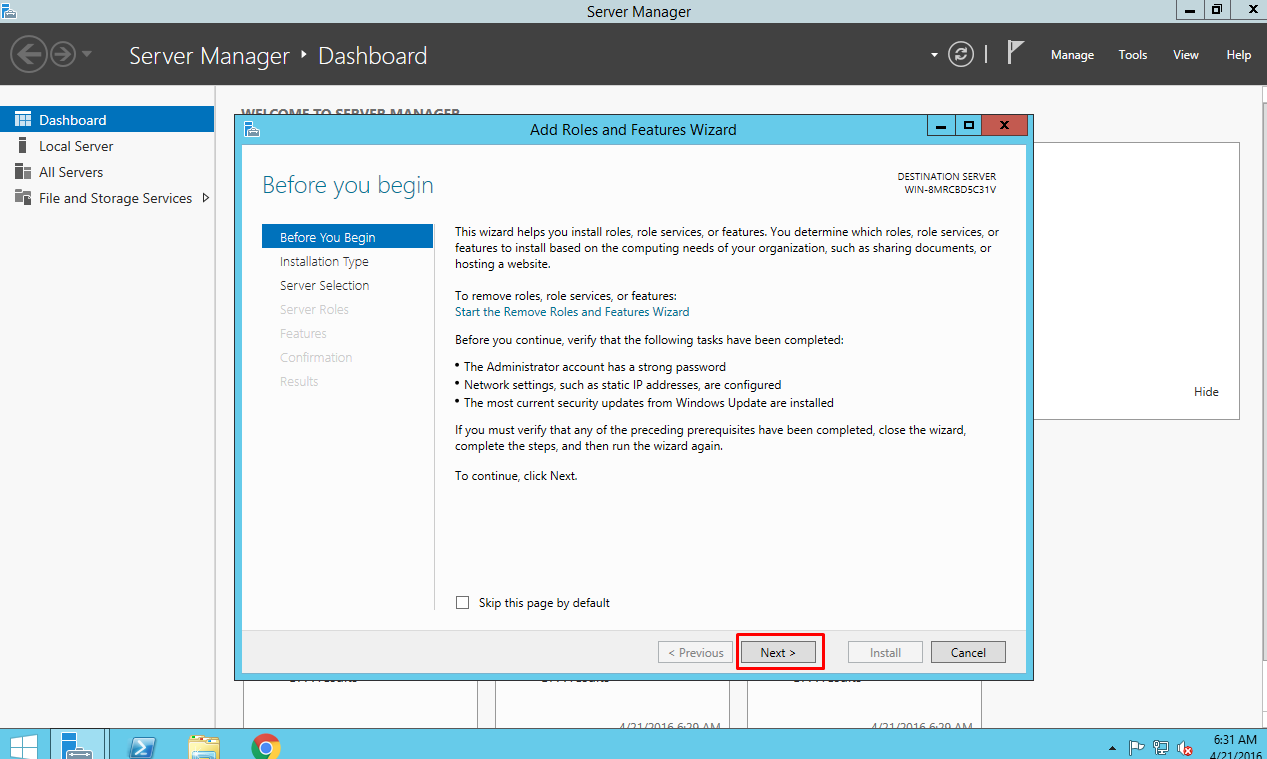
4.3 Roles and Features Wizard opens. Click “Next”.
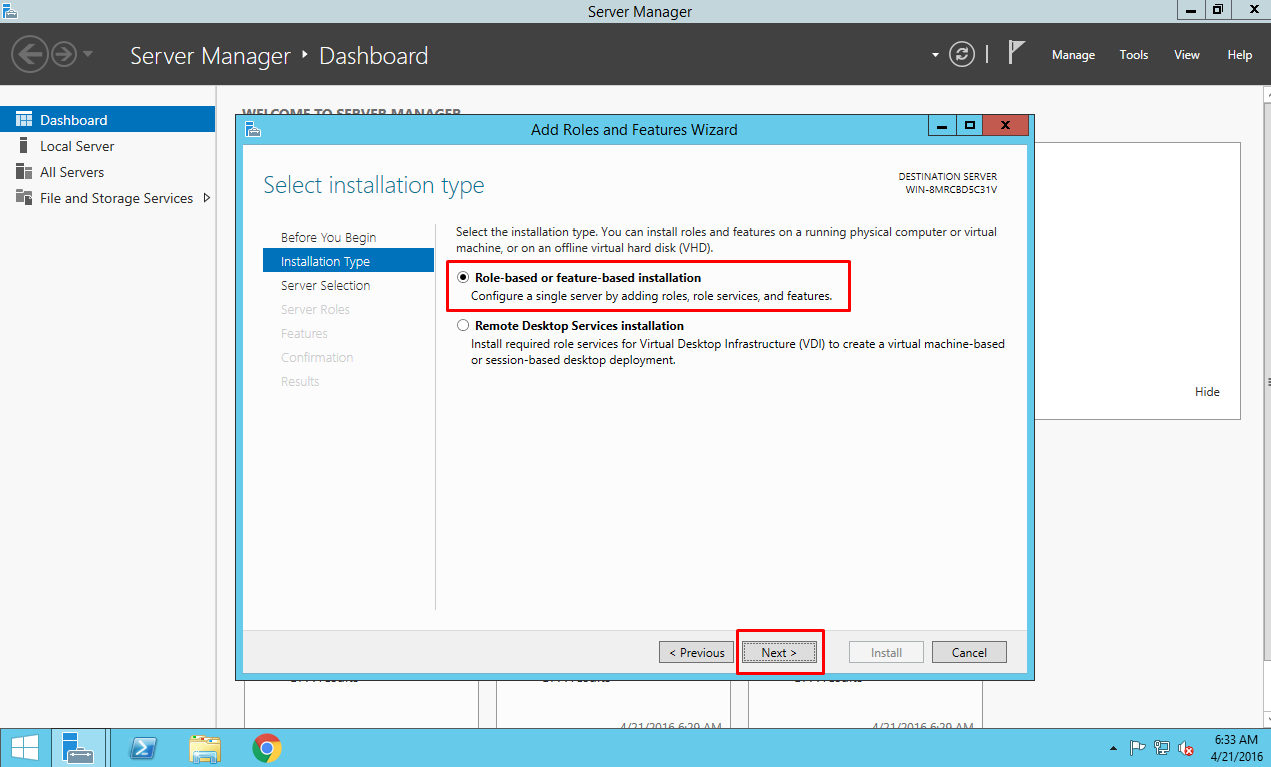
4.4 Select “Role-based or feature-based installation” and click “Next”.
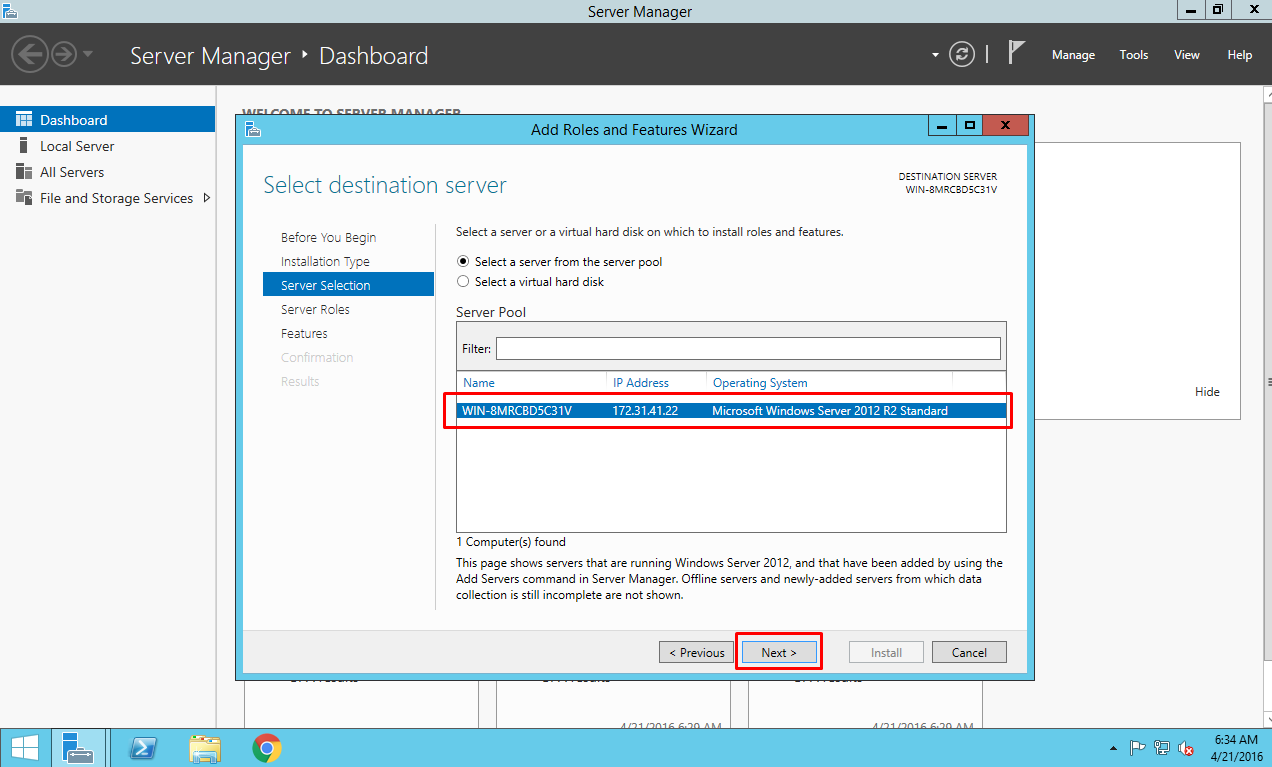
4.5 Select “Select a server from the server pool”, then choose your server and click “Next”.
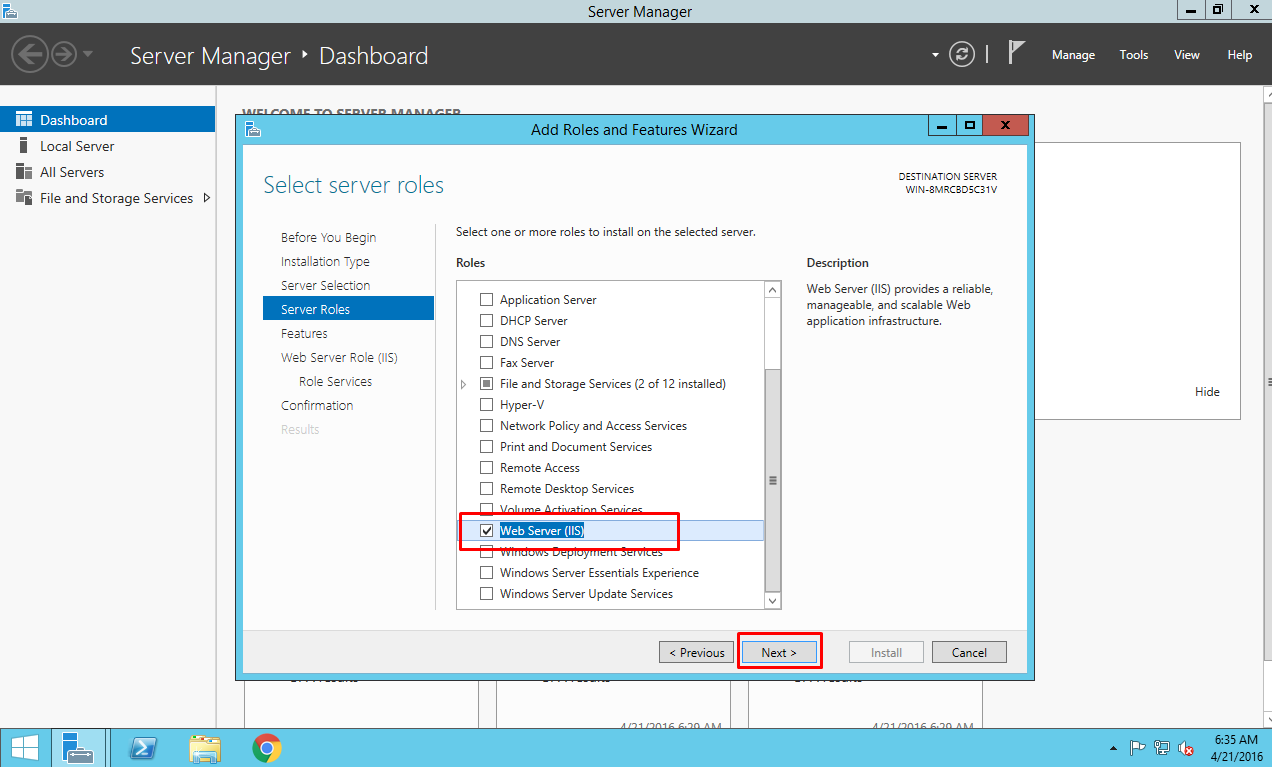
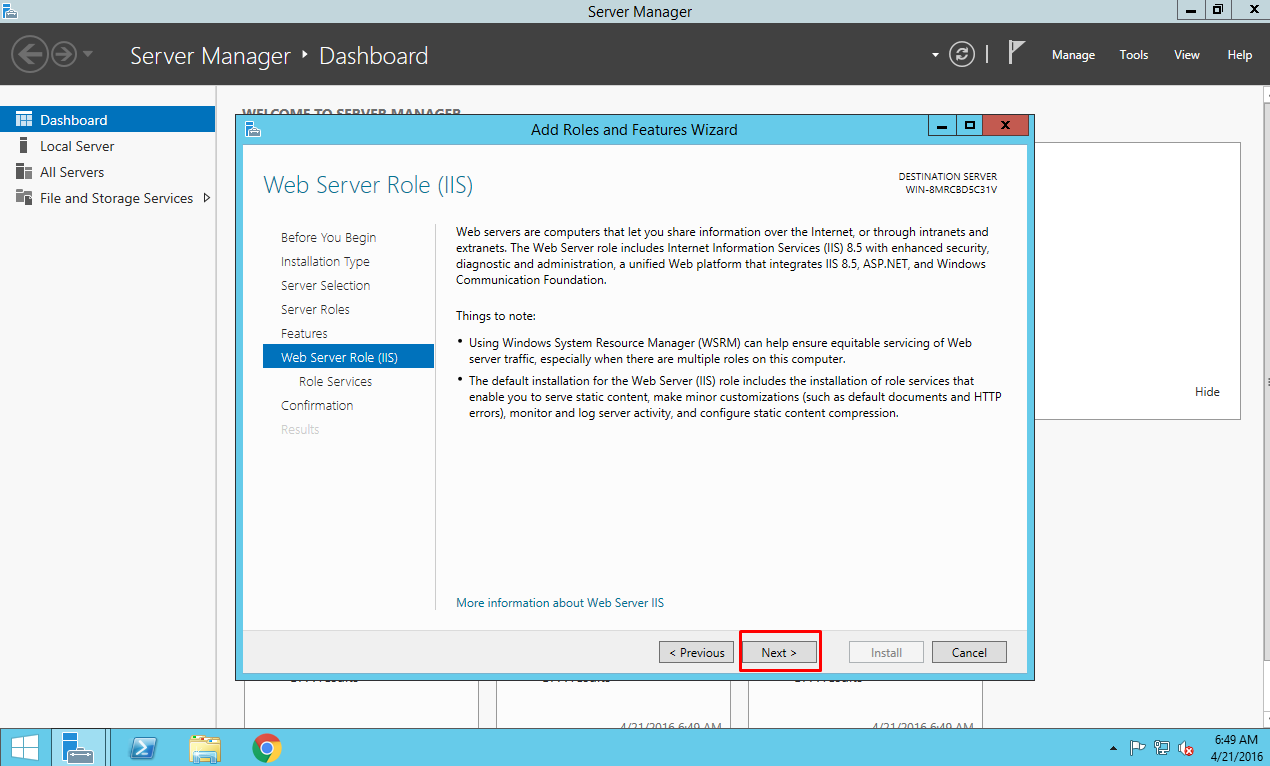
4.6 Select “Web Server (IIS)” from “Server Roles” list and click “Next”.
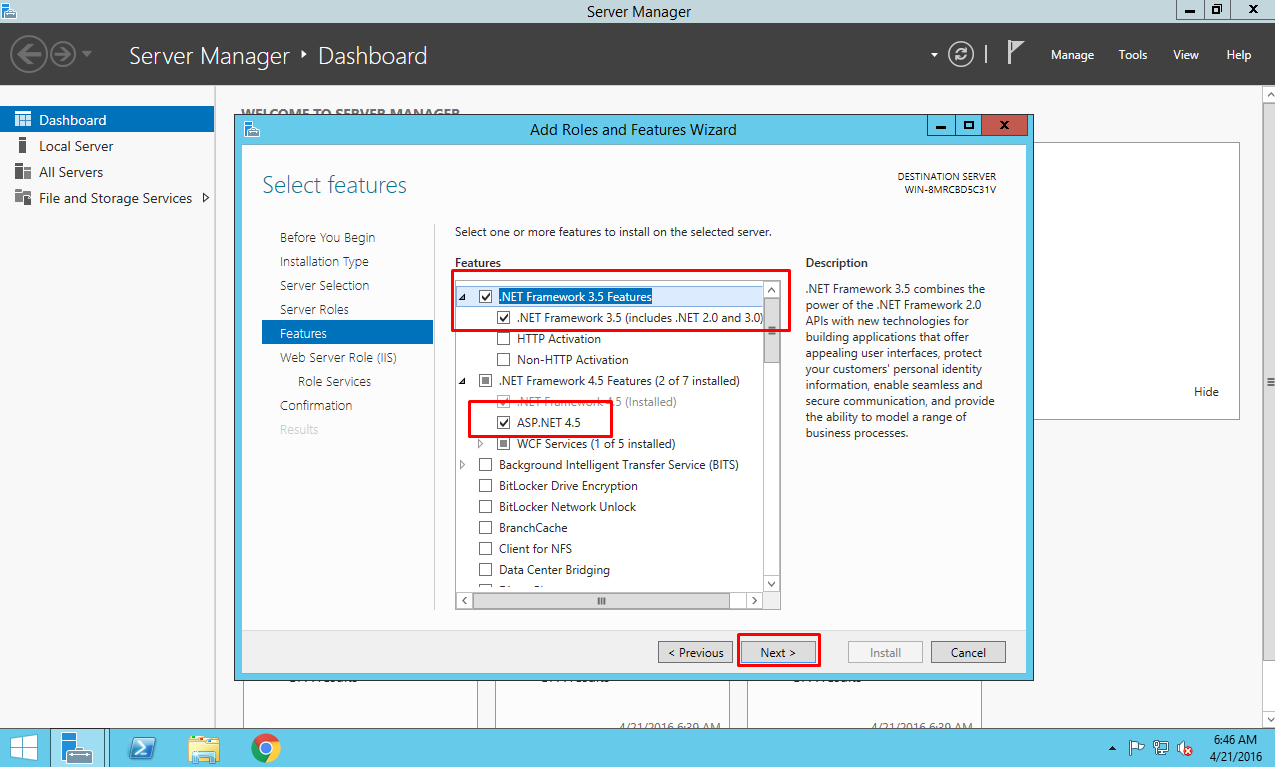
4.7 Select the following features: .NET Framework 3.5 Features, ASP.NET 4.5.
4.8 Click “Next”.
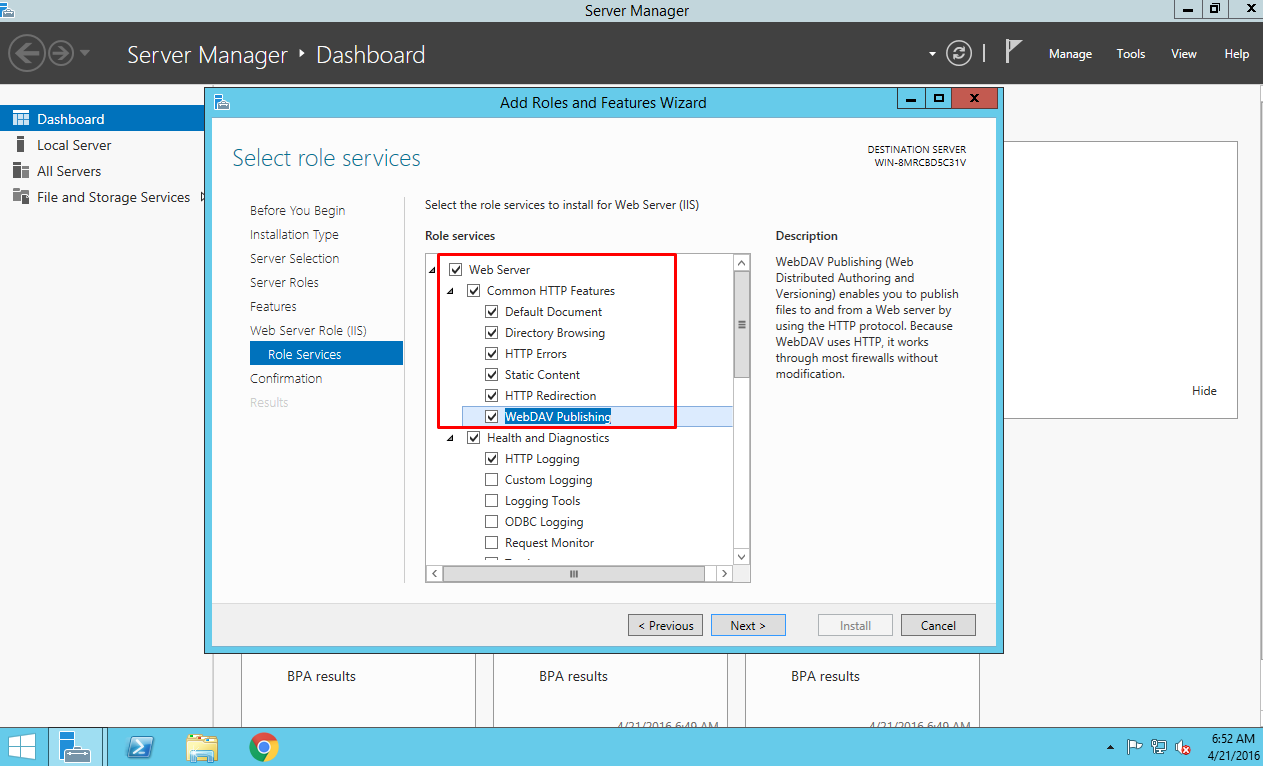
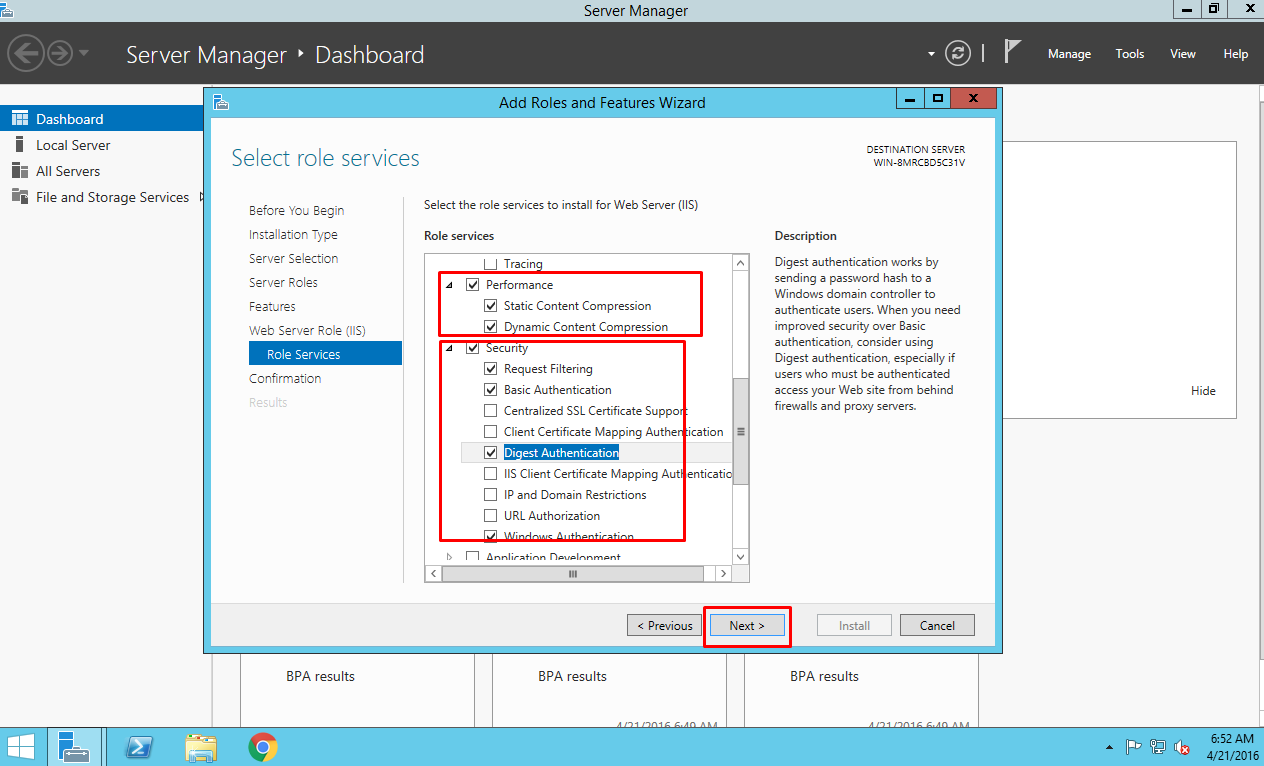
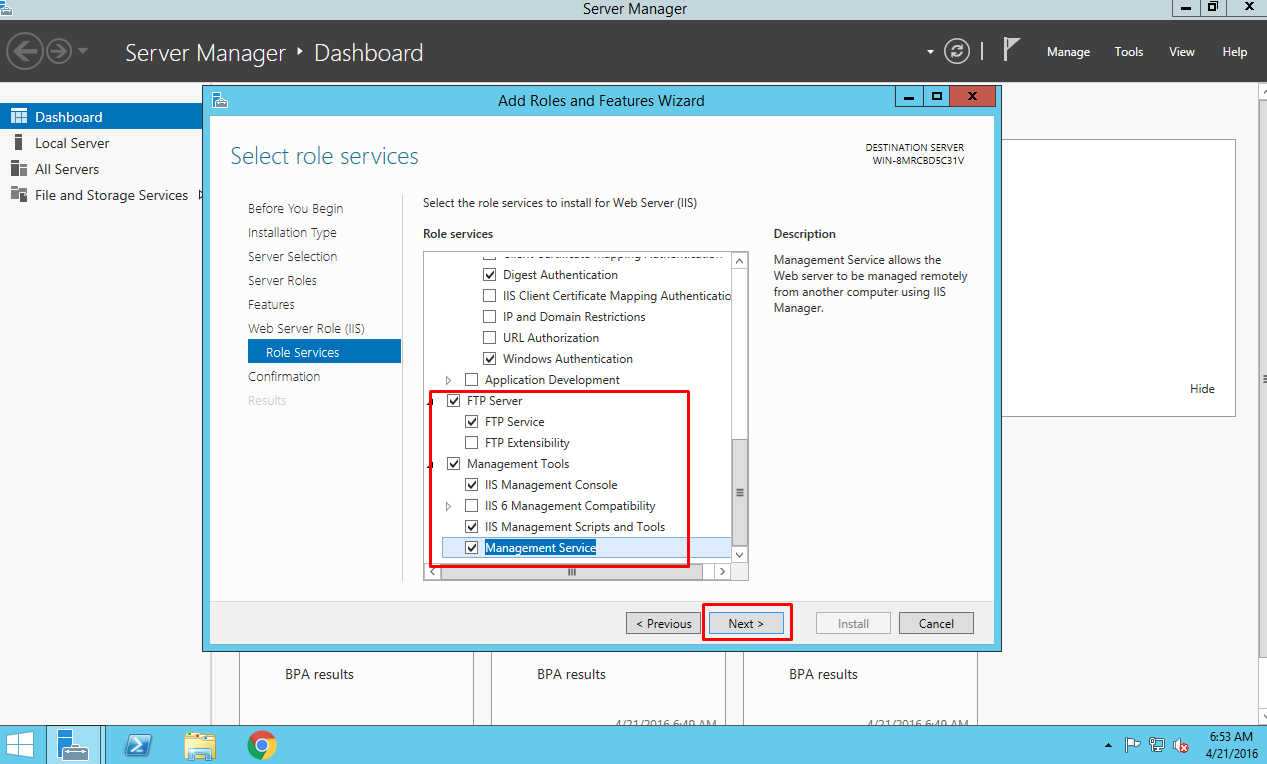
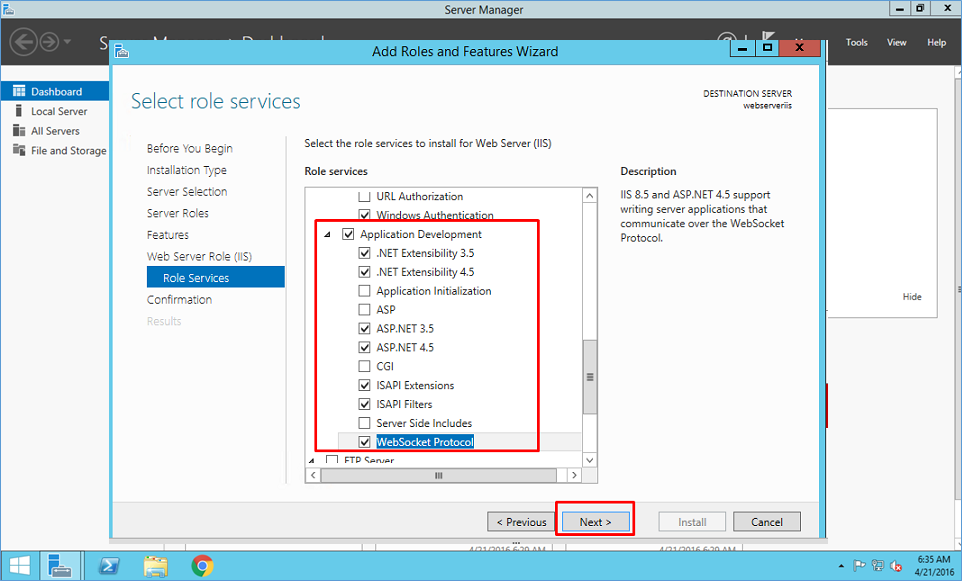
4.9 Let’s select Role Services: select items highlighted on the screenshots below and click “Next”.
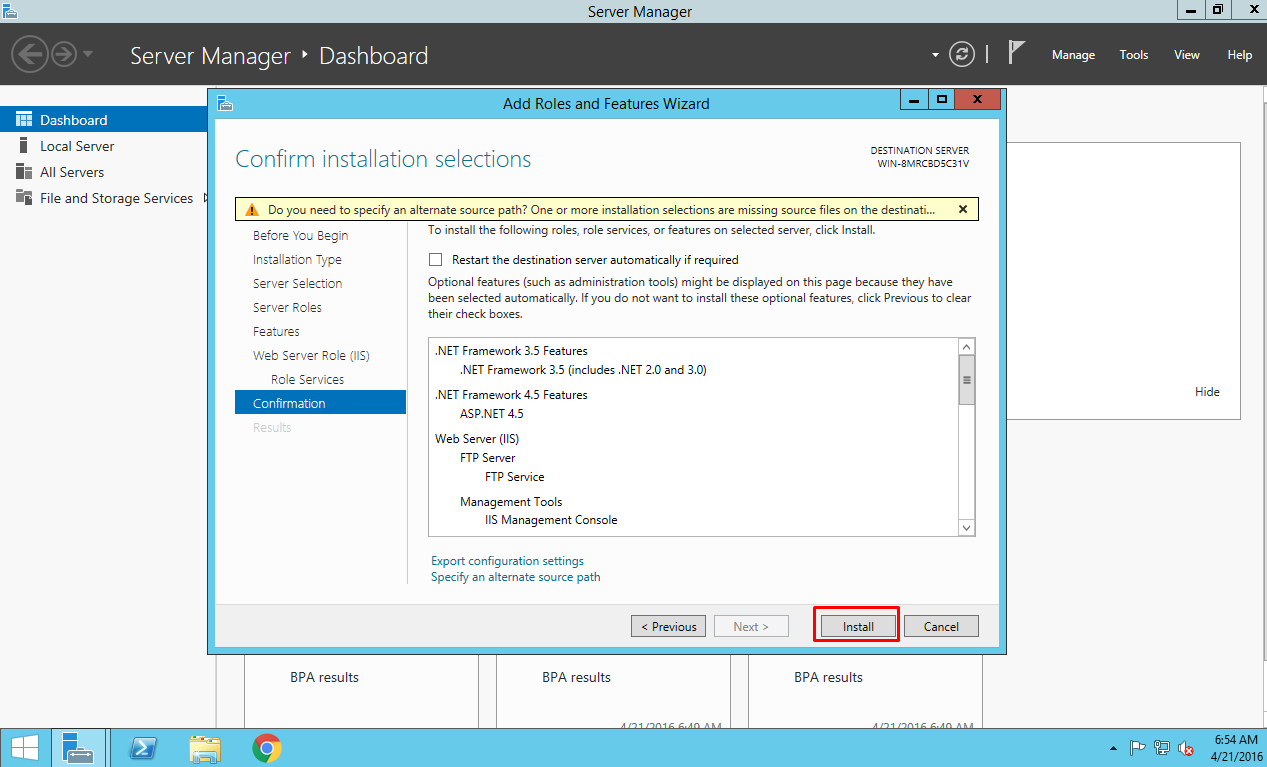
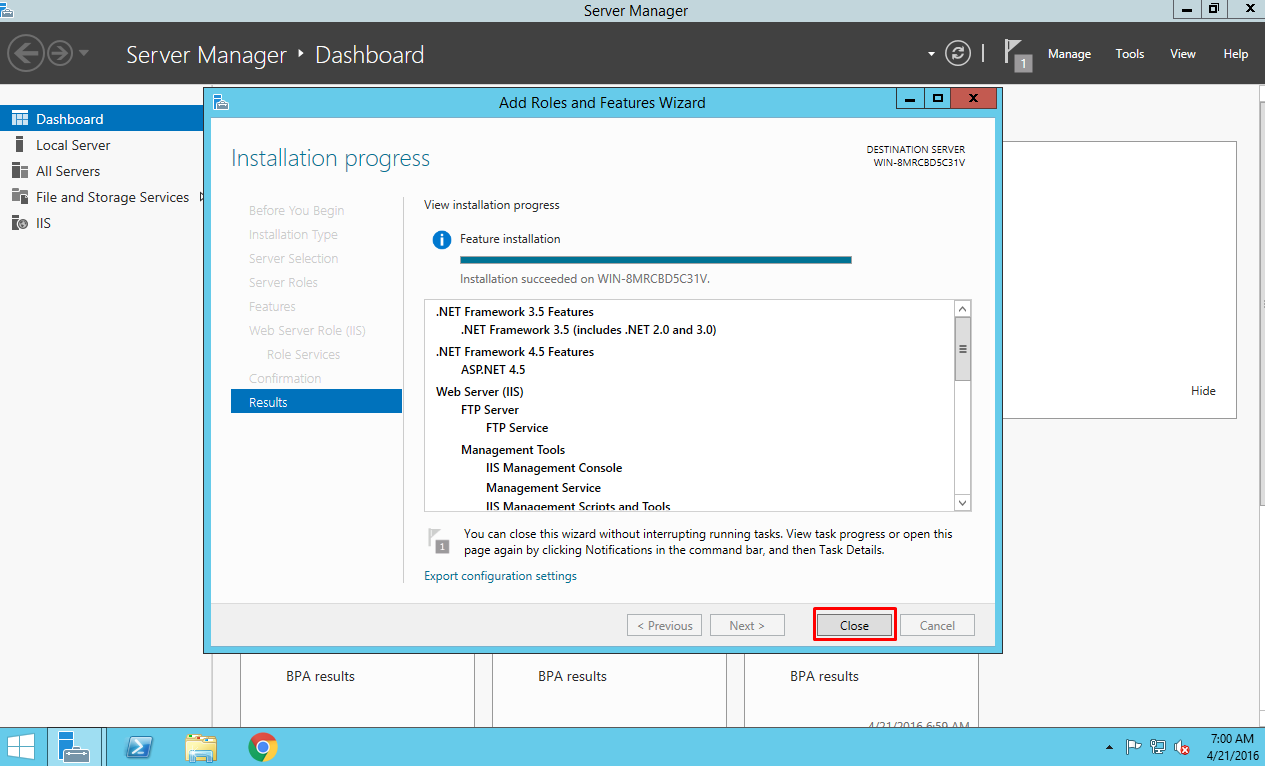
4.10 Click “Install” and wait until the installation is complete.
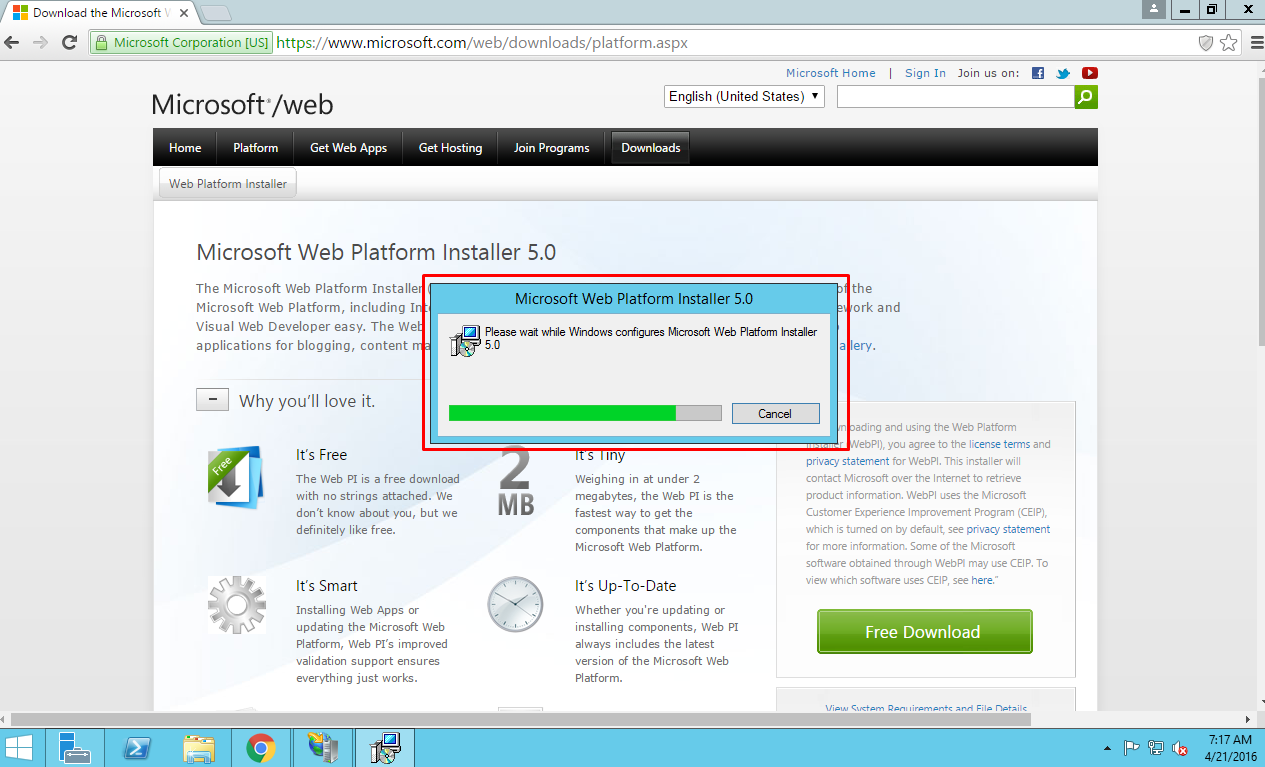
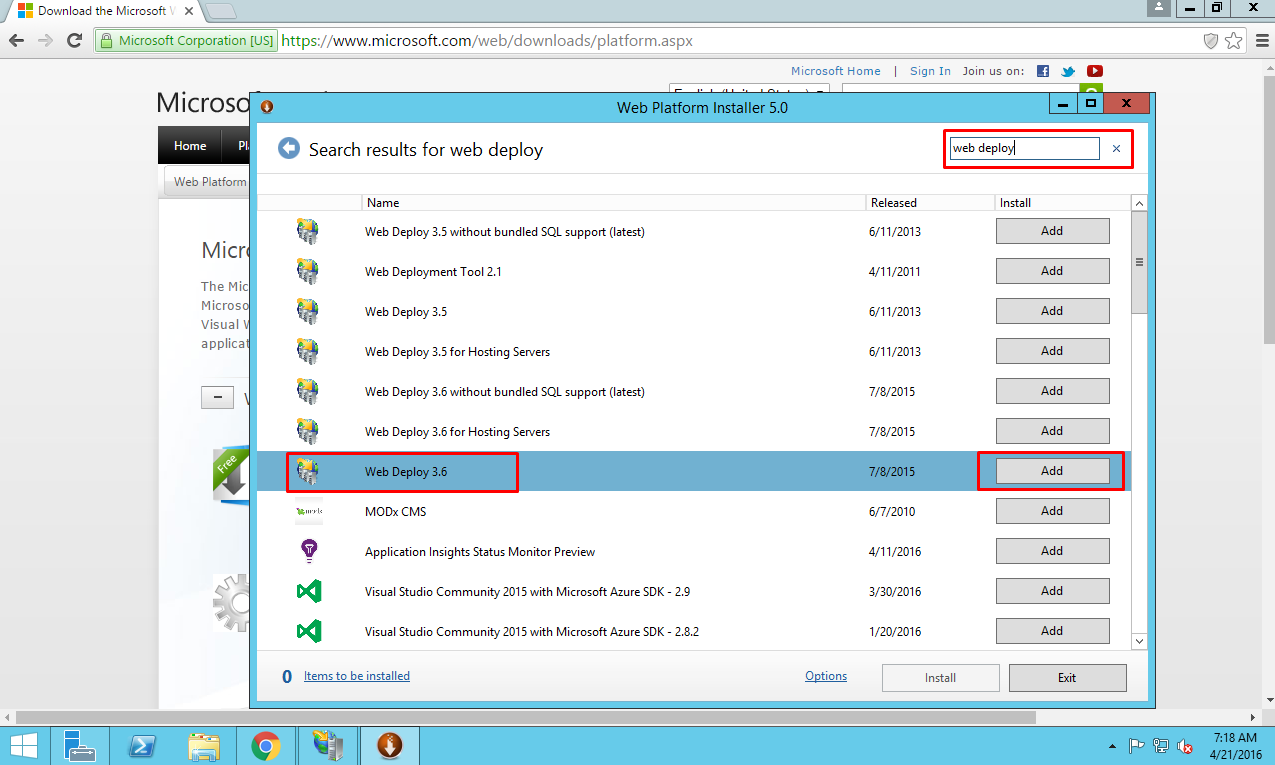
5.2. Using the installer search field, find and select Web Deploy 3.6 and click “Add”
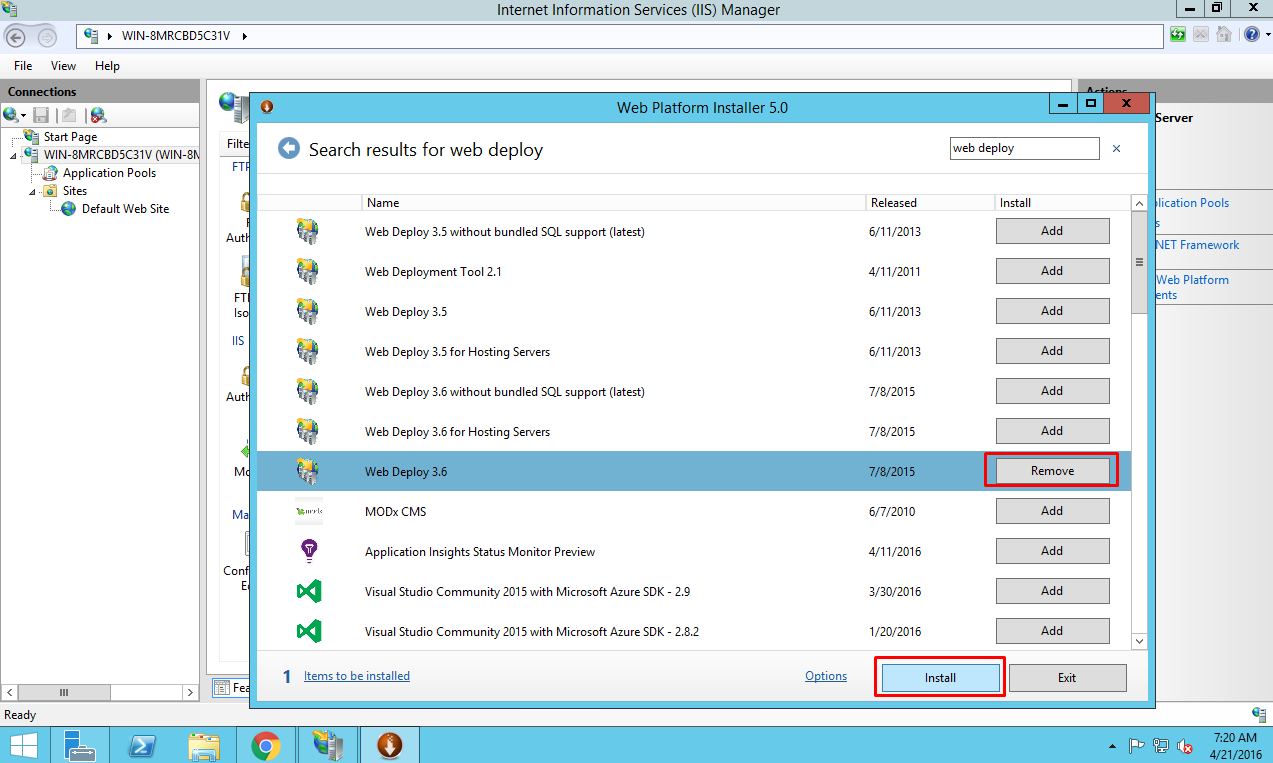
5.3 Then click “Install”.
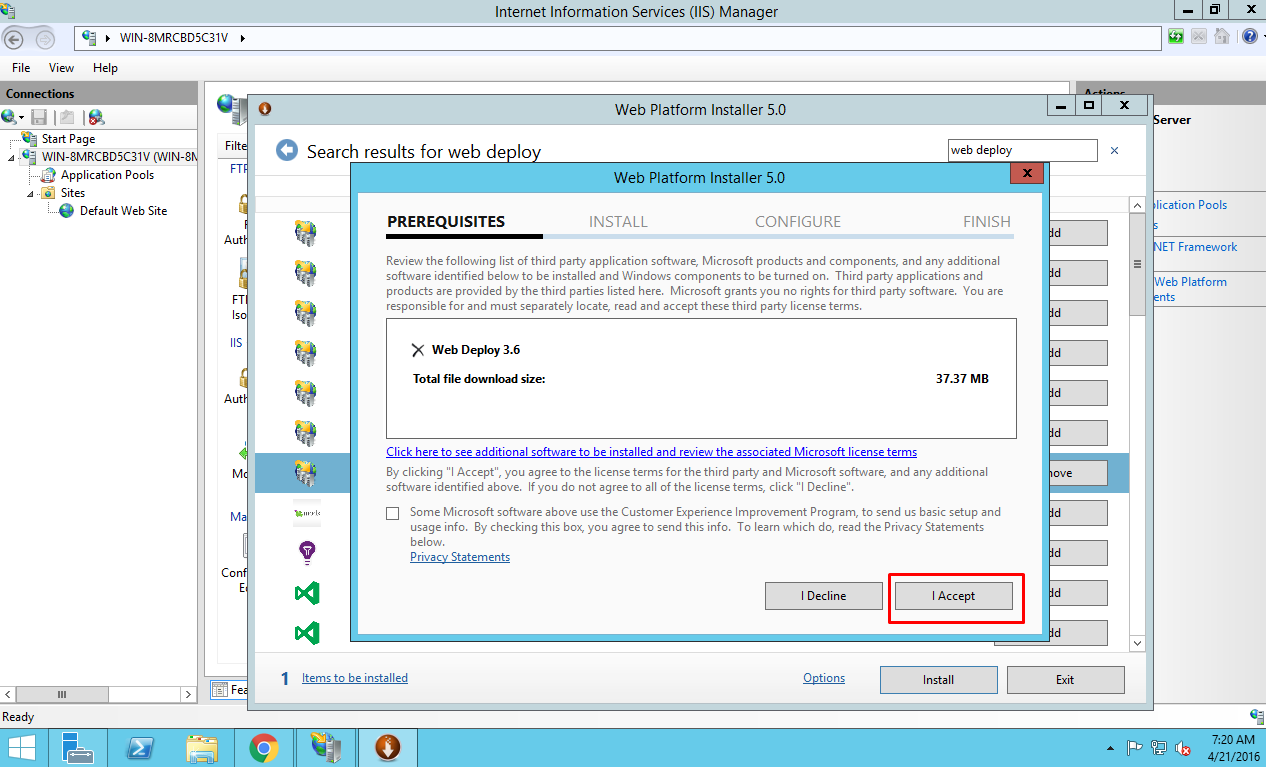
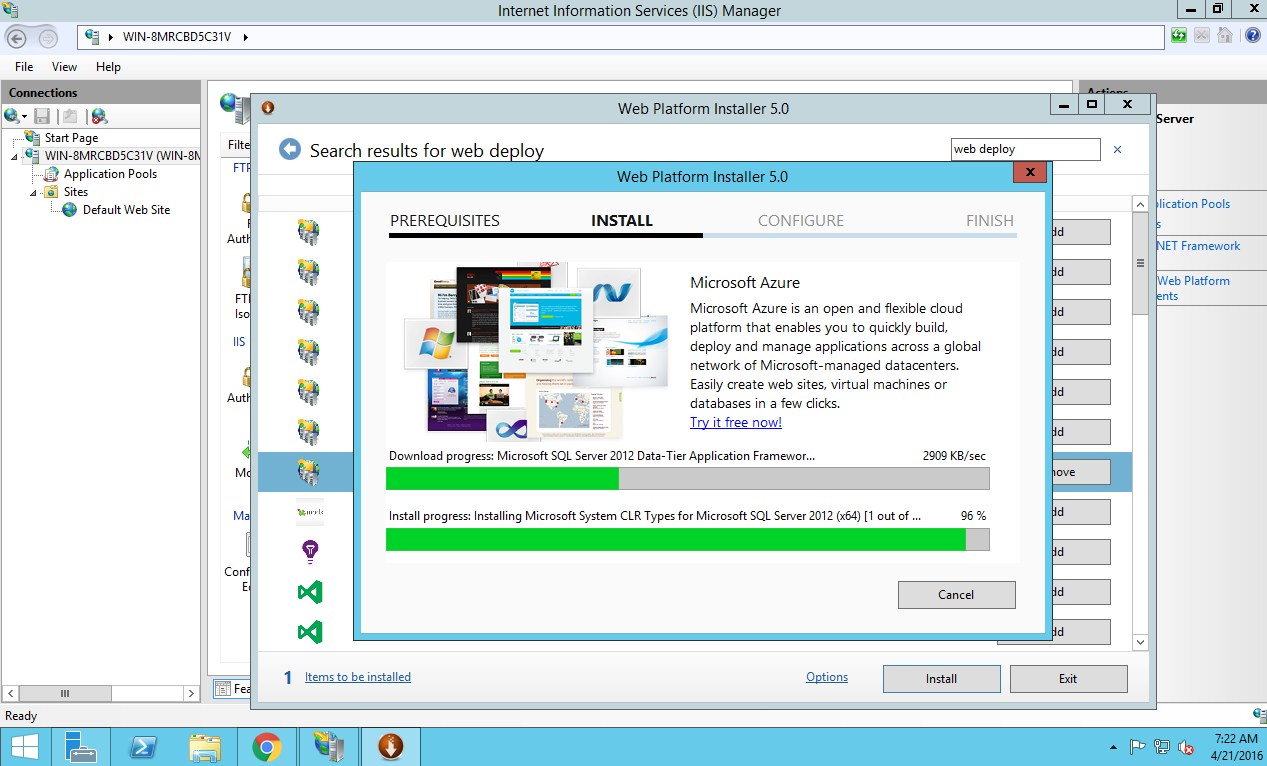
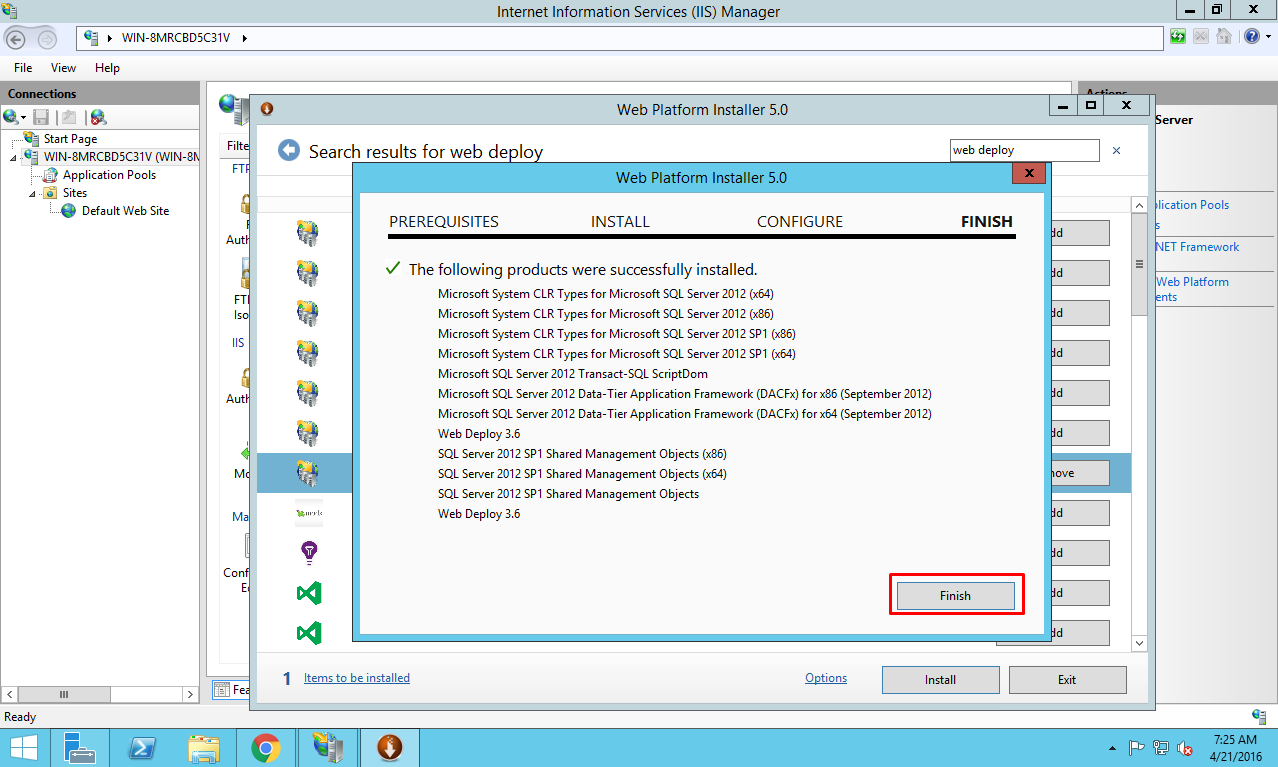
5.4 Accept the Microsoft license terms, then wait until the end of the installation and click “Finish”.
6. Creating ASP.NET MVC Application using VS2015 Web Express
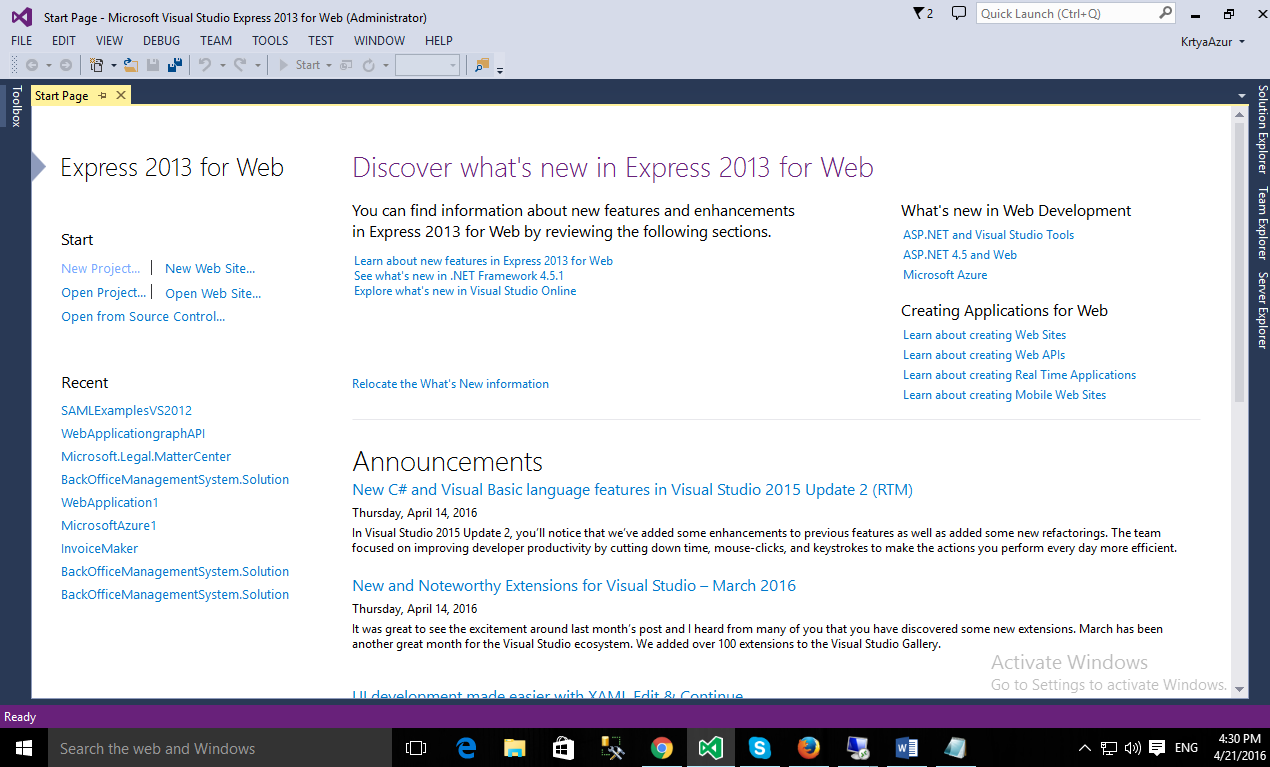
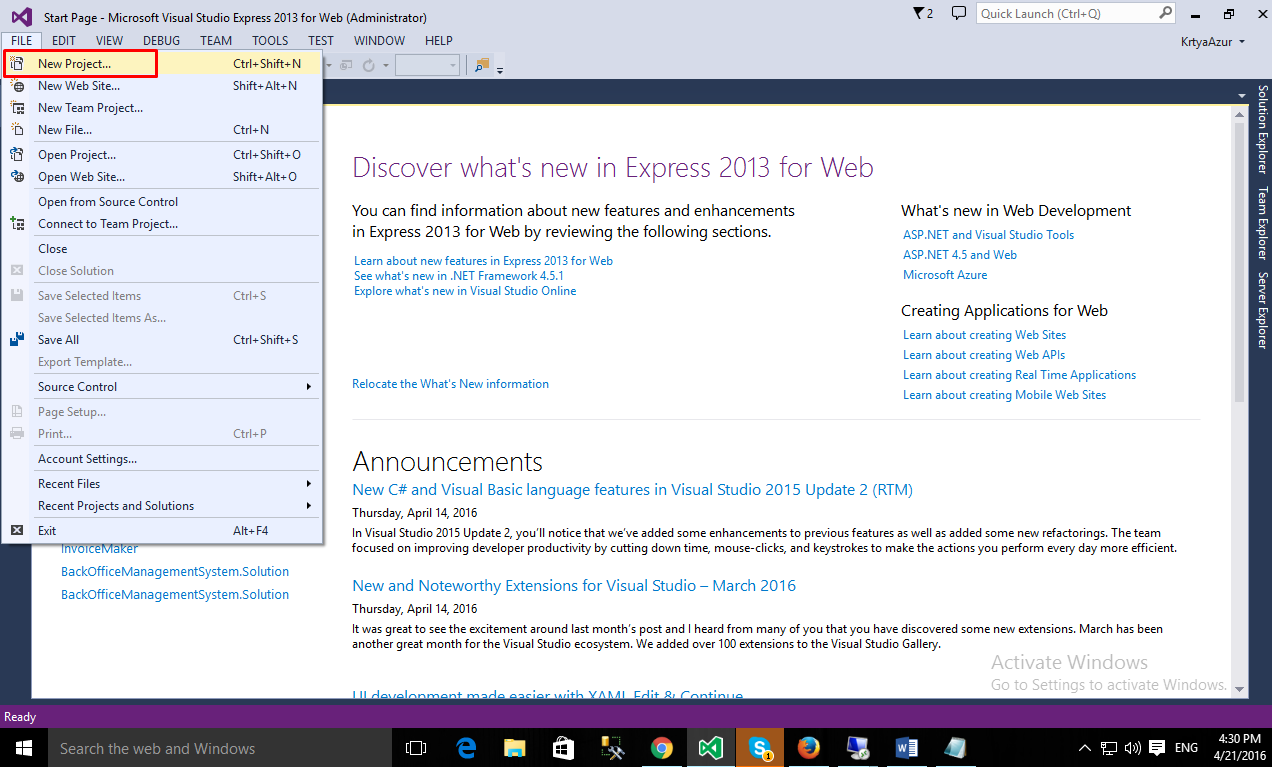
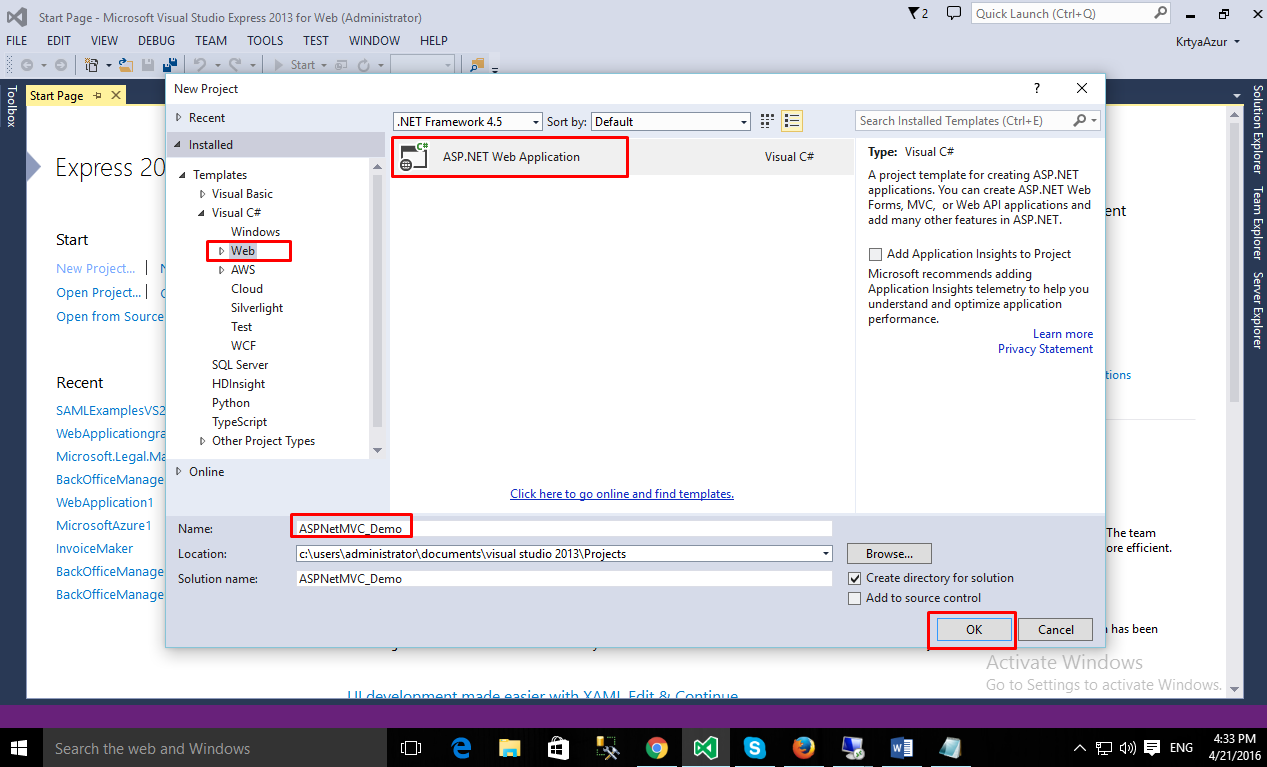
6.1 Start VS2015 Web Express and create a new project.
6.2 Choose ASP.NET Web Application from Templates > Web.
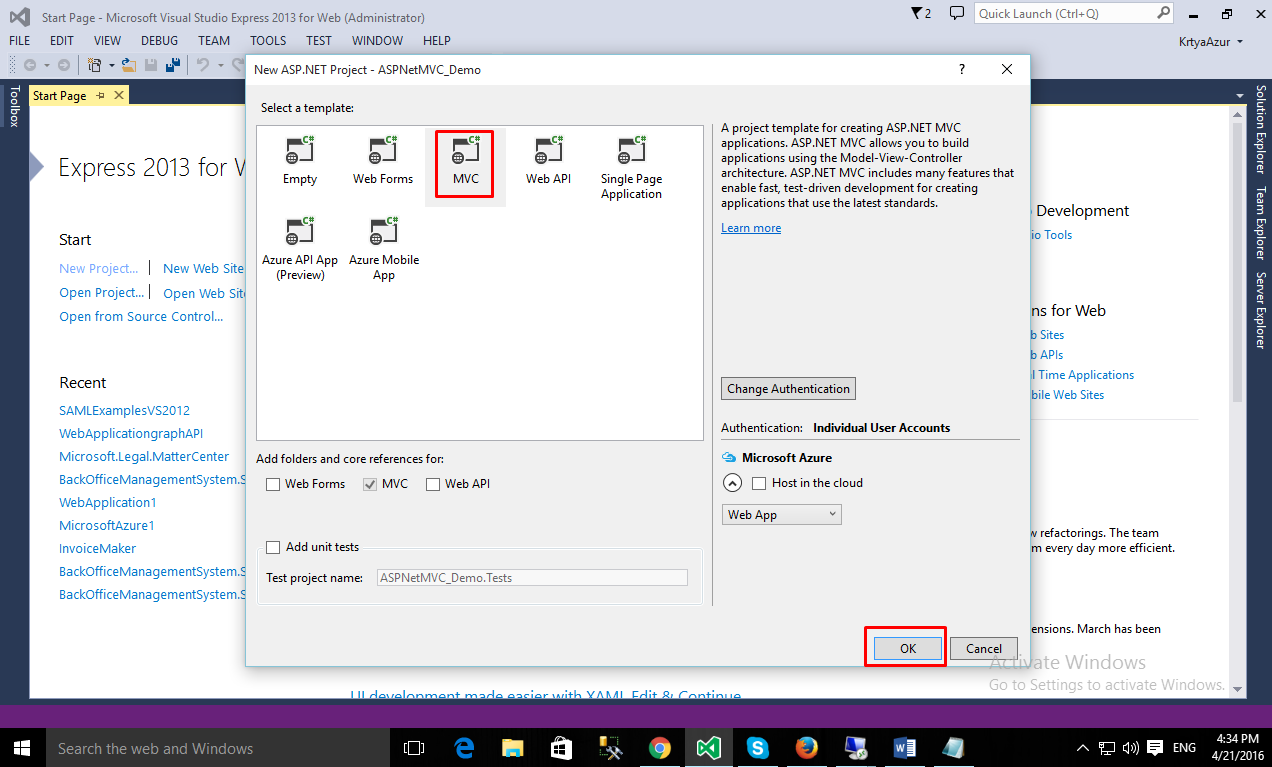
6.3 Select MVC template.
6.4 Your ASP.NET application was created! In the next section, we will show how to deploy it.
7. Deploying ASP.NET MVC Application from VS2015 Web Express
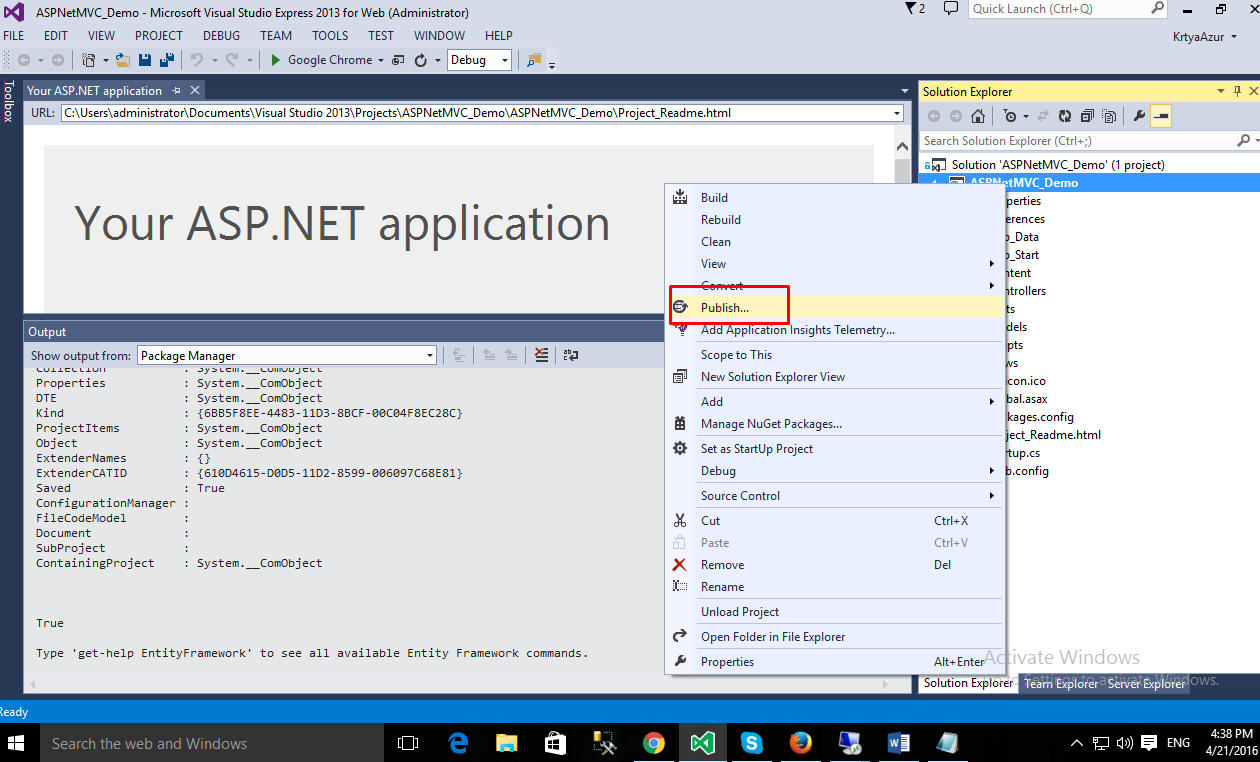
7.1 Right-click on your project name in the explorer panel (it is highlighted in the screenshot) and select “Publish”.
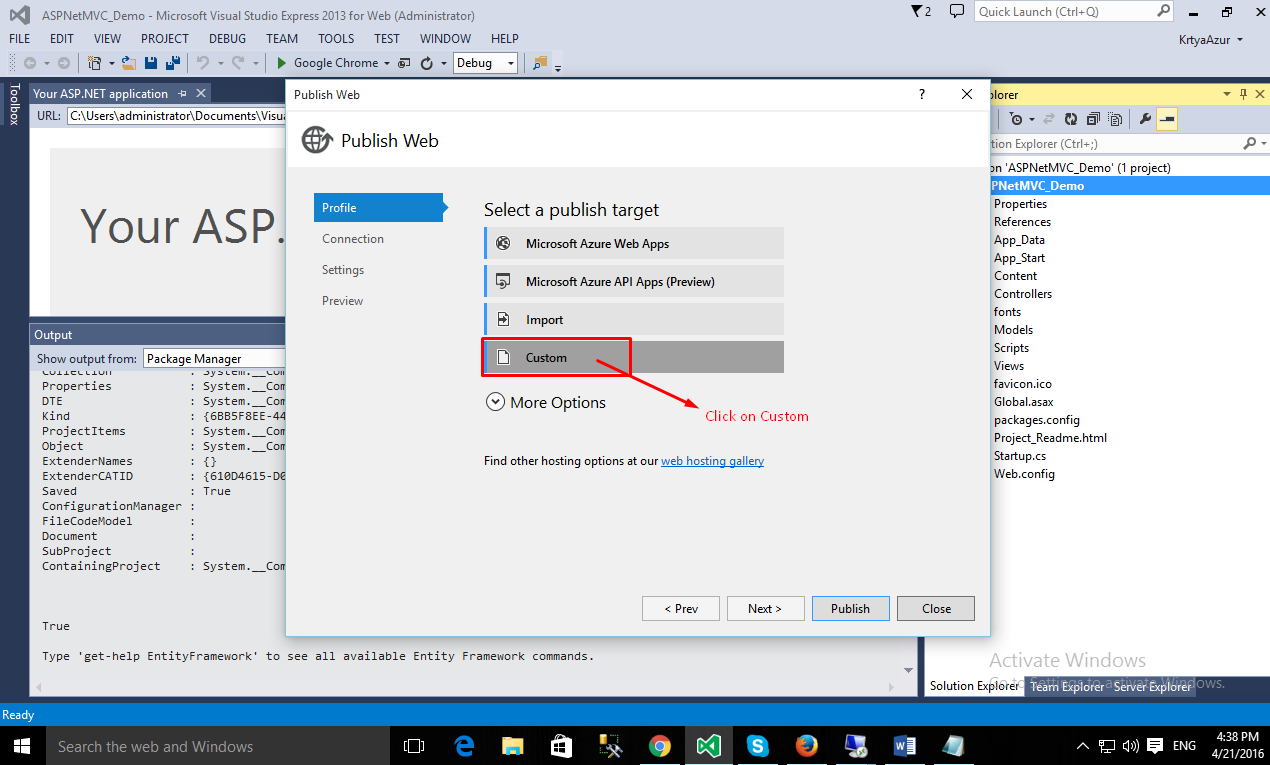
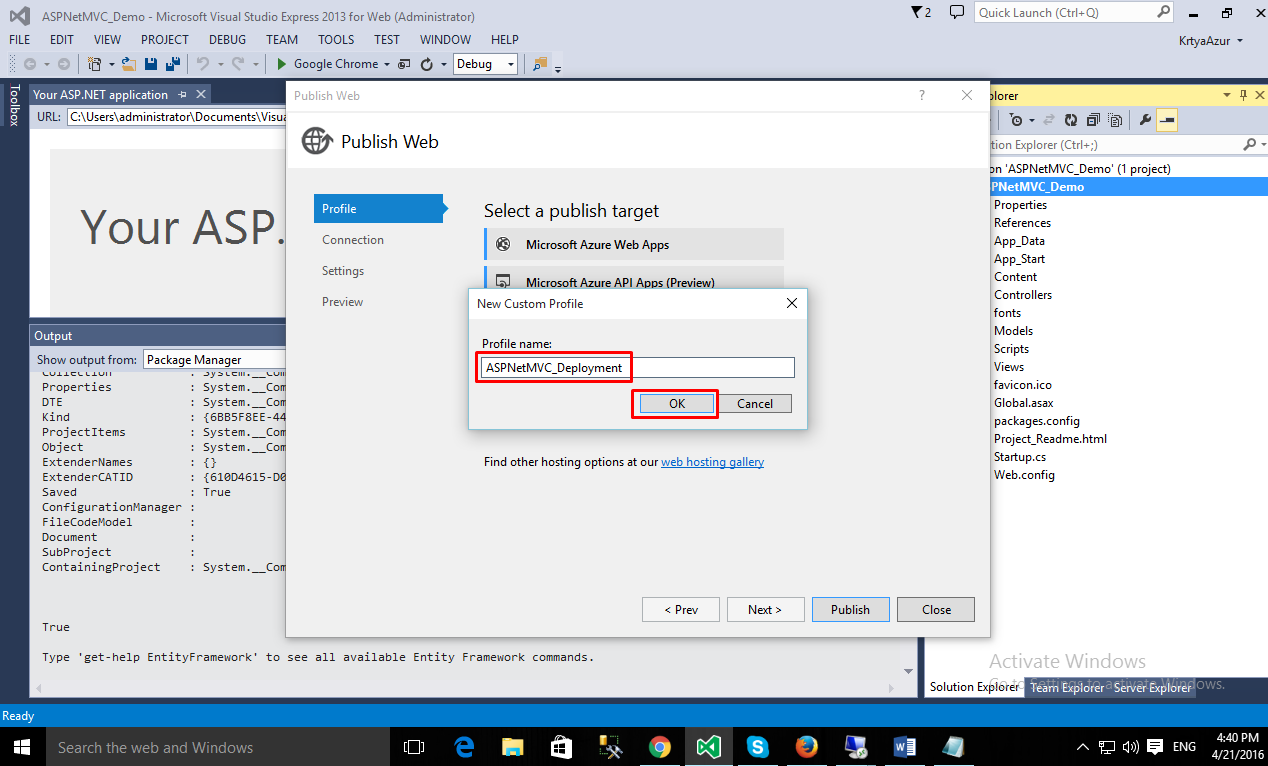
7.2 Select “Custom” publish targetagain.
7.3 Enter Profile name and click OK.
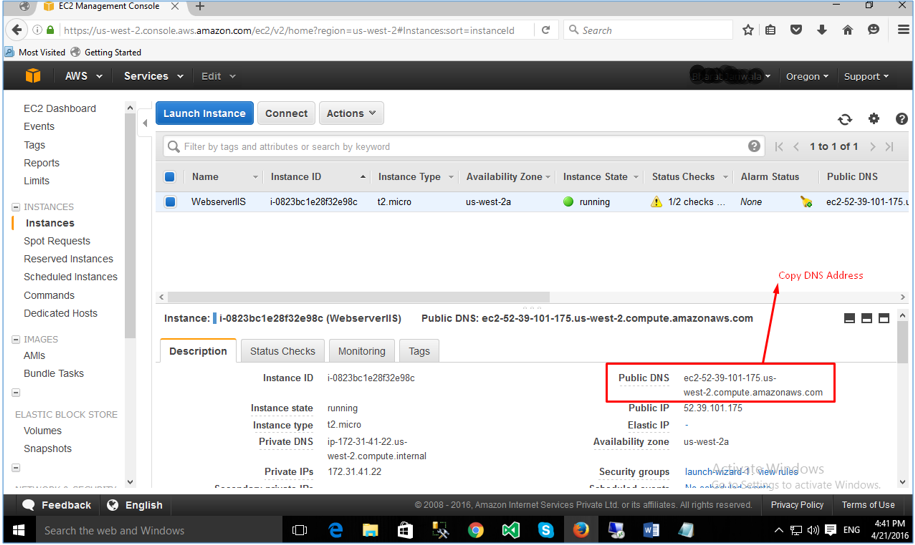
7.4 Go to EC2 Management Console now and check Instances. Copy and note down Public DNS Address.
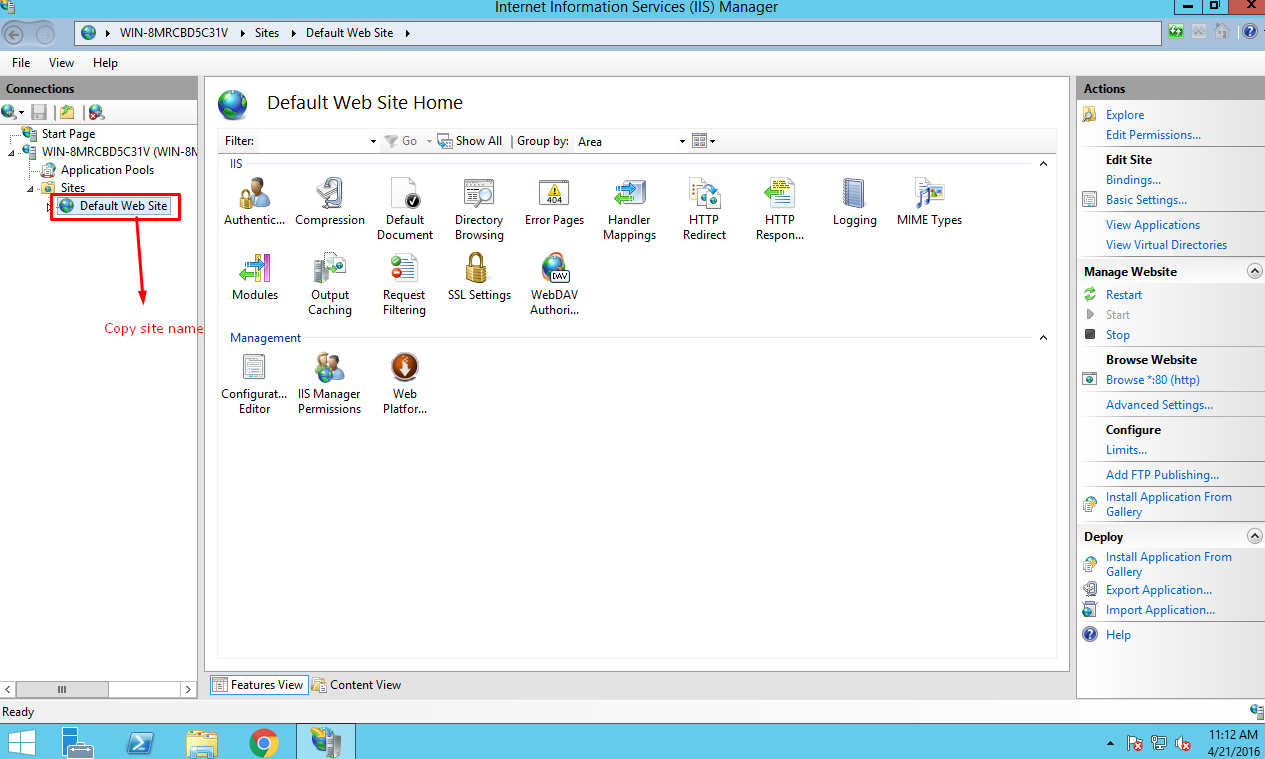
7.5 Now go to IIS Manager panel again. Check the Connections panel on the left and copy the site name under Sites.
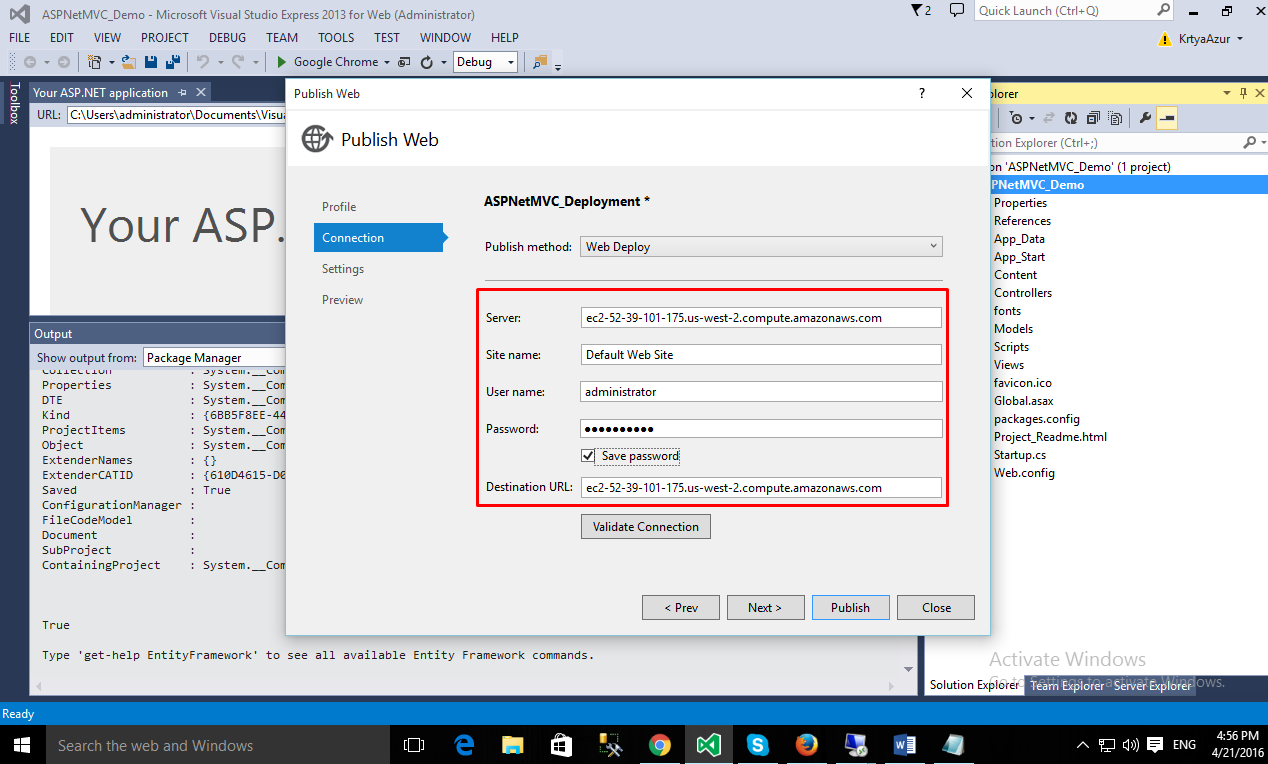
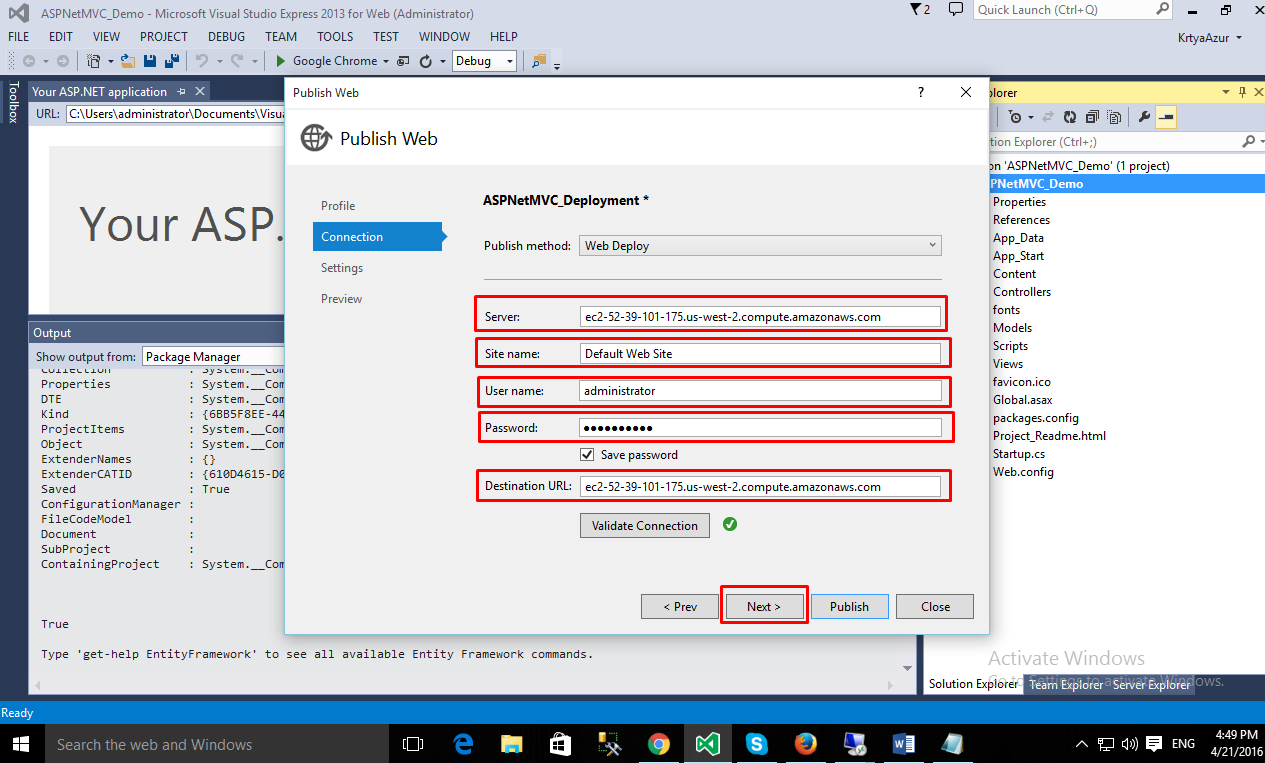
7.6 Return to the VS2015 Web Express and fill in the Connection settings. Here you will need your Public DNS address and site name from previous steps. Then click “Publish”.
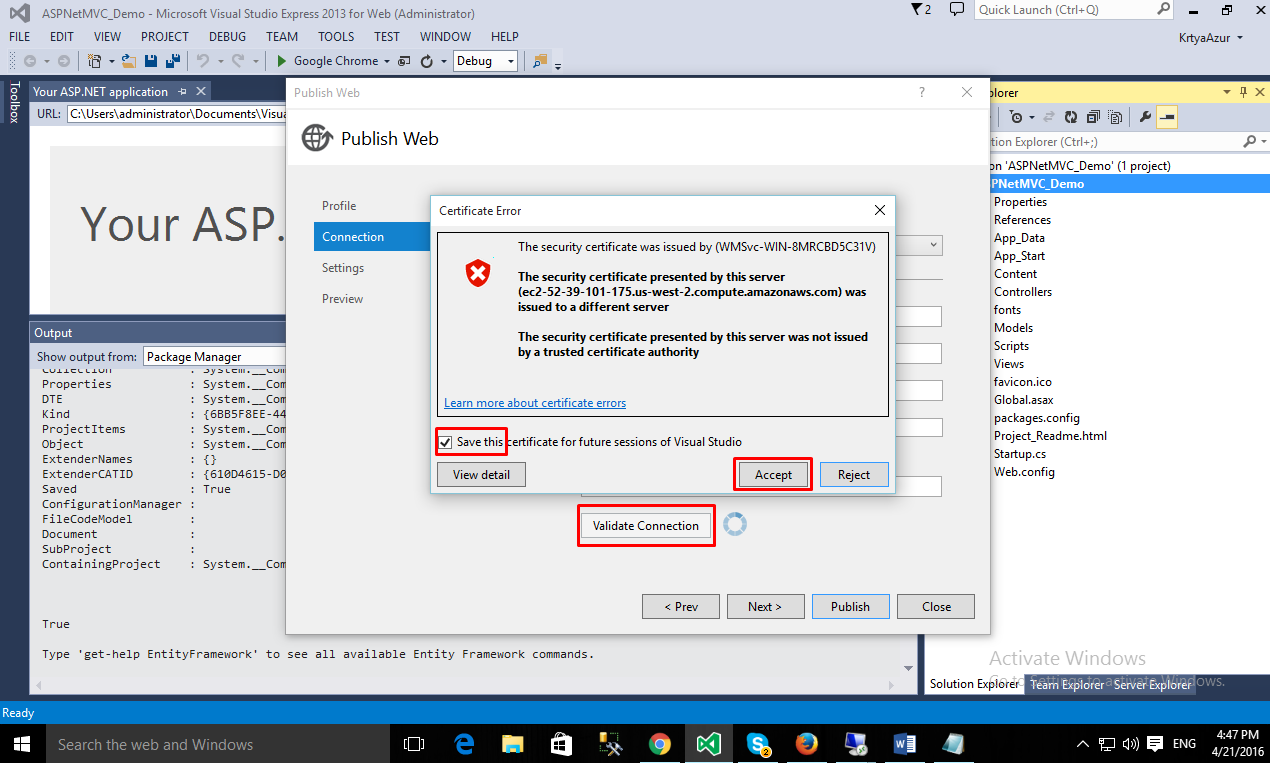
7.7 Check the “Save this certificate for future sessions” checkbox, then click “Accept” to accept the security certificate.
7.8 Now a green checkmark should appear near to Validate Connection button. Click “Next”.
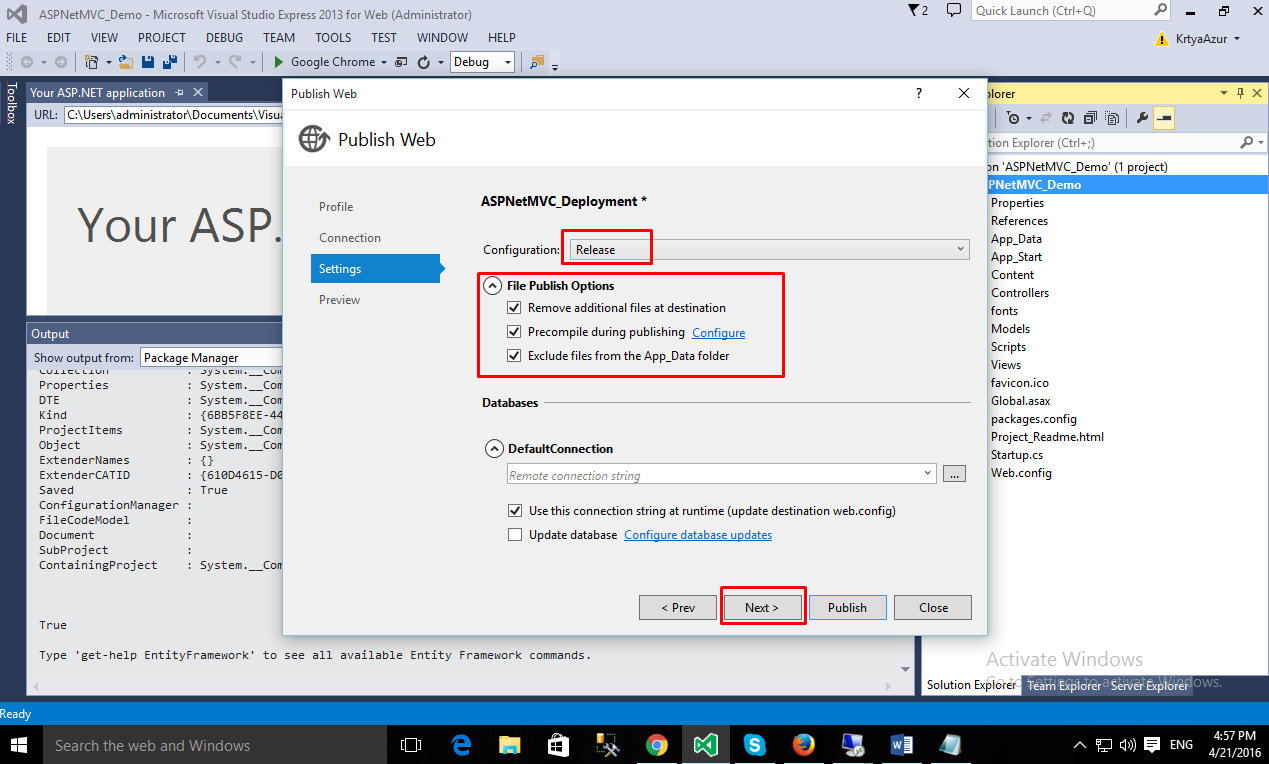
7.9 Set Configuration to Release, check all 3 checkboxes in File Publish Options, and click “Next”.
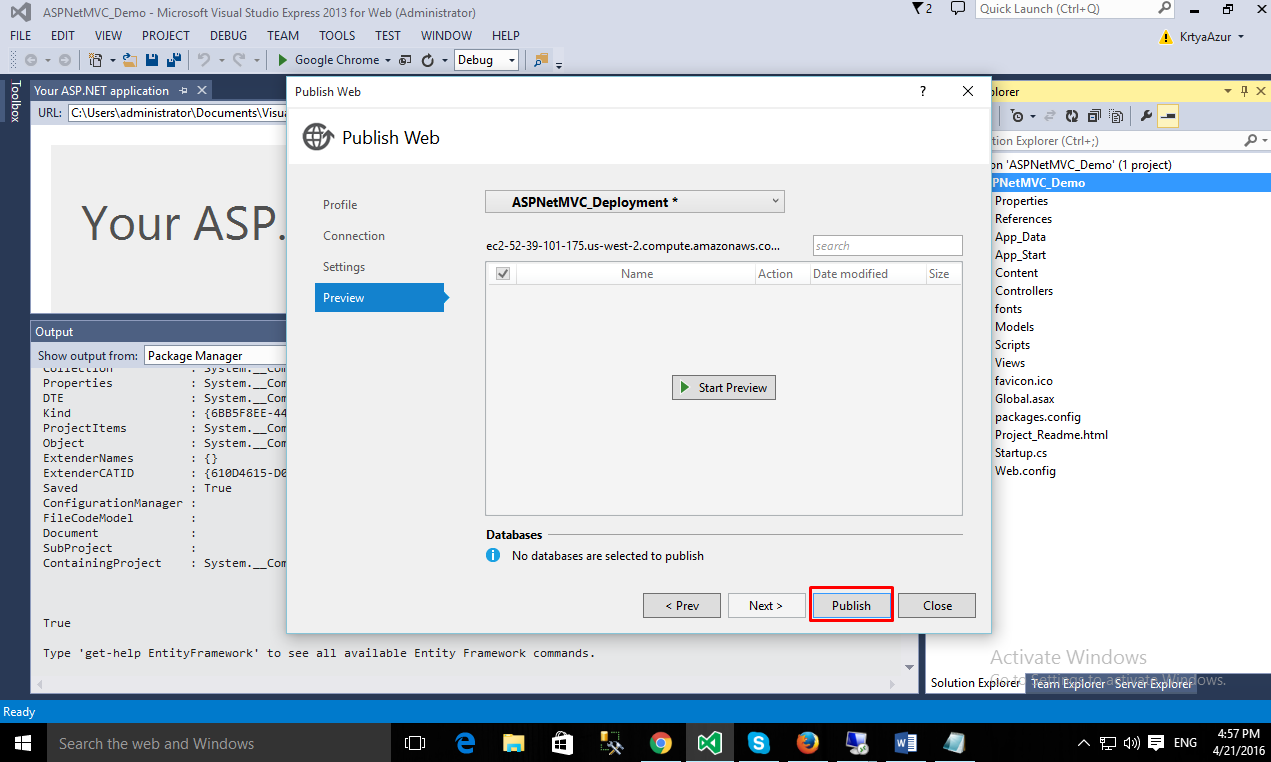
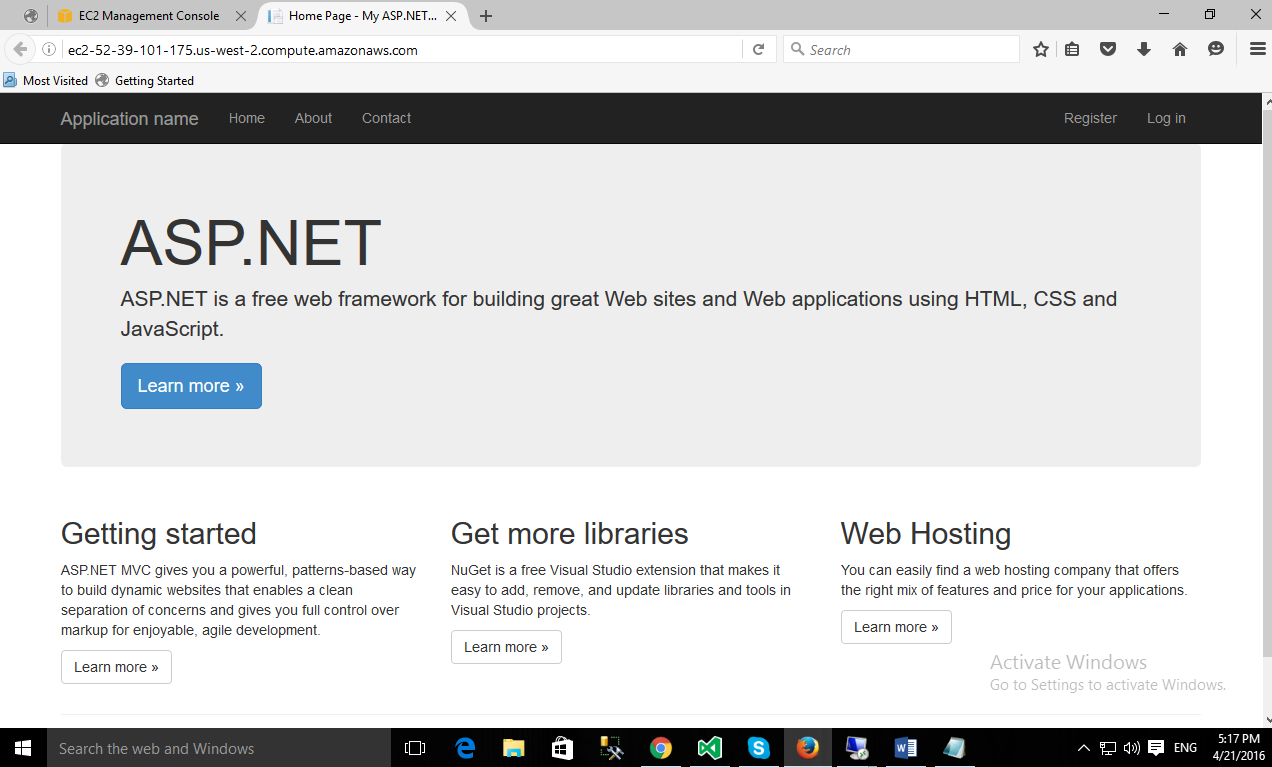
7.10 Here you can preview the app, but we will just click “Publish” to finish the deployment process.
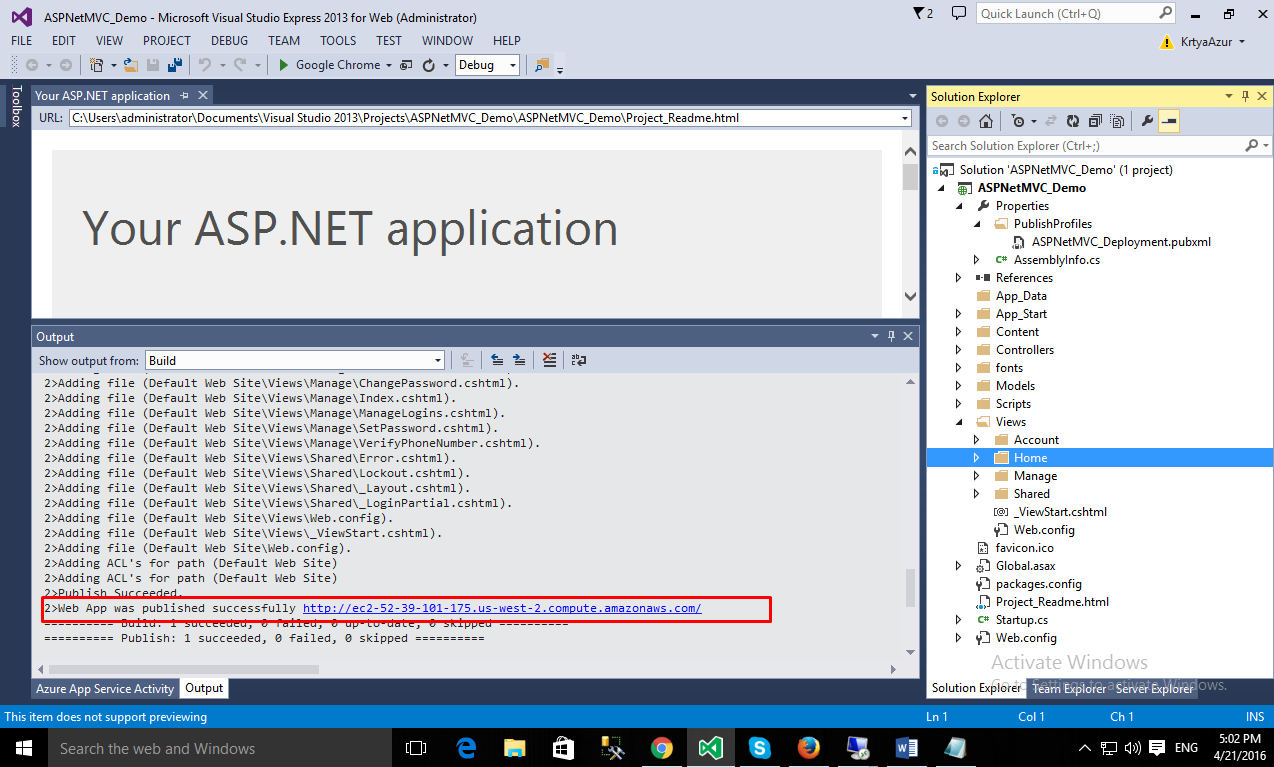
7.11 In the Visual Studio output console you can see the “Web App was published successfully” message and the address to access the app.
ByteScout Team of WritersByteScout has a team of professional writers proficient in different technical topics. We select the best writers to cover interesting and trending topics for our readers. We love developers and we hope our articles help you learn about programming and programmers.
Fascinating commercial applications of the functional programming paradigm abound today. Why do we hear so little about them? For one thing, functional programming (FP) is...
The default installation location of PDF extractor SDK is ‘C:\Program Files\Bytescout PDF Extractor SDK’ where you can find dlls for .net 2.0, 4.0, and core...