Our ByteScout SDK products are sunsetting as we focus on expanding new solutions.
Learn More
Important Update
ByteScout SDK Sunsetting Notice
Our ByteScout SDK products are sunsetting as we focus on our new & improved solutions.Thank you for being part of our journey, and we look forward to supporting you in this next chapter!
If you are into web development, sooner or later, you will find that you need a webserver to effectively work on your projects. Initially, it is easy to create an HTML file and run it via your browser. This approach is beginner-friendly and lacks the intricacies to handle a complex website creation.
In this tutorial, we are going to look at the steps required to install Apache Web Server on Windows.
However, before we get started, let’s first completely understand the concept of the webserver.
When a browser sends a request for a website, it is sent to a server(webserver) and requests the data required to render the site. The resources requested by the browser can be images, files, or code files.
So, when a user requests a site, for example, www.myownsite.com; the browser simply requests the web server holding the site for the required content. Once the request is complete, the browser then renders the site on the computer for the user.
The web server plays a crucial role and acts as a doorway between the browser and the site’s file. Apart from storing the files, the webserver is also capable of processing data or code for the site, providing a way to create a dynamic site that reacts to the user’s requests.
Web servers can be created by anyone. They are used for hosting sites. On top of that, you can also use web servers for testing purposes. The good thing is that you can install a local webserver to test out your site!
But, why apache?
In case you are wondering why apache, then we also got you covered. Apache, in general, is a well-known web server capable of hosting almost every type of site. If you are using sites created using ASP.NET, then Apache won’t cut.
Apache’s open-source license also makes it an ideal choice for businesses as they do not have to worry about license payments or vendor-lockin problems.
Getting Started With Apache On Windows
Windows is always known for its friendliness. That’s why it common for you to find all-in-one packages. In case you want to set up your Apache server as fast as possible, you can use these all-in-one packages such as WampServer, and XAMPP. They are easy to set up and comes with wizard installation.
You also need to ensure that you have Visual C++ installed on your system. In case, you are not sure, you can download the visual C++ directly from the web.
However, if you are not fond of this approach, then let’s use the Apache installation wizard to the rescue.
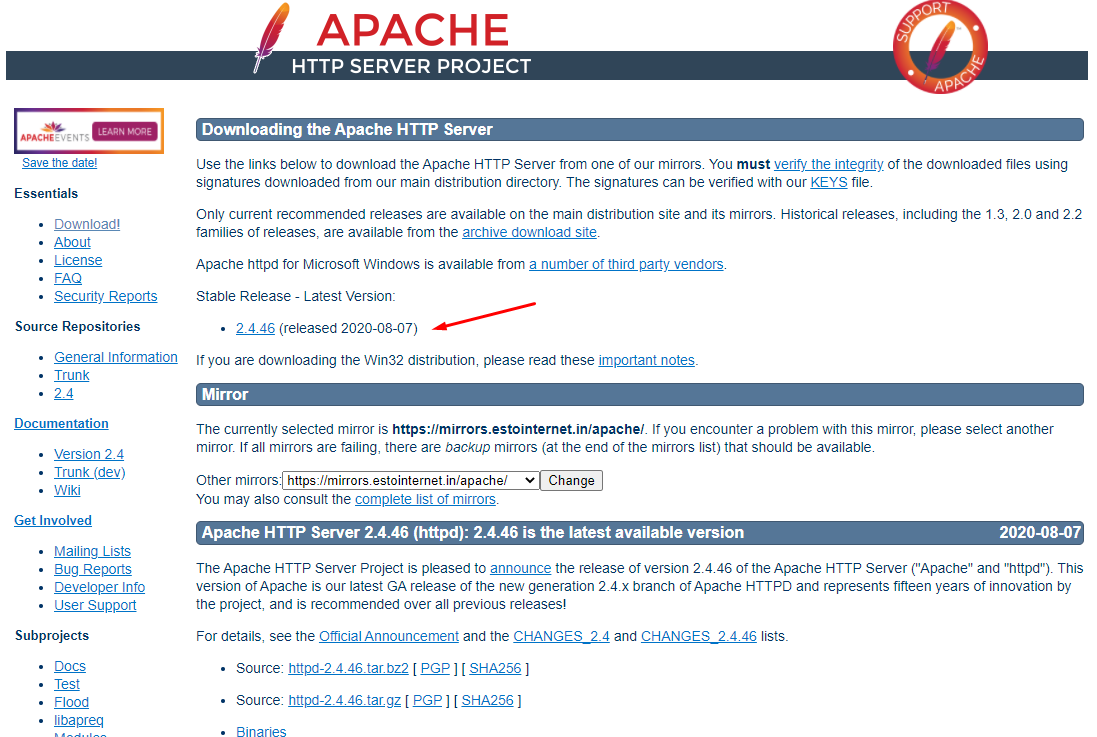
To get started, you need to download Apache to your computer. You can visit their download page here: http://httpd.apache.org/download.cgi
Once there, you will see an .msi installation wizard option. Simply download it
Once downloaded, you need to run it to start the installation. The wizard will guide you through the whole process and you are done! So, if you are a novice and don’t want to jump into the intricacies of the installation process then this process is for you.
Apache Web Server Windows Manual Install
If using the wizard is not a cup of tea, then you can also manually install the Apache webserver on your Windows. Manually installing the web server means that you can configure the server according to your requirement. Other key benefits include that you can easily backup your web server when possible.
A manually installed web server also enables you to run it from anywhere. For instance, you can run Apache from a spare hard disk or removable storage including a USB drive.
So, why wait? Let’s list the process through which you can install Apache manually on your Windows.
IIS stands for Internet Information Services. It is the service run by Windows to talk with the internet.
Apache, on the other hand, utilizes the TCP/IP port 80. This means that you need to re-configure or uninstall any software/solution that uses that port. This is the easiest way. Also, you can change the port at which Apache listens. However, changing Apache ports can be tricky and also makes many web applications and frameworks not work as intended.
Windows, by default, have IIS already configured to TCP/IP port 80. So, to make Apache work, you need to either reconfigure IIS or disable/remove the components or its service.
2) Getting the files ready
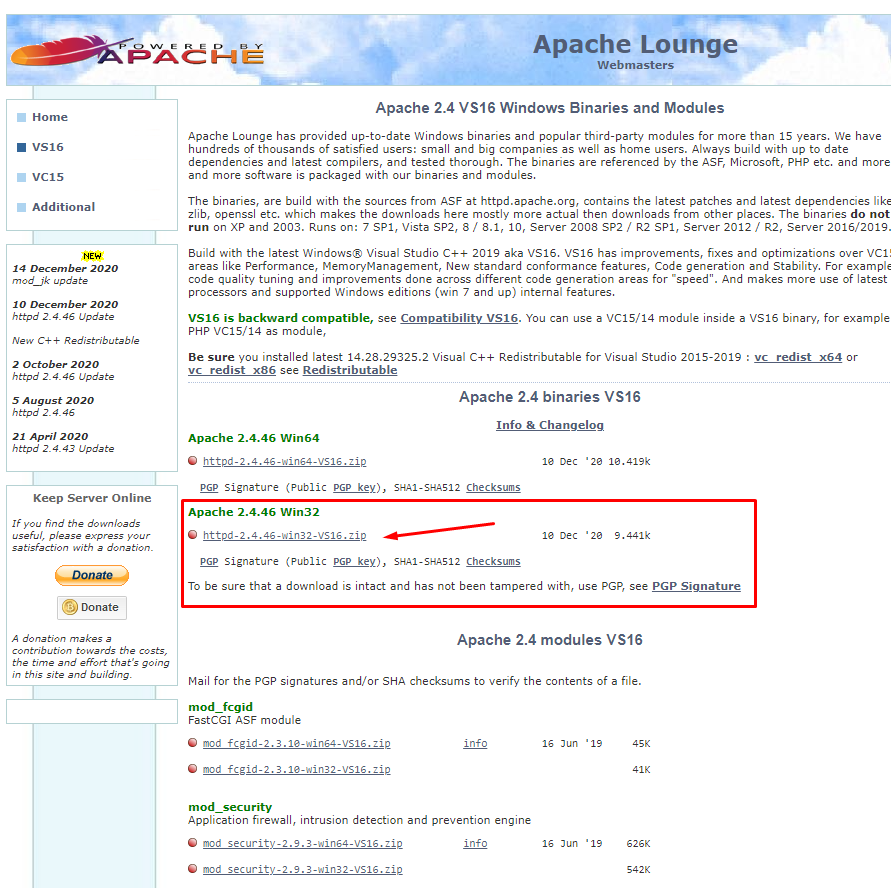
Just like the .msi setup, here also you need to download files. However, in this case, you need to download unofficial binary files. Head to Apache Longue: https://www.apachelounge.com/ and then download the latest zip file set from there.
3) Extracting the file
Once the file is download, we need to extract it. Copy the zip file to the root of C:/ drive and then extract it so that its content is saved in C:/Apache24.
This is done to make Apache work as optimally as possible. You can also install it in your other drives, but that’s not advisable as you need to do more configuration including changing he SVROOT configuration.
4) Apache configuration
It is now time for us to configure Apache.
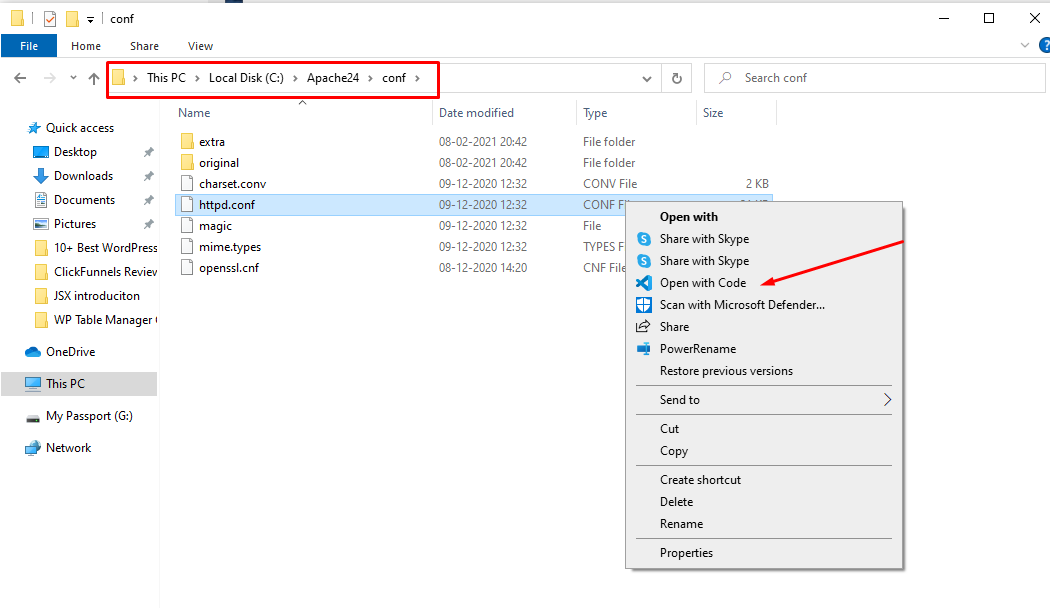
To get started, you need to open up conf/httpd.conf. The file is present within the Apache24 folder.
We have Visual Studio Code so we opened the file using it. In case you do not have any editor installed, you can also edit the fileusing notepad.
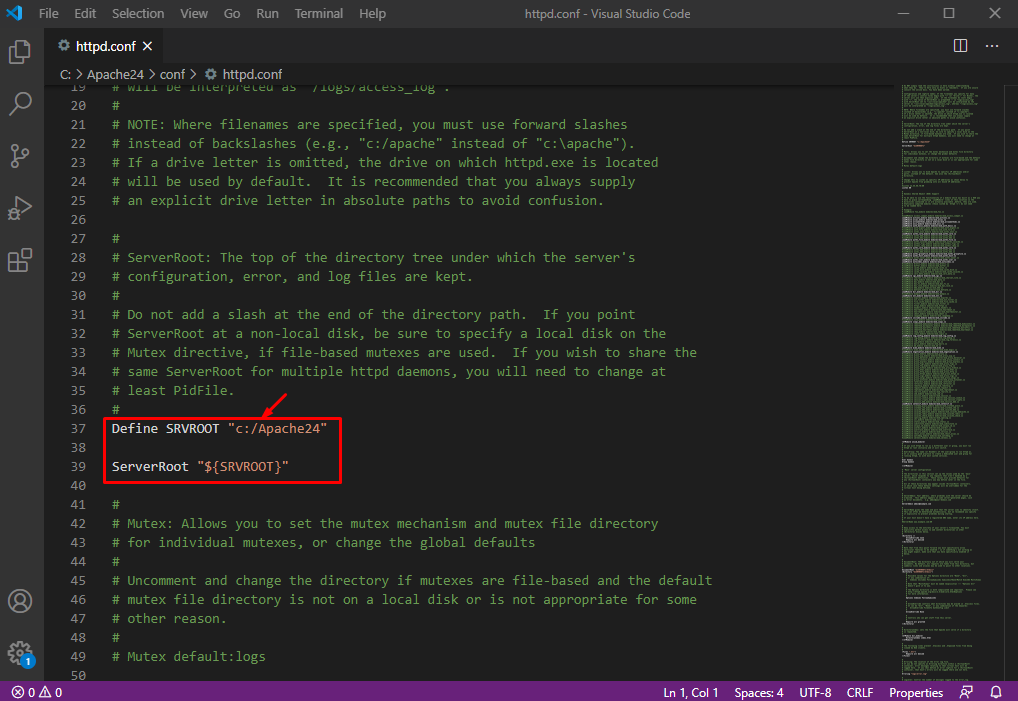
You will instantly notice how the filepaths are coded. Here the forward slash is used (/) which is different from the backward slash used in Windows configuration files.
So, what else we need to do here.
You can configure based on your needs. In case you are not sure, follow the below configuration guidelines.
Make sure the Apache is listening to the right port. Go to line 60. You will see the port associated with the Apache. By default, the port is set to 80. In case if you want to listen to a different port, change the setting here.
Now move to line 162. Here you will find the mod-rewrite option.
LoadModule rewrite_module modules/mod_rewrite.so
It is an optional step, but enabling it will help you in long run.
In line 277, you can change the server domain name.
ServerName example.com:80
If you are working on your local machine, you need to change it to the following:
ServerName localhost:80
Lastly, you need to enable .htaccess overrides by moving to line 272. You need to change it form AllowOverride None to AllowOveride All
5) Change root and doing basic configuration testing
In the final step, you need to test if everything is working as intended. Before, that you may want to do one more thing to make your life easier in the long run.
By default, Apache saves all the files(returns) to C:/Apache24/htdocs.
To ensure that it is easy for you to work with re-installation and backups, you need to change the DocumentRoot to somewhere else.
Once done, it is now time to test if everything is working as intended.
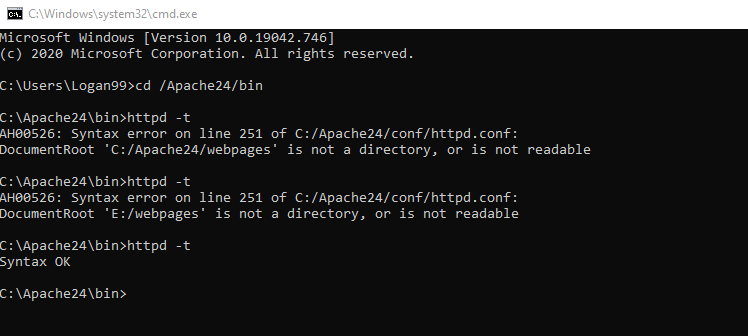
Open up the command prompt on your machine and then run the following command.
cd/ Apache24/bin
httpd -t
If it returns, “Sytnax OK”, then the configuration is done correctly.
6) Apache as a Windows service
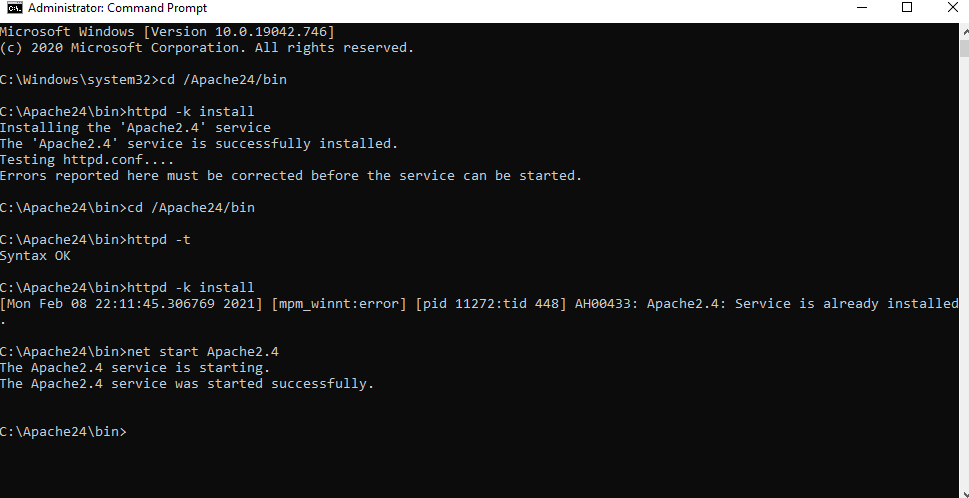
With configuration done, it is now time to install Apache as a Windows service. This is an important step as without it, you won’t be able to run the Apache webserver at all.
To do so, you need to open the command prompt and run the following command.
cd /Apache24/bin
httpd -k install
You can then manually run the server using net start Apache2.4
7) Web server testing
With everyone done, it is now time to test if the Apache web server is working as intended.
To do so, you need to create an index.html file within Apache’s web page webroot that we just set above. In case you didn’t change the webpage root, then you can proceed to create the file in htdocs folder.
<!DOCTYPE html>
<html lang="en">
<head>
    <meta charset="UTF-8">
    <meta name="viewport" content="width=device-width, initial-scale=1.0">
    <title>We are installing Apache Web Server</title>
</head>
<body>
    <h1>
        We manage to install Apache like it should! Let's go!
    </h1>
</body>
</html>
If Apache is working as intended, then the webpage should open as intended.
About the Author
ByteScout Team of WritersByteScout has a team of professional writers proficient in different technical topics. We select the best writers to cover interesting and trending topics for our readers. We love developers and we hope our articles help you learn about programming and programmers.
Windows Subsystem for Linux (WSL) enables Windows users to run a Linux environment directly on their Windows machines. It allows developers to access Linux tools...