ByteScout Tools Zapier integration is now available!
Learn more about Cloud API for Zapier.
This can be kicked off by any number of file-oriented triggers. One way to approach this is to create a Zap that is triggered by using Email by Zapier. When a new email is received, Zapier can create the file inside a specified Dropbox folder. This workflow will already add value to the accounts receivable team by ensuring all invoices are captured. Next, we will look at converting that newly-stored PDF invoice into a CSV using ByteScout.
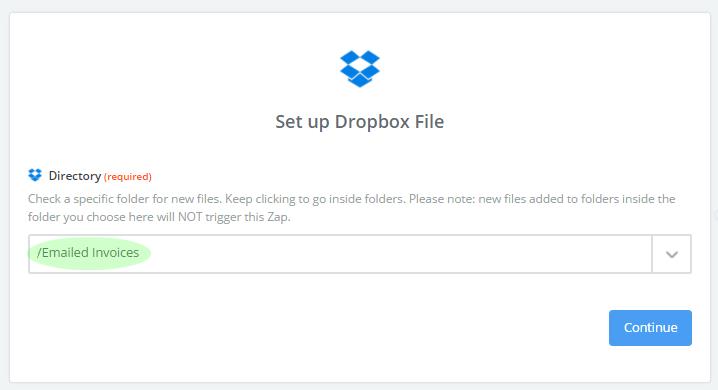
1) The first step, as in all Zaps, is to configure the trigger. In this case, our trigger is Dropbox – New File. We will tell Dropbox which folder to monitor, as shown below.

Multiple different file repositories can be used as a trigger, as shown in the Zapbook here.
Here’s a small security hint: there is a need to have a URL accessible publicly to see a file. When we speak about the Dropbox folder, a “Direct Media Link” is provided, which we will use in our Zapier steps. This Dropbox link expires after a few hours for security purposes, so it is important in your workflow that the document is posted to ByteScout quickly after creation. If you wish to use other services, they need to offer a way to provide a public URL. Depending on the sensitivity of the content, you may wish to ensure those links expire. Similarly, ByteScout links expire after one (1) hour for your security.
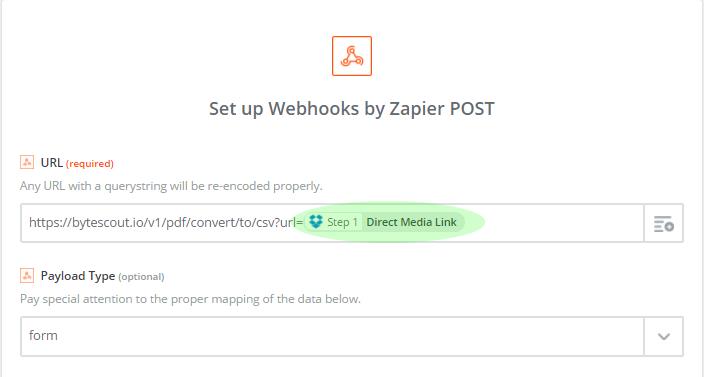
2) In our second step, we configure the HTTP request. We are basing this request on the documentation in the ByteScout support guide found here for method barcodeReadFromUrlPost. We can see that the green highlighted value is a variable, inserted from step #1. If your workflow is more complex, you can use variables from any step in the Zap that comes before the request to ByteScout. Note that the payload type is form; however, other payload types and configurations are supported, depending on the project requirements. The value of QRcode can also be replaced by other supported barcode types as defined in the documentation for this method – ByteScout can create almost any kind of barcode!
Helpful hint: ByteScout offers a new feature called “inline”. When this feature is used, the entire CSV content will be returned in the response body rather than as a URL. This might be helpful if you want to use the information contained inside of the original PDF, now returned as text, in a future step in the Zap. This can be invoked by passing &inline=true.
https://api.pdf.co/v1/pdf/convert/to/csv?url={Zap Variable}

a) Finally, we configure the HTTP headers for the request. In this case, we only need our authorization key which can be found on your ByteScout dashboard here.

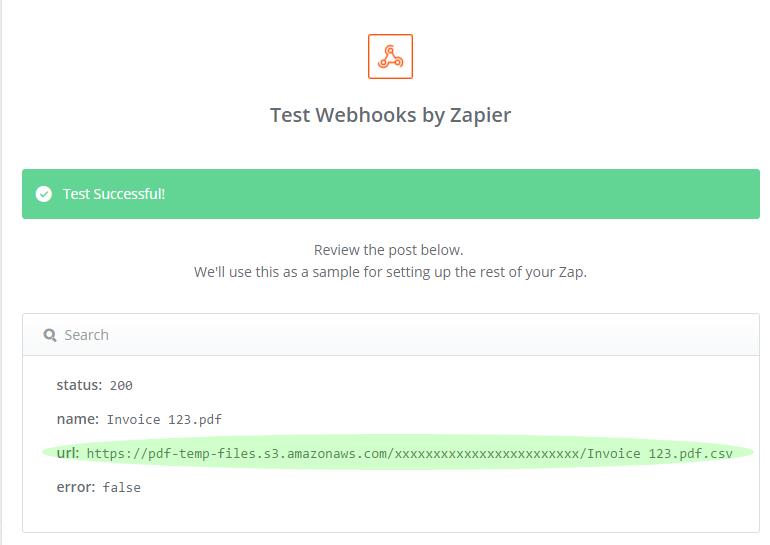
b) Now, we can follow the Zapier wizard and test our Zap! Upon successful response, Zapier will parse the entire response payload for friendly use. The response from ByteScout will include helpful information such as the file name and URL. We can see that our file is now a *.csv – confirming the conversion.
 3) The final step is to take our file and put it back in a Dropbox folder. We can do this using only the URL returned from ByteScout. Notice in this step, we insert the URL into the file object field and we have selected a subfolder of our “Emailed Invoices” folder. Optionally, we can also make a decision if we want Dropbox to overwrite a file with the same name, or we can override the file name if we have information from previous steps. An example of this is doing a search/find against your CRM, based on information in the email to find the associated company. It might be helpful to name the file based on that company name.
About the Author

ByteScout Team of Writers
ByteScout has a team of professional writers who specialized in different technical topics. We select the best writers to cover interesting and trending topics for our readers. We love developers and we hope our articles help you learn about programming and programmers.