Front web development is exciting as it gives you the ability to work on different technologies. TypeScript and React are those two amazing front-end technologies that give you complete control over your website.
However, as a developer, you may find it hard to manage them. In short, it can get confusing and challenging when you want those two technologies to work together. That’s why, in this article, we go through some of the best practices of using React with TypeScript. After all, using TypeScript can always make your UI look and perform better.

It is important to learn how both the technologies work together before we go through the best practice of using them.
By now, you should probably know, React is a front-end JavaScript library that lets you seamlessly build a user interface(UI). But how does it matches with TypeScript? Well, TypeScript is a JavScript superset that can be compiled to native JavaScript during rendering. In the end, you get the amalgamation of two different technologies that offers you to create an excellent front-end user experience. The end result is a better product with fewer bugs.
To ensure compatibility, TypeScript compiles React code to ensure that React does not have to do anything extra to make it work. However, TypeScript can be configured to not compile JavaScript out of the box.
Moreover, TypeScript also works with webpack, which makes it easy for you to handle your web project.
When you create classes in React, you should not use the public accessor. That means you should not use a public accessor while writing your code. This will only add extra code. React by default will only compile public classes on runtime while it hides the methods/classes with private or protected during run time.
Code with public accessor not used:
class App extends Component {
    method-onemptied() { }
    public render() {
        return <div>Hello, World!</div>
    }
}
Code where the public accessor is used:
class App extends Component {
   public method-onemptied() { }
   public render() {
      return <div>Hello, World!</div>
   }
}
As a developer, you are surely going to configure your project. However, you also do not want to spend a lot of time here as you want to get started as quickly.
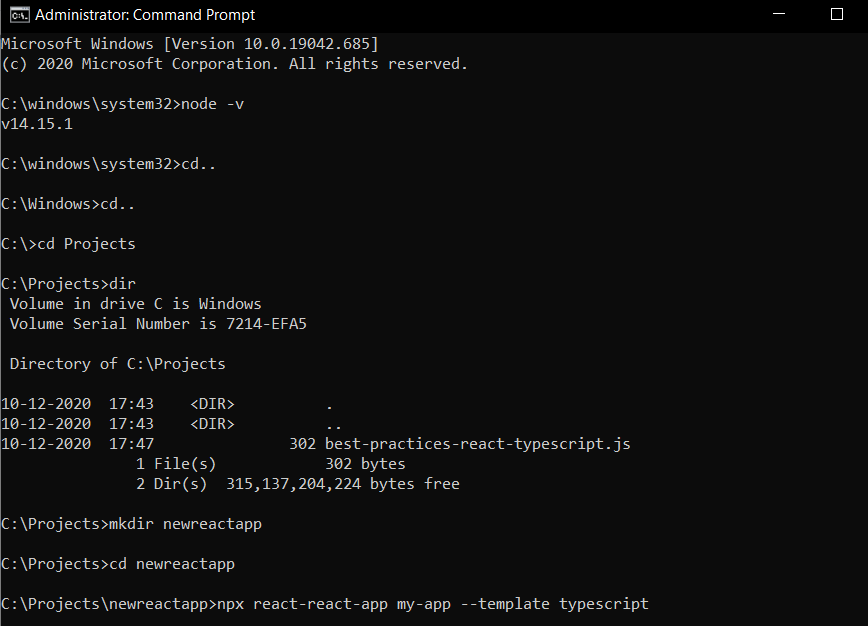
In this case, it is important to get started with the project setup itself. If you have worked with React before, you know that you need to use the create-react-app command to start your React/TypeScript app. To further ensure that you have the best possible configuration, you need to use the following command:
npx create-react-app my-app --template typescript
If you like yarn, you can also use it to initialize your application using it.
$ yarn create react-app your-app-name --template typescript

With this, you get the bare minimum to run your project. In this approach, you get access to three key files, including .tsx file extension, react-app-env d .ts, and the most important tsconfig.json.
The .tsx file is for TypeScript JSX. However, you need to play extensively with the tsconfig.json as it where you configure your project. In case if you are looking for SVG imports for your react-scripts, then you need to use the react-app-env.d.ts.
As mentioned, the tsconfig.json file is where most of the action happens. As we got the bare minimum settings, and that’s why you need to make quite some changes to it.
The best way to find the optimal settings is to check out the react-typescript-cheatsheet community.
Another optimal way to optimize your code using TypeScript/React is to not use protected in your code. There are other ways you can leverage functional patterns with React. However, you should use other methods to extend component behavior. For instance, you can use the following methods to achieve the same desired result.
TypeScript adds value to how you write code. One of the biggest changes you will see is the Interfaces. It changes how to access constructs. This means you can define your constructs including complex objects or components.
Using TypeScript in React provides a clear advantage that the compiler can validate the component necessary properties. It benefits by checking for the correct type. By doing so, the validation done by the prop-types library is not required anymore.
To understand it, let’s see an example below.
export interface CounterProps { value: number; label: string;}
export class CounterDis extends React.PureComponent<CounterProps> { render():
React.ReactNode { return ( <div> {this.props.label} value is
{this.props.value} </div> );}
SFC stands for Stateless Components. It is a function that lets you pass children components, properties object, and the optional context object. The function returns either a null or ReactElement.
As a developer, you may think that the SFC is used to create a component that doesn’t have any connection with the components, right? Well, that’s not the case here.
Let’s look at the code below on how it looks.
interface StatelessComponent<P = {}> { (props: P & { children?: ReactNode },
context?: any): ReactElement | null;}

type SFC<P = {}> = StatelessComponent<P>;
As you can see, there are plenty of things that you need to take care of if you want to use TypeScript with React. There are many ways you can optimally use both technologies in your project. The initial part is to get your project as optimized as possible from the start. This means ensuring that your configurations are done right. We covered that aspect briefly here. However, if you want to get hold of the configuration aspects, we suggest doing more research and optimize your project based on your requirement.
So, what best practices are you going to use in your project? Comment below and let us know.