Our ByteScout SDK products are sunsetting as we focus on expanding new solutions.
Learn More
Important Update
ByteScout SDK Sunsetting Notice
Our ByteScout SDK products are sunsetting as we focus on our new & improved solutions.Thank you for being part of our journey, and we look forward to supporting you in this next chapter!
GIT Extensions is a distributed version control system enabling a user to robustly manage a collection of source files and the changes made in them. The changes made are shown in the History of changes. Users can make changes by accessing a Central repository called remote repository and committing the changes to it. It implements classic GIT by using GUI (Graphical user interface), basically driven by a set of dedicated commands, hence maintaining the version control system intuitively. So, let us go through a glimpse of functionalities provided by GIT Extensions so that our version control system can be maintained.
Managing Repository
There are many options to manage the repository through GIT Extensions. It includes viewing the committed logs and changes made in comparison to the previous commit, cloning a repository, traversing through the file directory and filtering the committed logs by using custom search input, etc.
SSH Keys should be loaded as a one-time activity. SSH keys can be generated while setting up the GIT Extensions.
In order to use a safe development environment with SSH, you need to get PuTTY installed as a preferred SSH client. PuTTY can be downloaded from http://www.putty.org/
The first thing is to check that Git Extensions is properly configured to use PuTTY, as well as all paths, are given correctly.
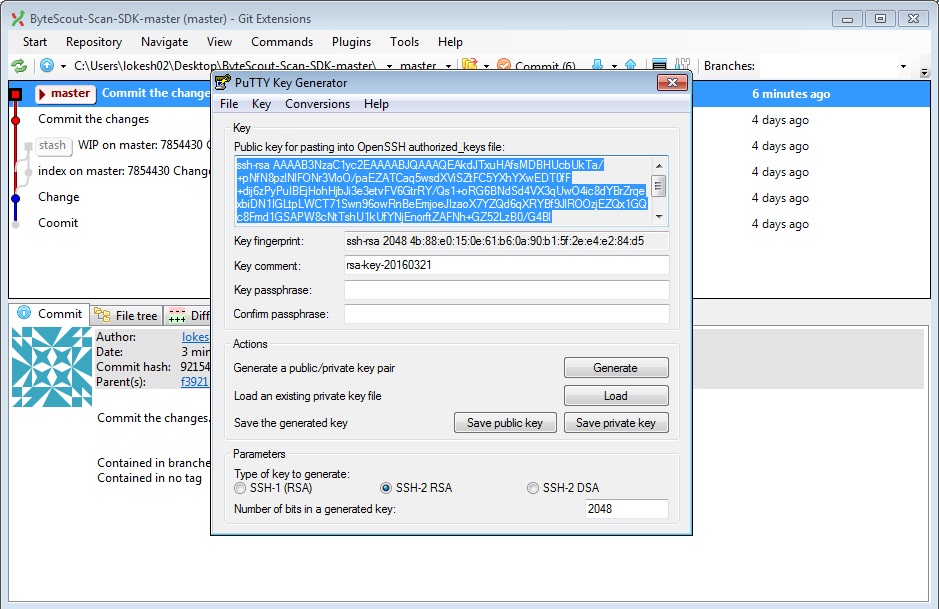
In the Remotes Tab just choose Generate or import key to start the key generator.
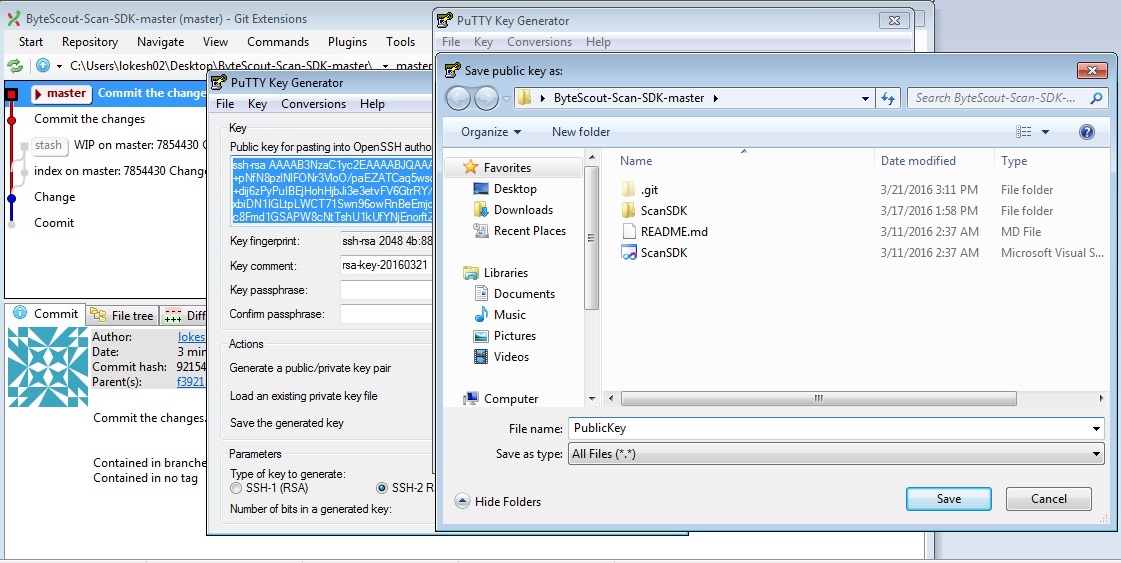
It will ask you to move around the mouse in order to generate more random keys. When the key gets generated, save the public and private key in a text file by clicking the Save Public key button.
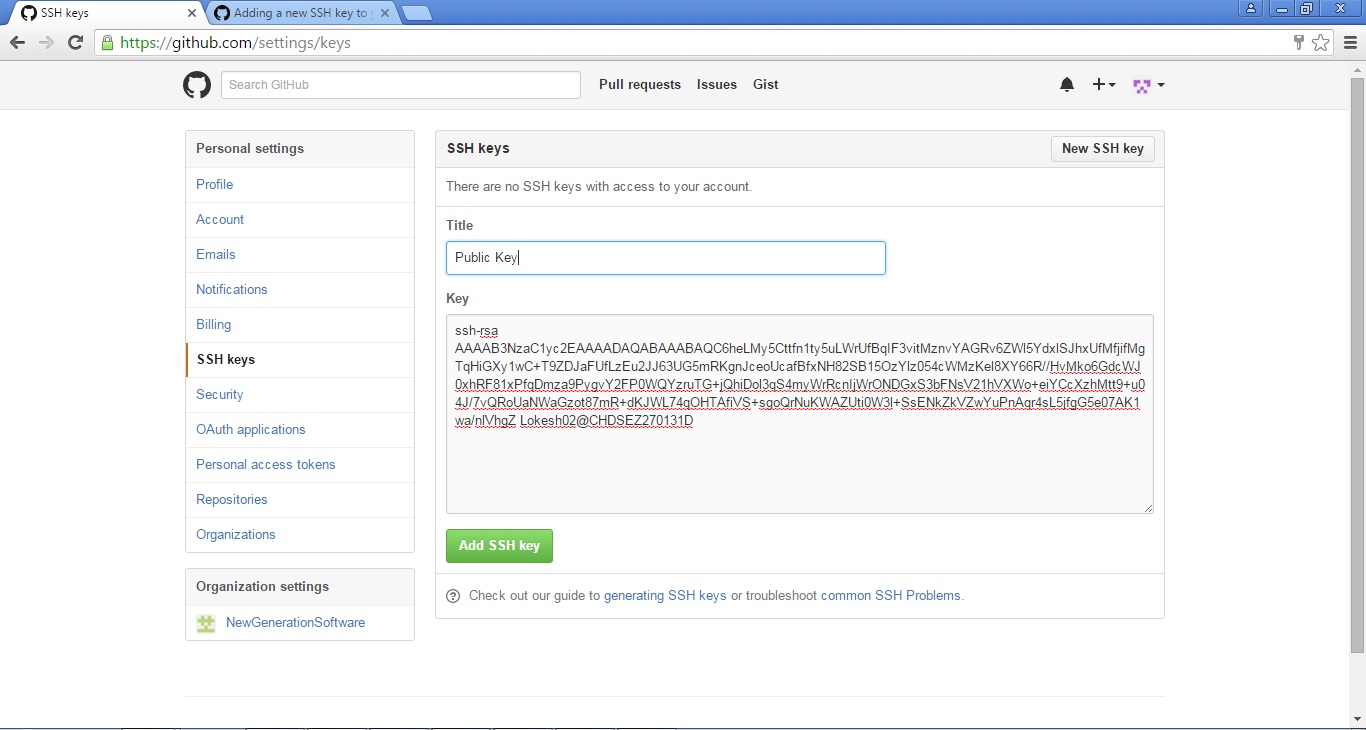
Since now you are having a key pair, provide the public key to the Github account by copying the Key from the file which you just saved above at your desired location.
Then open your Github account and click on the profile image, followed by Account settings and going to the SSH Keys tab. Finally, paste the public key over there.
Now GitHub will get to know which public key it has to use to decrypt. Now you also need to provide the private key to GitExtensions to encrypt. You will find a Load SSH key button in the clone dialog where you can load the private key in PuTTY authentication.
Note: This is a one-time activity and you don’t need to repeat these steps again.
How to Clone a Repository?
Cloning a repository will create a local copy of the repository being cloned by this action.
It’s possible that the repository you want to clone is located on a network share or is accessible via an internet or intranet connection. You may need to load an SSH key into PuTTY depending on the protocol (http or ssh). You must also indicate the location of the cloned repository and the branch that will be checked out first. If the cloned repository has submodules, they can be initialized with their default values if necessary.
When making a clone, you can create two different sorts of repositories. A personal repository stores all of the histories as well as a functioning copy of the source tree. A central (bare) repository serves as a public repository to which developers push updates that they want to share with others. A central repository holds the entire history but does not have a working directory, unlike personal repositories.
Click the ’Clone repository’ link from the Common Actions section on the left to clone a repository.
Provide the necessary inputs as Repository to clone (highlighted URL at the top tells which repository needs to be cloned), Destination (local hard drive location), Branch (automatically loaded when the local repository address is provided), and Repository type, and then click ‘Clone’.
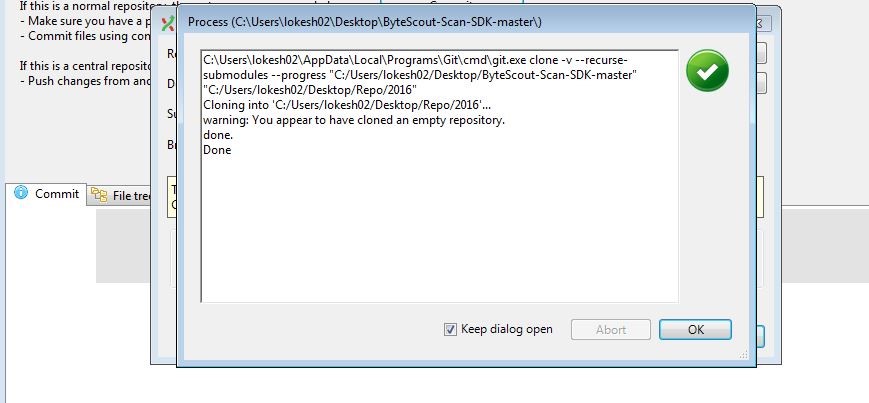
The process of cloning starts and the remote files are checked-out to the specified destination i.e. local directory. A green tick mark indicating completion of the process will be displayed.
Note: A Red Cross mark with respective errors will be displayed too during the occurrence of errors in the process if any.
Errors in Cloning – Troubleshooting
You’ll likely get some issues when cloning a repository. If you’re having trouble cloning a repository, make sure:
You can use HTTPS to connect.
You have access to the repository you’d like to clone.
The default branch that you’d like to clone is still available.
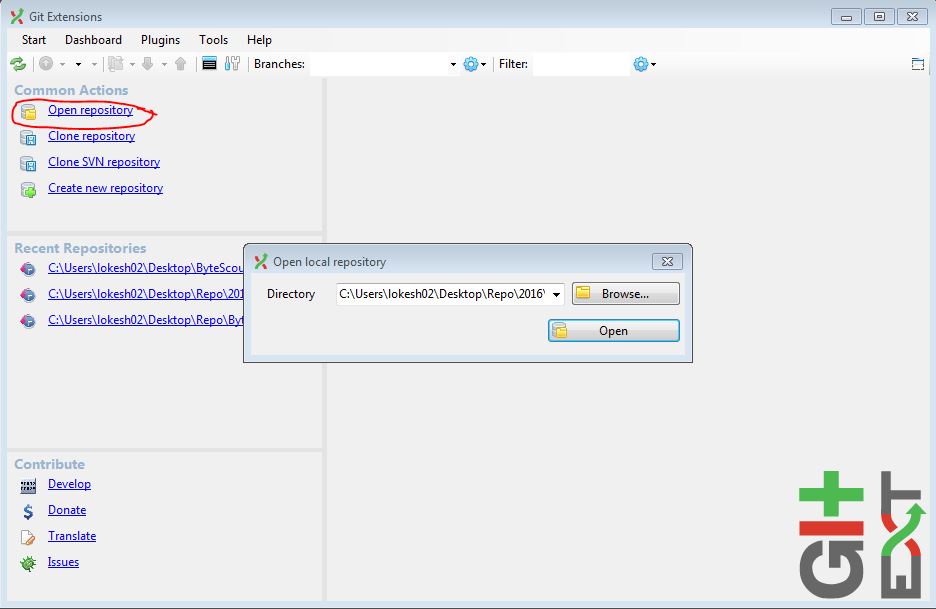
How to Open a Repository?
From the Common Actions section at the left click the ‘Open Repository’ link and give the directory address for opening a repository. Then click the ‘Open’ button as highlighted in the figure.
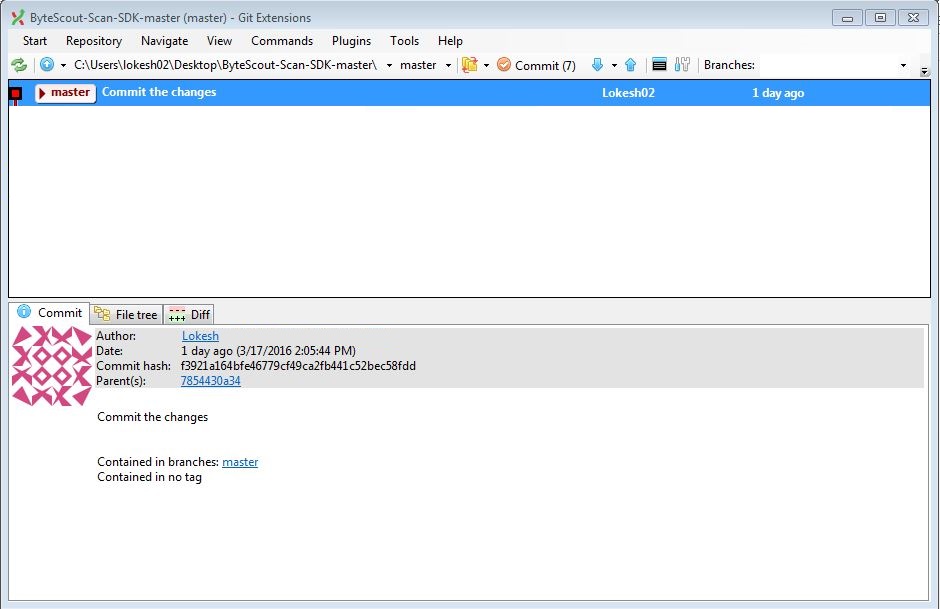
It opens the repository and all committed logs will be shown with an abstract message associated with them, committed user, and the time elapsed when the commit was done (Refer figure). Also, the details like Author, date are shown at the bottom in the commit section.
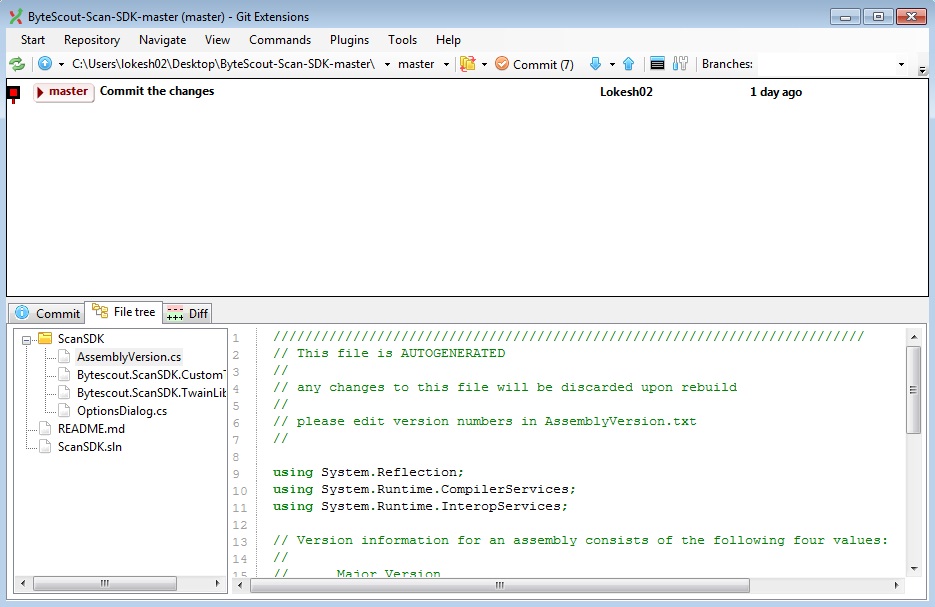
How to Traverse into the Repository?
Initially click the ‘File Tree’ tab. It will show the whole repository in the form of a file tree and intended files and directories can be viewed easily. This is the step-wise procedure to traverse a repository by a user.
Using libgit2
Let’s have a peek at the source code.
#include <git2.h>
This header file must be included in any program that uses libgit2.
The first step is to use git libgit2 init to get libgit2 and its resources up
The next step is to develop a revision walker, which is an object that iterates over a git repository. The git revwalk new function handles this.
git_revwalk_sorting(walker, GIT_SORT_NONE);
Once we’ve created a revision walker, we’ll need to provide a few parameters to manage the traverse. One example is the sorting mode when iterating over the repository. This is accomplished by invoking git_revwalk_sorting with one of the following values as the second parameter:
GIT SORT NONE – the default reverse chronological order (beginning with the most recent) of commits as in git
GIT SORT NONE – the default reverse chronological order (beginning with the most recent) of commits as in git
GIT SORT TIME – order of commit timestamps
GIT SORT REVERSE – performs commits in reverse order.
An OR can also be used to combine topological and temporal ordering.
It’s worth noting that you don’t need to use this function to set GIT_SORT_NONE because that’s the default setting.
git_revwalk_push_head(walker);
We are now ready to begin the traversal after the setup stage. This is accomplished by the method git revwalk next, which obtains the ID of the next commit to visit.
Calling git_revwalk_push_head changes the root to the HEAD of the repository.
We are now ready to begin the traversal after the setup stage. This is accomplished by the method git_revwalk_next, which obtains the ID of the next commit to visit.
Finally, we shut down libgit2 with git_libgit2_shutdown.
How to Track the Changes using Git Extensions?
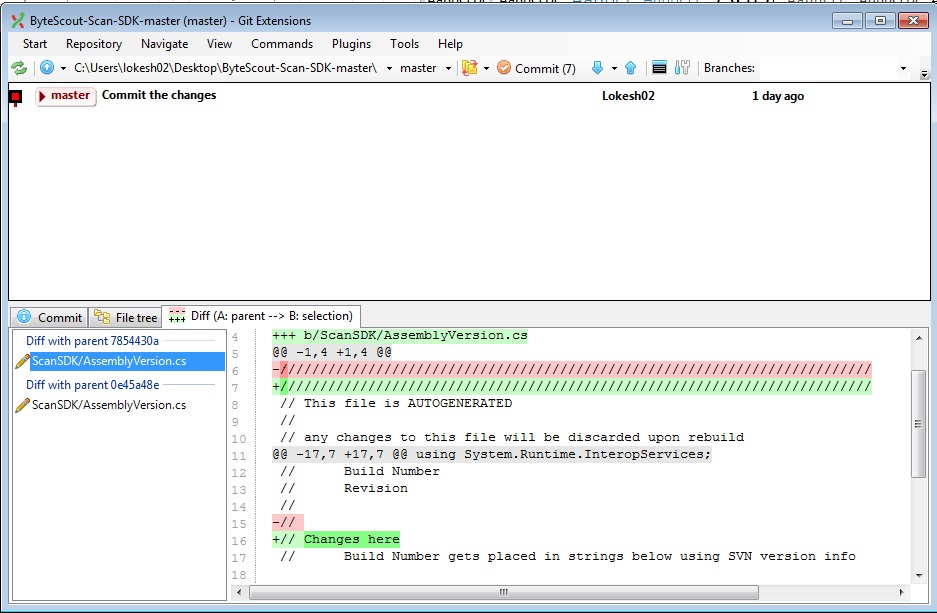
By clicking the ‘Diff’ tab comparison can be made with respect to the previous commit as shown in the figure.
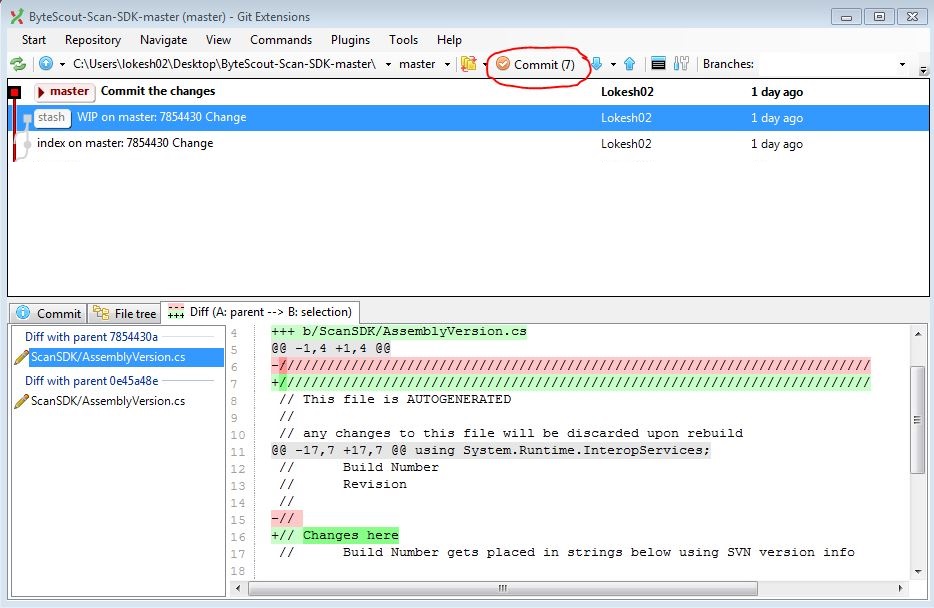
Press Ctrl+click commits to see all changes between them in the Git Extensions GUI. Because the first pick is handled as the base, choose an older commit first to show the change direction in diff view (additions/deletions) appropriately.
AFAIK, Git Extensions does not offer a GUI option to send a directory diff to an external tool (just file by file); therefore, you must do it from Git shell to obtain all changes at once to Beyond Compare (assuming you have configured it as a diff tool for Git).
git difftool -d <commit1> <commit2>
If you want to compare your current checked-out version to <commit1>, omit <commit2>. For instance, if you are on your local master and use fetch rather than pull
git difftool -d origin/master
will display the modifications that will be made when your local branch is merged with the origin branch.
Note: Newly added lines are marked as ’+’sign and shown with green color and the deleted ones as ’-’ sign and presented with red color.
How to Perform Commit & Push?
This action of committing and then pushing the given code to a remote repository is divided into two operations:
Committing to Local Repository
Committing to Remote Repository
Committing to Local Repository with Git Extensions
This process of committing involves various steps:
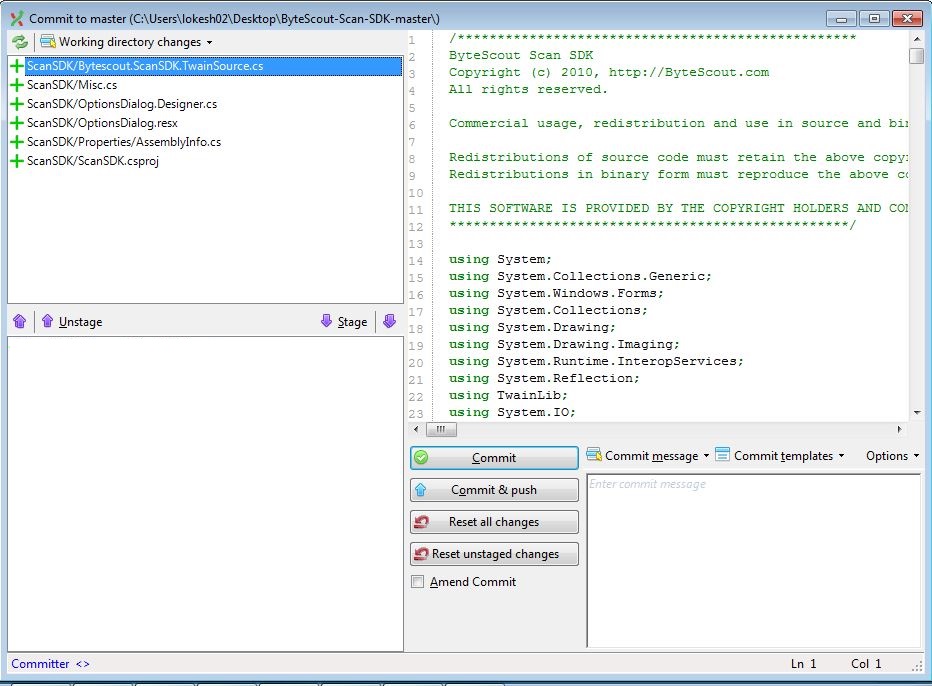
To start the process click the ’Commit’ icon.
The respective fields are displayed in the newly opened commit window (Refer figure):
Working directory files.
Staged files.
Details of the modifications compared to the respective repo code.
Input box for the commit message to be entered by the user.
The top left section will show the working directory files which were modified since the last commit:
Icon
Meaning
This represents all existing files that were edited after the last commit
This represents files that are removed after the last commit
This represents new files that are added after the last commit
Click any file from the working directory file list. The files with their modified changes (highlighted in Red and Green) are displayed on the right section. This way we can identify file-wise discrete changes.
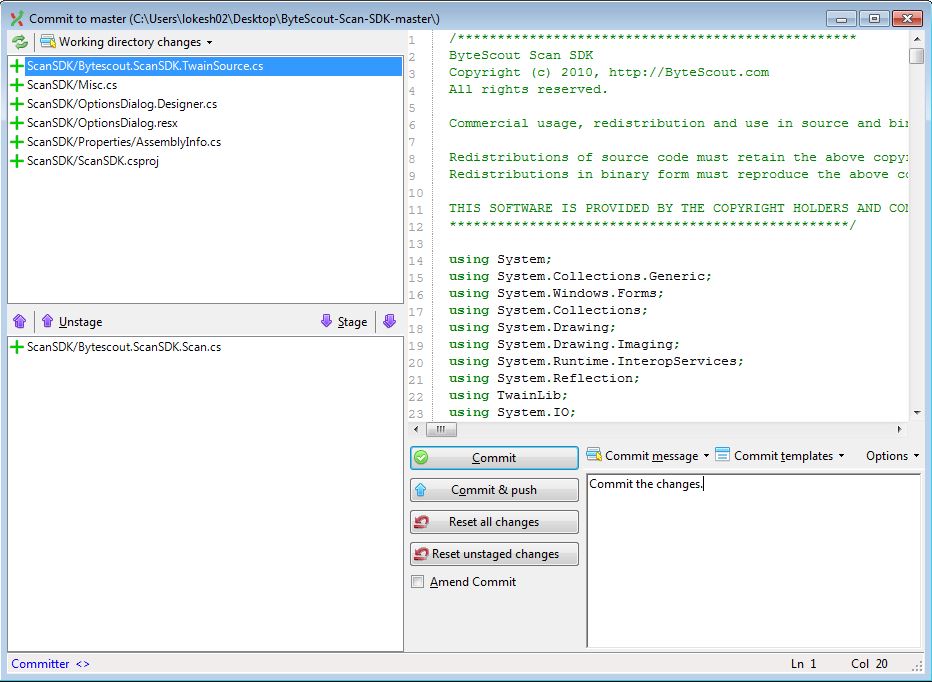
When the changes are verified, files can be staged by using the ‘Stage’ option (Refer Figure). These Staged files are ready to commit and provide an easy way for filtering certain files not committed during the previous stage for the users.
Note: Users can also Unstage a staged file by using the ‘Unstage’ option opposite to Stage icon.
When the verification and staging of all required files are done, you have to provide a suitable message to show the current commit action. The Commit History screen will show this message. The purpose of committing an action can be easily interpreted in an appropriate message is given.
Commit the files using the ‘Commit’ button. The status of the commit operation is displayed in a dialog window. It will also show all the run-time errors of the process, displaying them with the appropriate stage of the whole process.
Note: Clicking ‘Commit’ lets the files be committed into the local repository and not into the remote repository.
Committing to Remote Repository
‘Push’ action is used to move the files of the local repository into a remote repository. It needs to be ensured by the user that the code which was taken lastly from the remote repository is not modified before you perform push action. There is every possibility that a repository could have been modified when it has been pulled or cloned by another person. This generally happens in a multi-user environment where a lot of branching and merging happens. Hence, it is necessary for a user to perform a Pull before opting for a Pushing action for the committed code.
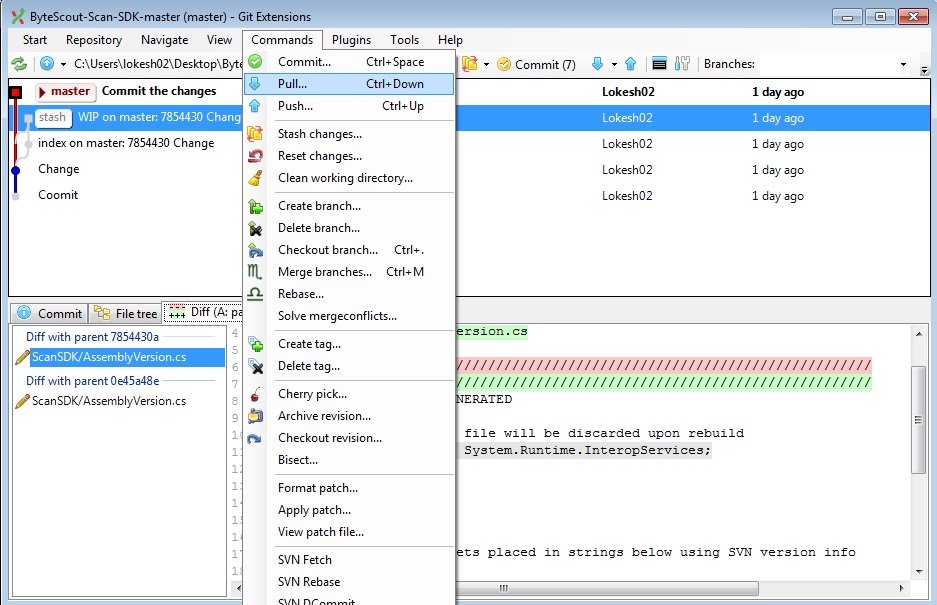
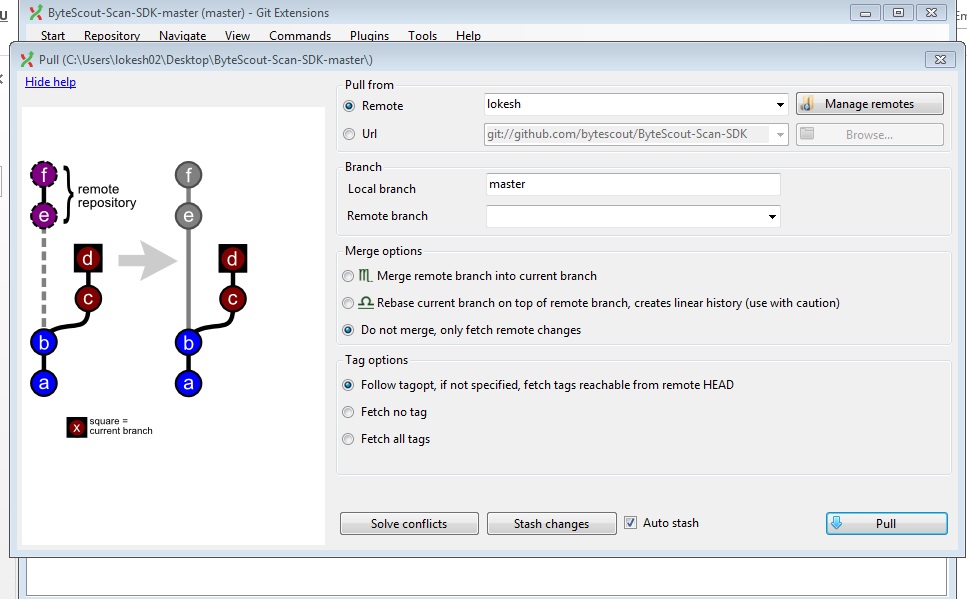
Pulling the Code
Open the pull Window by clicking on the ‘Pull’ icon as shown in the figure. Provide the remote repo URL and select the remote branch from there.
It is necessary to select the Do Not Merge Option (Do not merge, only fetch remote changes) and ‘Auto Stash’ option.
Lastly, click the ‘Pull’ button.
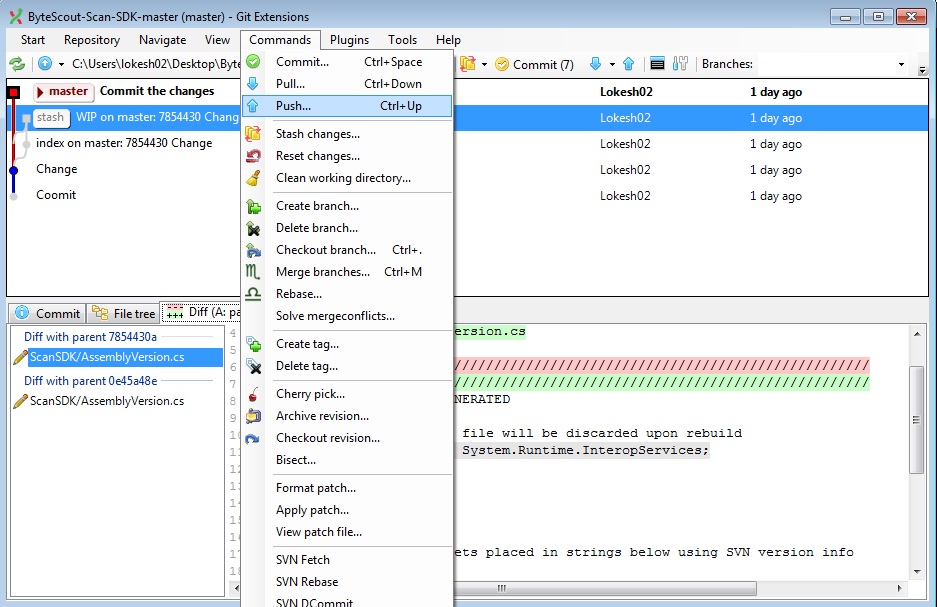
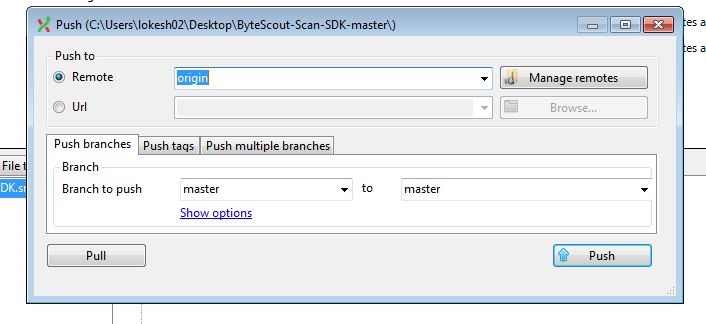
Pushing the Code
As of now, the local repository and the remote repository are in sync, so the user now has to click the ‘Push’ button as shown in the figure so that all the locally committed changes can be pushed to the remote repository.
We hope that this tutorial helps you in getting familiarized with the use of Git using the tool Git Extensions.
About the Author
ByteScout Team of WritersByteScout has a team of professional writers proficient in different technical topics. We select the best writers to cover interesting and trending topics for our readers. We love developers and we hope our articles help you learn about programming and programmers.
Today we are going to talk about something that doesn't get talked about enough in JS, and that's IIFE (Immediately invoked function expressions) and the...
MySQL, PostgreSQL, and Oracle are relational database management systems. The major difference between these three databases is that MySQL is open source whereas PostgreSQL is...