Our ByteScout SDK products are sunsetting as we focus on expanding new solutions.
Learn More
Important Update
ByteScout SDK Sunsetting Notice
Our ByteScout SDK products are sunsetting as we focus on our new & improved solutions.Thank you for being part of our journey, and we look forward to supporting you in this next chapter!
Getting Started With MERN stack: Creating ToDo App Backend in MERN
Getting Started With MERN stack: Creating ToDo App Backend in MERN
Are you looking to build your first application using the MERN stack? If yes, then you have come to the right place.
As a web developer, you always need to learn new technologies. MERN has recently started to catch attention from the startup community. If you are an agile developer, then MERN is for you!
Let’s get started.
What is MERN?
MERN stands for MongoDB, Express, React, and Node.js. It is a technology “stack” that consists of tools and frameworks so that you can do end-to-end development. A stack works closely with each other so that you can take benefit from their synergy.
Other key widely used web development stacks include LAMP(Linux, Apache, MySQL, PHP) and MEAN(MongoDB, ExpressJS, AngularJS, NodeJS).
Here is a quick look at how all the MERN technologies play together to help with your end-to-end development:
MongoDB
MongoDB is a document-oriented database that stores data in flexible documents using a NoSQL JSON-based query language.
The content, size, and number of fields can vary between two documents. This allows you to store data structures that can be easily changed over time, making the database very flexible.
Features:
Highly Scalable in terms of data volume and throughput.
It can be used to store data over multiple servers.
Data is stored in flexible JSON-like documents.
Use JavaScript to work with database entries.
Supports master-slave replication and uses native applications to maintain multiple copies of data.
Express
Express is a flexible and minimal back-end web application framework for Node.js. It can help you design web apps and apps and is often regarded as the de facto standard server framework for Node.js.
The technology also helps to simplify the process of writing server code. There is no need to repeat the same code as was the case with the Node.js HTTP module.
Features:
Known for its fast and minimal architecture.
Can be used to create scalable web apps and APIs.
Comes with built-in routers that help with code reusability.
Supports tons of plugins to add extra advanced features.
The technology is single-threaded and asynchronous.
React
React is a front-end JavaScript library for building user interfaces (UI) and other UI components. The technology can be used for the development of single web pages or even full-fledged mobile applications.
Using React, developers can create large web applications that can change the data without reloading the page. The technology was developed by a Facebook developer to keep track of Facebook views in HTML.
Features:
For every DOM object, React creates a lightweight copy called a virtual DOM which includes all the properties of the real DOM.
Supports one-way data binding for better control over data flow.
It is component-based, where component logic is written in JavaScript instead of templates.
React Native can be used to code Android and iOS apps.
React is fast, scalable, and easy to use.
Node.js
Finally, we have Node.js – a cross-platform back-end server runtime environment based on JavaScript. It is built on top of Google Chrome’s JavaScript engine, a.k.a V8.
Developers can use the technology to create scalable network applications and even execute JS code outside of their browsers.
Features:
Built using V8 – Google Chrome’s JavaScript engine.
All the data output is in chunks, and you will never experience any data buffers.
App Node.js libraries are asynchronous – meaning Node.js servers don’t wait on APIs to return data.
Uses a single thread model with even looping. This helps the server respond in a non-blocking way making it highly scalable.
Can be used to create really powerful server-side applications.
Getting Started With MERN stack: Building your first application
In this tutorial, we are going to create a simple todo application backend using the MERN stack.
Before we get started, we need to list the pre-requisite for the project.
Prerequisites
To get started, you need two things: nodeJS and npm. Installing them can take quite some command and hence we encourage you to their respective site to install them.
We will also be using Ubuntu for the tutorial. If you have Windows, you can also follow the tutorial. All you need to do is do basic things based on your operating system.
Lastly, we need a code editor that can highlight JavaScript.
Code Setup
With our pre-requisite installed, it now does our application code setup.
Let’s create a folder named, TodoApp using the command below.
mkdir TodoApp
Now, to get into the created directory, use the cd command.
cd TodoApp
Once you are inside the folder, you need to initialize the folder using the npm command.
npm init
This will walk you through the instructions to set up the application. If you want default settings to work for your application, then you need to use npm init – y instead of just npm init.
If you did everything correctly, it would create a file named, package.json
Server Setup
For our TodoApp application, we need to run a server. You can create a server in two ways: first is to use the HTTP module that is inbuilt within the node. Another way is to use the expressJS framework. As we are using the MERN stack, we are going to use the expressJS framework for creating our server.
Let’s setup express below.
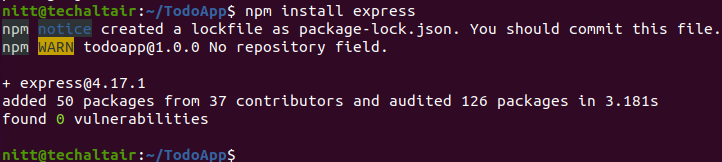
npm install express
Now, your project folder should have two files and one folder.
node_modules folder
JSON
package-lock.json
Next, we need to create an index.js file for our project. In the index.js file, you need to put in the following code.
We also need to add the following code so that it fixes the Cross-Origin Resource Sharing(CORS). It generally happens when you try to access the app’s API across different domains.
Now, it is time for us to save the index.js file and run the server. To run the server, use the following code.
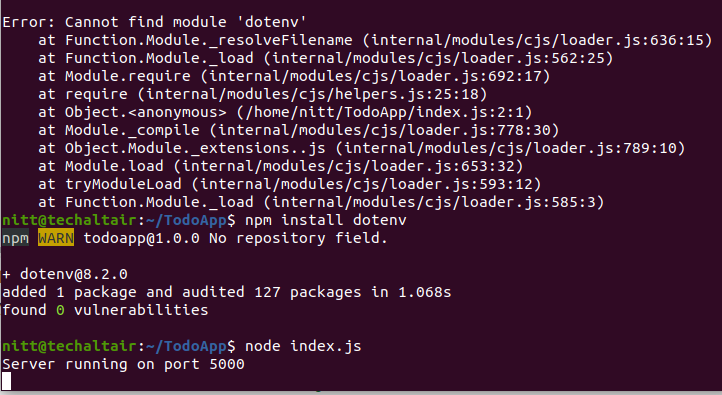
node index.js
There is a chance that you can get an error, cannot find module ‘dotenv’, then you need to install the npm module using the command below.
npm install dotenv
Getting an error and solving it
Now, rerun the node index.js command and you should be able to receive the following message.
Server running on port 5000
Routes
Our next step is to create routes for our app. These routes are required to perform actions for our app. In the case of a ToDo app, we need to create routes for three actions.
View the Todo tasks
Create a Todo task
Delete a Todo task
Routes are a way to create endpoints for the app.
First, we will create a routes directory.
mkdir routes
Next, create an api.js files within the routes folder.
cd routes
gedit api.js
Once the file is created, now copy-paste the code as shown below.
Awesome! We now have our servers and routes ready; it is time for us to create Models for our TodoApp, powered by MERN stack.
Models are used if you use MongoDB. Along with the models, we also need to create a schema. This is needed as MongoDB is a NoSQL database.
But, why do we need schema?
Schema is a blueprint that will enable you to construct the database. It lets you define fields in each document. Moreover, you can also set default values and also provide a validation requirement for them.
Apart from that, you can also define the instance and static helper methods. It lets you work easily with different datatypes.
We are going to use the mongoose – node package that lets you work with MongoDB easier.
npm install mongoose
Once installed, we now need to create the models directory and then create a todo.js file within it.
mkdir models
cd models
gedit todo.js
Now, copy and paste the following code in the todo.js file.
//create schema for todoApp
const TodoAppSchema = new Schema({
  action: {
    type: String,
    required: [true, 'This field is required']
  }
})

//create model for todoApp
const TodoApp = mongoose.model('todo', TodoSchema);

module.exports = TodoApp;
Going back to Routes
If you remember, our routes file, api.js is not yet completed. As we have completed our models, it is now time to write our api.js file according to it.
Here at the top, we will link the model file we created.
const TodoApp = require(‘../models/todo’);
The get function of the router will be defined as below.
router.get('/todos', (req, res, next) => {
  //exposing the data and action fields
  Todo.find({}, 'action')
    .then(data => res.json(data))
    .catch(next)
});
Our post function will be as below.
router.post('/todos', (req, res, next) => {
  if(req.body.action){
    Todo.create(req.body)
      .then(data => res.json(data))
      .catch(next)
  }else {
    res.json({
      error: "Input field is empty, please enter something"
    })
  }
});
We have made a lot of progress until now. We have completed writing our routers, models and also making the server work. Now, it is time for the database to work.
Database creation and configuration is always a long process. That’s why we recommend you to use mlab to do it. You can read here on how to do it.
Once you have set it up correctly, it is now time to add the database code to the index.js file. Simply add the code below to the index.js file and we are good to go!
Lastly, we need to now create a .env file at the application core folder so that we can access environmental variables with process.env.
Once you create the file, you need to provide the mlab database credentials including username and password.
DB = ‘mongodb://<USER\>:<PASSWORD\>@ds039950.mlab.com:39950/todo’
Testing API and Conclusion
We have successfully created the backend part of our TodoApp. Now, you need to test APIs using Insomnia and Postman or another testing client from here.
From here, you need to learn how to use react and create the frontend. We leave it up to you so that you can use your creativity in designing the app.
Did you find the tutorial useful? If you do, then comment below let us know.
About the Author
ByteScout Team of WritersByteScout has a team of professional writers proficient in different technical topics. We select the best writers to cover interesting and trending topics for our readers. We love developers and we hope our articles help you learn about programming and programmers.
1. Outline the basic features of Django. Django is SEO optimized. It is very fast. It is a fully equipped framework. Django comes with authentications,...