Our ByteScout SDK products are sunsetting as we focus on expanding new solutions.
Learn More
Important Update
ByteScout SDK Sunsetting Notice
Our ByteScout SDK products are sunsetting as we focus on our new & improved solutions.Thank you for being part of our journey, and we look forward to supporting you in this next chapter!
Create/Manipulate Excel file with different options using ByteScout Spreadsheet SDK in C#
Create/Manipulate Excel file with different options using ByteScout Spreadsheet SDK in C#
One of the oldest of the Microsoft Office applications – Excel is already packed with a rich set of features. As a developer many times we have to work with excel files like creating/modifying etc. Programming with Excel can be a crucial solution with data-rich projects/applications.
ByteScout Spreadsheet SDK provides many features that let the developer create rich Microsoft Excel solutions with the use of its easy and extensive SDKs.
In this article, we are going to explore the various features of ByteScout Spreadsheet SDK which helps you to unlock its full potential by covering some test cases code written in C#.
In the following articles, we are going to walk through some programs demonstrating basic Excel programming with ByteScout Spreadsheet SDK and learn how to:
* Create an Excel file in the simplest way with C#:
Let’s write this step-by-step.
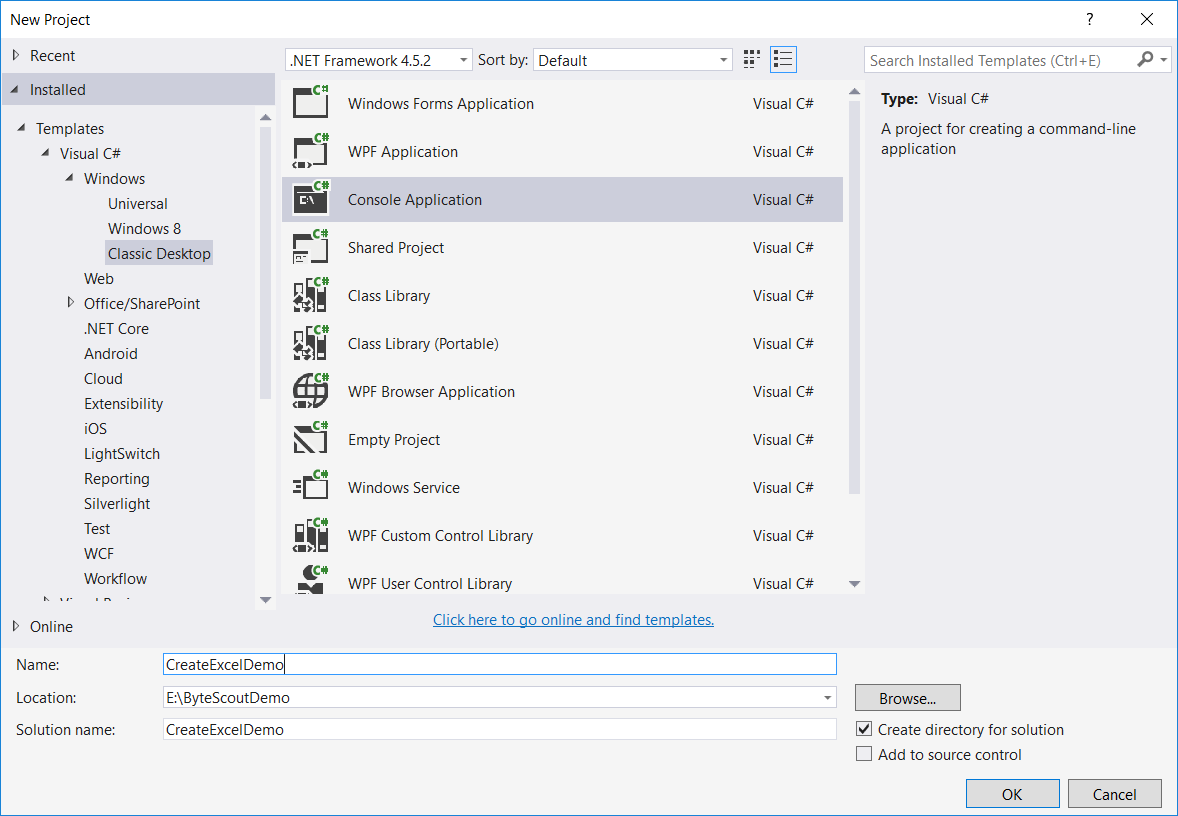
Step-1: Create a new C# console application project.
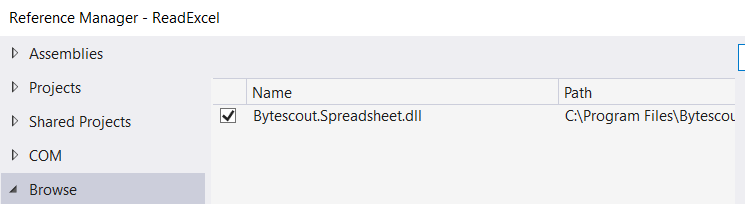
Step-2: Then add Spreadsheet.dll file as a reference to your project.
Step-3: Include the following namespaces in the Program.cs file.
using System.Diagnostics;
using System. Drawing;
using Bytescout.Spreadsheet;
using System.IO;
Step-4: Add the following code snippet to add data to an Excel file.
			class Program
			{
				static void Main(string[] args)
				{
					// Create new Spreadsheet
					Spreadsheet document = new Spreadsheet();

					//add new worksheet
					Worksheet worksheet = document.Workbook.Worksheets.Add();  // <-- Add worksheet with default name - "Untitled-1"
					// Using below code you can give custom name to your worksheet
					//Worksheet worksheet = document.Workbook.Worksheets.Add("ByteScoutSheet");

					// Write the sample text
					worksheet.Cell("A1").Value = "Demo Excel created using ByteScout Spreadsheet SDK";
					worksheet.Cell("A1").Font = new Font("Verdana", 18, FontStyle.Bold);
					worksheet.Cell("A1").FontColor = Color.BlueViolet;

					if (File.Exists("MyNewExcelFile.xls"))
						File.Delete("MyNewExcelFile.xls");

					// Save document
					document.SaveAs("MyNewExcelFile.xls");

					// Close Spreadsheet
					document.Close();

					// open generated XLS document in default program
					Process.Start("MyNewExcelFile.xls");
				}
			}
And here’s the output.
Let’s understand the above code step by step.
First, we create an instance of Spreadsheet
// Create new Spreadsheet
Spreadsheet document = new Spreadsheet();
And then we add the new worksheet in a newly created object of Spreadsheet using the following code.
And then we check if the same file name already exists in the application’s bin\Debug folder. If exists then first delete it.
// delete MyNewExcelFile file if exists already
if (File.Exists("MyNewExcelFile.xls")){
File.Delete("MyNewExcelFile.xls");
}
And then we generate a file.
// Save document document.SaveAs("MyNewExcelFile.xls");
* Create an Excel file with multiple worksheets in C#:
In this program, we will create multiple sheets with two different approaches.
Step-1: Create a new C# console application project
It is shown in the first demo program.
Step-2: Then add Spreadsheet.dll file as a reference to your project.
Step-3: Include the following namespaces in the Program.cs file.
using System.Diagnostics; using System.Drawing; using System.IO; using Bytescout.Spreadsheet;
Step-4: We will start with a basic approach to create multiple sheets in an Excel file.
	class Program
	{
		static void Main(string[] args)
		{
			// Create new Spreadsheet
			Spreadsheet document = new Spreadsheet();

			//add multiple worksheet
			Worksheet worksheet1 = document.Workbook.Worksheets.Add("MyNewWorksheet 1");
			Worksheet worksheet2 = document.Workbook.Worksheets.Add("MyNewWorksheet 2");

			// Write the sample text in worksheet1
			worksheet1.Cell("A1").Value = "Hello World in - MyNewWorksheet 1";
			// Set the font
			worksheet1.Cell("A1").Font = new Font("Verdana", 14, FontStyle.Bold);
			// Set the color
			worksheet1.Cell("A1").FontColor = Color.BlueViolet;

			// Write the sample text in worksheet2
			worksheet2.Cell("A1").Value = "Hello World in - MyNewWorksheet 2";
			worksheet2.Cell("A1").Font = new Font("Verdana", 14, FontStyle.Bold);
			worksheet2.Cell("A1").FontColor = Color.Coral;

			if (File.Exists("MultipleWorksheetDemo.xls"))
				File.Delete("MultipleWorksheetDemo.xls");

			// Save document
			document.SaveAs("MultipleWorksheetDemo.xls");

			// Close Spreadsheet
			document.Close();

			// open generated XLS document in default program
			Process.Start("MultipleWorksheetDemo.xls");
		}
	}
As we can see in the above code snippet which itself is self-explanatory where we add multiple worksheets using the following code and then write the text in each worksheet.
Step-5: Let’s achieve the same functionality with a different approach.
In this approach, we are using one of the cool features of C# which is – Extension method For that we need to create one static class which contain our extension method like this:
	public static class ExtensionUtil
	{
		public static void CreateWorkSheets(this Spreadsheet document, params string[] workSheetNames)
		{
			foreach (var workSheetName in workSheetNames)
			{
				document.Workbook.Worksheets.Add(workSheetName);
			}
		}
	}
And here is the full code of how to use it in our main method.
	class Program
	{
		static void Main(string[] args)
		{
			// Create new Spreadsheet
			Spreadsheet document = new Spreadsheet();

			//add multiple worksheet
			document.CreateWorkSheets("MyNewWorksheet 3", "MyNewWorksheet 4", "MyNewWorksheet 5");

			// Get worksheet object by its name
			Worksheet worksheetObj = document.Workbook.Worksheets.ByName("MyNewWorksheet 3");

// -----  OR you can use below code to get the worksheet object by its name in indexer
			//Worksheet worksheetObj = document.Workbook.Worksheets["MyNewWorksheet 3"];
			// ------ OR you can use below code to get the worksheet object by its index position in indexer
			//Worksheet worksheetObj = document.Workbook.Worksheets[2];

			// Write the sample text in worksheetObj
			worksheetObj.Cell("A1").Value = "Hello World in - MyNewWorksheet 3";

// Set the font
			worksheetObj.Cell("A1").Font = new Font("Verdana", 14, FontStyle.Bold);
			worksheetObj.Cell("A1").FontColor = Color.DarkCyan;

			if (File.Exists("MultipleWorksheetDemo.xls"))
				File.Delete("MultipleWorksheetDemo.xls");

			// Save document
			document.SaveAs("MultipleWorksheetDemo.xls");

			// Close Spreadsheet
			document.Close();

			// open generated XLS document in default program
			Process.Start("MultipleWorksheetDemo.xls");
		}
	}


	public static class ExtensionUtil
	{
		public static void CreateWorkSheets(this Spreadsheet document, params string[] workSheetNames)
		{
			foreach (var workSheetName in workSheetNames)
			{
			document.Workbook.Worksheets.Add(workSheetName);
			}
		}
	}
So as we can see that we have first created an object of Spreadsheet and then call our extension-method using that object to add multiple worksheets.
Now sheets are created. To write in the sheets, we need to get their object. In ByteScout Spreadsheet SDK there are three approaches to get the worksheet object.
* Approach 1 – Using “ByName()” method of worksheets object
And then we write some sample text in the worksheet and generate our required file.
Here’s the output.
* Create a password-protected worksheet of Excel file in C#:
This is a very interesting feature of the ByteScout Spreadsheet library. Consider a scenario where you want to share an excel file with other developers or an organization and which contains some important formula and you don’t want that other user can see or edit your formula. Well, ByteScout Spreadsheet SDK has already one method using which we can easily achieve this type of requirement.
Let’s implement it step-by-step.
Step-1: Create a new C# console application project.
Step-2: Then add Spreadsheet.dll file as a reference to your project.
Step-3: Include the following namespaces in the Program.cs file.
using System.Diagnostics; using System.IO; using Bytescout.Spreadsheet;
Step-4: Add the following code snippet.
            class Program
	{
		static void Main(string[] args)
		{
			// Create new Spreadsheet
			Spreadsheet document = new Spreadsheet();

			//add new worksheet
			Worksheet worksheet = document.Workbook.Worksheets.Add("ProtectedWorksheetDemo");

			// Write the sample text in worksheet1
			worksheet.Cell(0, 0).Value = "Can't edit this worksheet as it contain some confidential formula.";
			worksheet.Cell(2, 0).Value = "Right click on sheet name => Unprotect Sheet => Enter password";
			worksheet.Columns[0].Width = 150;

			worksheet.Cell(5, 0).Value = "Total Revenue";
			worksheet.Cell(5, 1).HiddenFormula = true;
			worksheet.Cell(5, 1).Value = "=(3.14*20000)";

			// Set the worksheet with password
			worksheet.Protect("byteScout@123");

			if (File.Exists("ProtectedWorksheetDemo.xls"))
				File.Delete("ProtectedWorksheetDemo.xls");

			// Save document
			document.SaveAs("ProtectedWorksheetDemo.xls");

			// Close Spreadsheet
			document.Close();

			// open generated XLS document in default program
			Process.Start("ProtectedWorksheetDemo.xls");
		}
	}
Here’s the output.
Let’s understand the above code step by step.
As usual first we create an instance of Spreadsheet object and then we add the new worksheet in newly created object and then we write some sample text and instruction.
// Write the sample text in the worksheet
worksheet.Cell(0, 0).Value = "Can't edit this worksheet as it contains some confidential formula.";
worksheet.Cell(2, 0).Value = "Right click on sheet name at bottom left => Choose "Unprotect Sheet" => Enter password";
worksheet.Columns[0].Width = 150;
And then we write our secret formula which I don’t want to make visible in Excel’s formula bar. For that, this library has one boolean property namedHiddenFormula which should be set to true.
worksheet.Cell(5, 0).Value = "Total Revenue";
worksheet.Cell(5, 1).HiddenFormula = true;
worksheet.Cell(5, 1).Value = "=(3.14*20000)"; //<– This is a secret formula
And then we set the worksheet with a password by using the Protect() method.
// Set the worksheet with password
worksheet.Protect("byteScout@123");
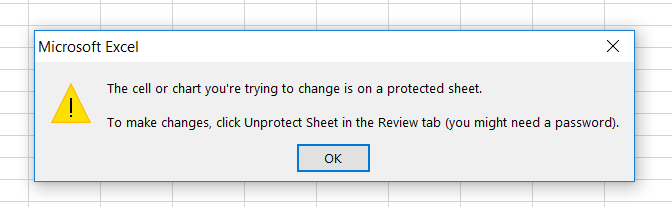
Now when you run this application, it will open the worksheet protected Excel file. If you try to edit any cell then it will open the following dialog.
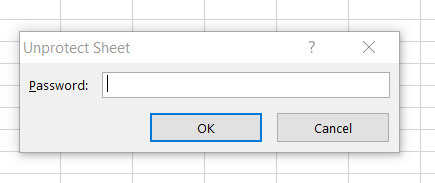
So now to unprotect it what you need to do is – Right-click on sheet name at the bottom left => Choose “Unprotect Sheet” which will ask you to enter the password as shown below.
Once you entered the correct password, you can edit the file and can also see our secret formula in the formula bar of excel.
* Steps to implement various formulas in an Excel file:
In this step, we will create an excel file by adding some formulas which are supported by ByteScout Spreadsheet library.
Step-1: Create a new C# console application project.
Step-2: Then add Spreadsheet.dll file as a reference to your project.
Step-3: Include the following namespaces in the Program.cs file.
using System.Diagnostics; using System.IO; using Bytescout.Spreadsheet;
Step-4: Add the following code snippet.
            class Program
	{
		static void Main(string[] args)
		{
			// Create new Spreadsheet
			Spreadsheet document = new Spreadsheet();

			//add new worksheet
			Worksheet worksheet = document.Workbook.Worksheets.Add("FormulasheetDemo");

			// Get list separator. List separator depends from locale.
			string listSeparator = document.Workbook.Locale.TextInfo.ListSeparator;

			// Write the sample text in worksheet1
			worksheet.Cell(0, 0).Value = "Excel Formula Demo.";
			worksheet.Columns[0].Width = 100;

			int rowNumber = 2;

			// Example on SQRT() function in formula
			worksheet.Cell(rowNumber, 0).Value = "SQRT(9)";
			worksheet.Cell(rowNumber, 1).Value = "=SQRT(9)";

			rowNumber += 2;

			// Example on PI() function in formula
			worksheet.Cell(rowNumber, 0).Value = "PI()";
			worksheet.Cell(rowNumber, 1).Value = "=PI()";

			rowNumber += 2;
			// Example on LEN() function in formula
			worksheet.Cell(rowNumber, 0).Value = "LEN(\"Bytescout\")";
			worksheet.Cell(rowNumber, 1).Value = "=LEN(\"Bytescout\")";

			rowNumber += 2;
			// Example on YEAR() function in formula
			worksheet.Cell(rowNumber, 0).Value = "YEAR(NOW())";
			worksheet.Cell(rowNumber, 1).Value = "=YEAR(NOW())";

			rowNumber += 2;
			// Example on SUM() function in formula
			worksheet.Cell(rowNumber, 0).Value = "SUM(5" + listSeparator + "3)";
			worksheet.Cell(rowNumber, 1).Value = "=SUM(5" + listSeparator + "3)";

			rowNumber += 2;
			// Example on COUNTA() function in formula
			worksheet.Cell(rowNumber, 0).Value = "COUNTA(B1:B11)";
			worksheet.Cell(rowNumber, 1).Value = "=COUNTA(B1:B11)";

			if (File.Exists("ExcelFormulaDemo.xls"))
				File.Delete("ExcelFormulaDemo.xls");

			// Save document
			document.SaveAs("ExcelFormulaDemo.xls");

			// Close Spreadsheet
			document.Close();

			// open generated XLS document in default program
			Process.Start("ExcelFormulaDemo.xls");
		}
}
Bytescout.Spreadsheet support almost every mathematical function like here we have “=SQRT(9)”, “=COS(30)”, “=LOG10(5)” etc. “LEN()” function in a formula will return the length of the passing parameter. We can have data manipulation related functions like – “=YEAR(NOW())”, “MONTH(NOW())”, “=WEEKDAY(NOW()) etc. We can also have aggregate function like – “=COUNT(B1:B10)”, “=MAX(50,30)”, “=MIN(50, 30)” etc. This list goes on and on. The best way to know the code is to debug it and make a small change in the above code to see what happens.
Here’s the output.
In this article, we have explored the four different features to manipulate the excel and the features list is not limited.ByteScout Spreadsheet SDK has many more features and we will explore some more advanced features in the next article. Till then stay tuned and stay updated with us.
Happy Coding 🙂
About the Author
ByteScout Team of WritersByteScout has a team of professional writers proficient in different technical topics. We select the best writers to cover interesting and trending topics for our readers. We love developers and we hope our articles help you learn about programming and programmers.
Digital transformation through technologies such as automation, the internet of things (IoT), and cloud computing, increases the chances of data leaks and security breaches. They...