Our ByteScout SDK products are sunsetting as we focus on expanding new solutions.
Learn More
Important Update
ByteScout SDK Sunsetting Notice
Our ByteScout SDK products are sunsetting as we focus on our new & improved solutions.Thank you for being part of our journey, and we look forward to supporting you in this next chapter!
How to change WP theme on a multilingual WordPress website
How to change WP theme on a multilingual WordPress website
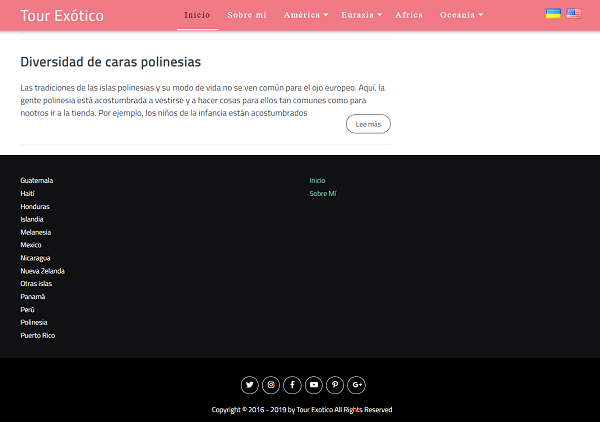
In this article, we will explain the process that needs to be done when changing a WP theme on a multilingual website. The website is tourexotico.com.You can check it to see how it looks like when everything is done. Here are the steps you should follow to change WP theme smoothly:
Firstly you need to make a backup of your WordPress website. (Make Backup is recommended when there is any change on the site, and from time to time.) You can create a full backup (WordPress files and database) via WordPress plugins (UpdraftPlus, Duplicator, etc.), or through the admin panel of your hosting.
2. Create a Child Theme
Then create a child theme (if a child theme is not already included in the distributive of your new theme). If the child theme already exists then you can skip this step.
The child theme is a good thing if you want to make modifications with the theme (even if you do not need any modifications – it is always recommended to create a child theme)
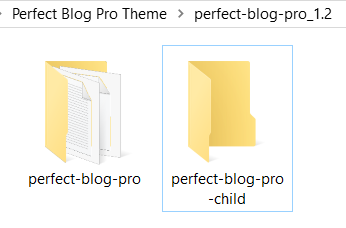
To create Child Theme we need to create a folder on your computer. In our example the main theme called:
perfect-blog
Then for the child theme, we give the following name:
perfect-blog-child
You can use any name for the child theme. But a good tone is considered to add ‘child’ to the title of the main theme.
Now we have two folders:
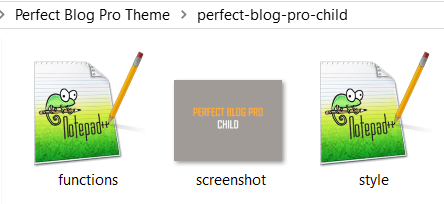
Once you have created a folder for your child theme, you need to create a style.css file insider.
Stylesheets file consist of some information about your child theme, so we paste the following in it (modify for your purpose):
/* Theme Name: Perfect Blog Pro Child Theme URI: https://www.themeisle.com/ Description: This is a custom child theme I have created. Template: perfect-blog-pro Version: 1.0 */
Create another file – functions.php in the child theme folder and paste the following:
You don’t need to make any modifications to this code (but for some theme you will need to change it a little). And the last file by now – screenshot.png. This is an image for a theme that is displayed in the WordPress admin panel when you select a theme. The picture should have size 1200×900 pixels. You can make the desired image in Photoshop or in another editor. So we have three files in our child theme folder now:
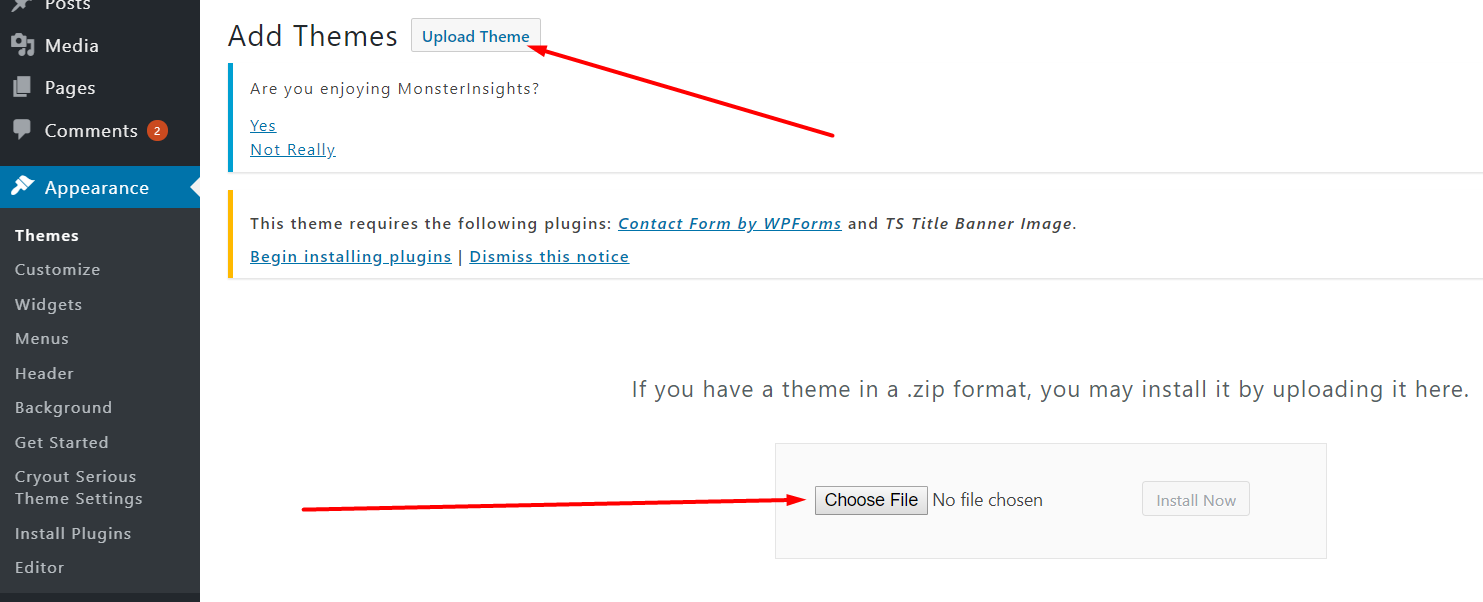
Now we will create two zip archives for the main and child themes and we will go to the WordPress admin panel of the site to install our themes. Appearance -> Themes -> Click “Add New” button -> Click “Upload Theme” button -> “Choose File” button
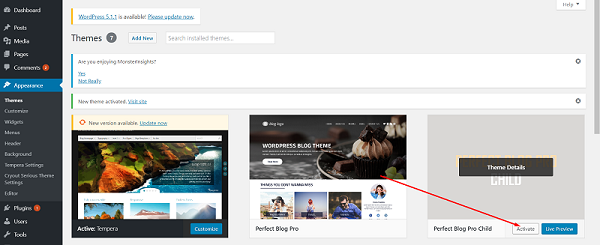
When you download both themes this way, activate the child theme, by clicking the “Activate” button.
You have installed the theme, Good job! Now let’s create the main page.
3. Create the Main Page
By default, the main page displays the latest posts. In our theme, there is a template for the main page (with a slider and widgets). Based on it, we can create a page. In some topics, there is no template for the main page. But you can create any page yourself and then set it as a static home page in the admin panel of WordPress.
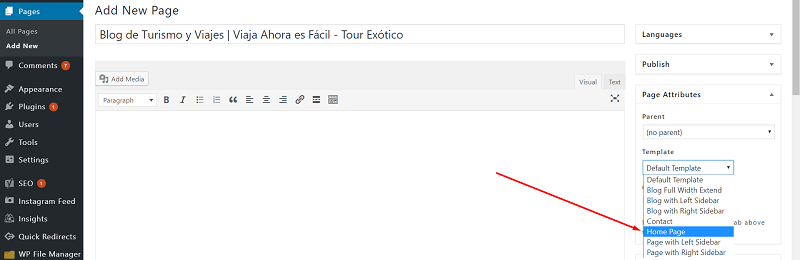
Go Pages – Add New Page, give the name for the main page, and set Home Page template in page attributes.
Save page. (click Publish button)
As we have a multilingual website (Polylang plugin installed), we need to set home pages for two more languages.
In language setting (translations) click the plus sign to create a page in the desired language. The page will be created automatically. Give the page name, set the Home Page template, and click publish. Make these steps for both additional languages.
Now we can see all languages versions in the language setting box:
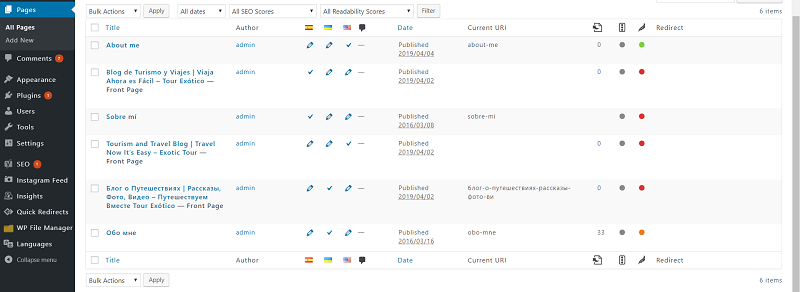
Create one more page using the default template and translate it to other languages as a home page. All the pages we have you can see on the screenshot:
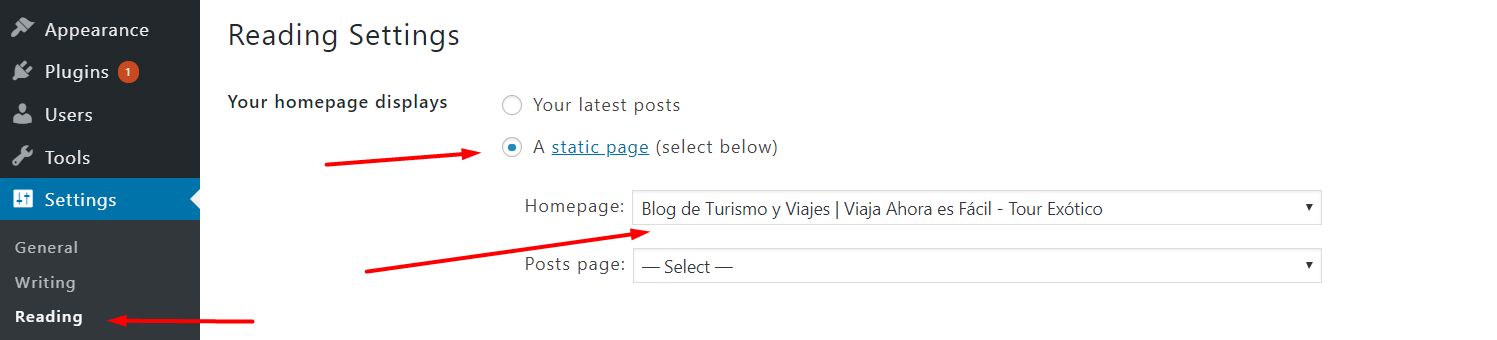
Go Settings – Reading. Select a static page option, and set page for the homepage.
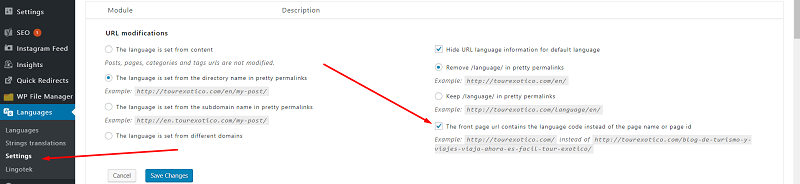
Go Languages – Settings. Checkmark “The front page URL contains the language code instead of the page name or page id”. Because we need a simple URL for the main pages, like http://tourexotico.com/, http://tourexotico.com/en/, etc.
4. Header and Footer changes.
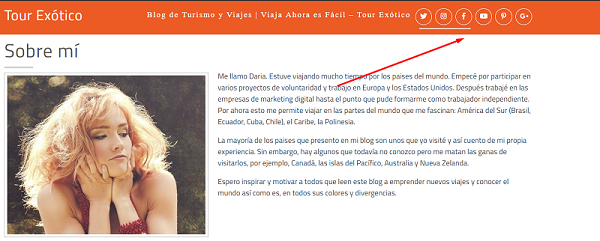
By default, there is a block with social links in the header menu.
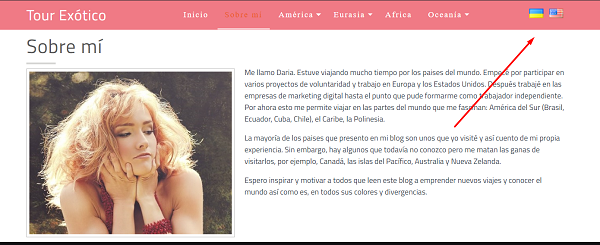
But we want to move social links to the footer, and in their place in header place Polylang languages switcher. There is no theme setting to achieve these goals. Therefore we need to make these changes through copying header and footer templates from the main theme to the child one. And then we can modify the code of these templates (child theme templates). Let’s go.
Copy two files from the main theme to the same folder of the child theme:
When you have already copied the files, then open content-header.php file in your child theme folder. Comment div block with social links (or you can remove this block if you want). And add a block with Polylang language switcher shortcode.
.polylang-switcher li img{ height: 20px; text-align: right; margin-left: 5px; }
To me, it looks great! You may need to stylize the mobile version of Polylang switcher appearance. Do it yourself.
And now put our social links to the footer right above the copyright field. Open template-parts/footer/copyright.php file of your child theme and add social links code from the header:
Go Appearance – Menus and create menus (if not exists) for different language versions. We have three languages on the site, so we have the same number of menus.
Go to the tab “Manage Locations” and make settings here:
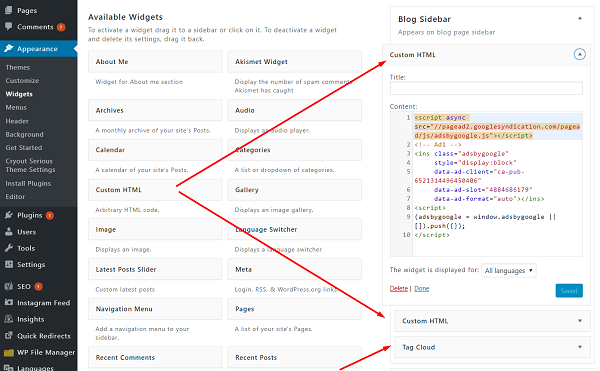
6. Setting widgets for sidebars
The theme provides us with four types of sidebars:
Blog Sidebar (used for a blog post)
Page Sidebar
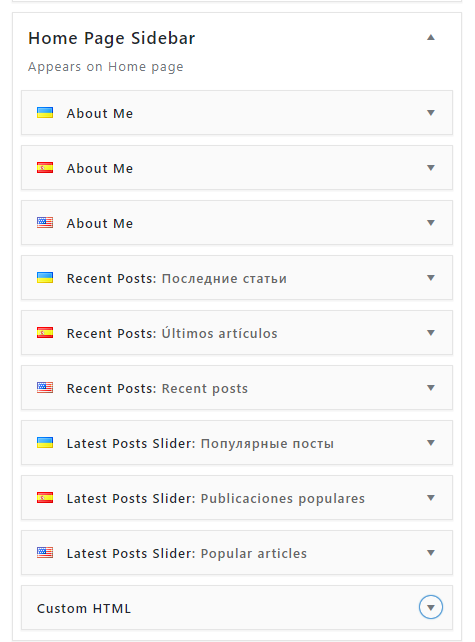
Home Page Sidebar
Footer (Four Sidebars as Column)
+ Blog Sidebar
Drag two Custom HTML widgets on the blog sidebar to set advertisement code on them.
Also, add a Tag Cloud widget:
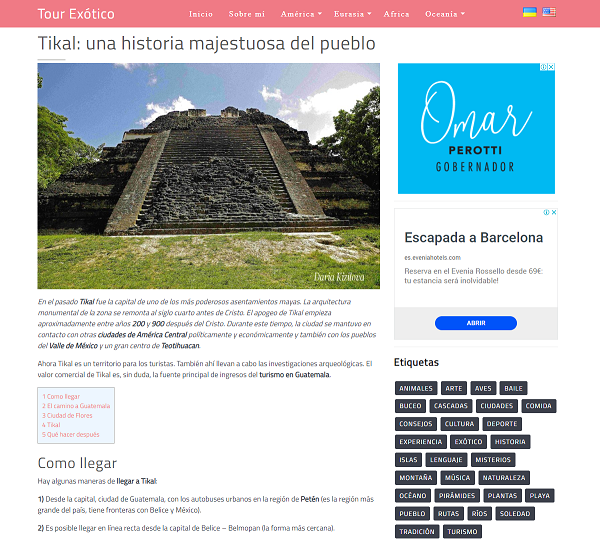
Here’s what it looks like on the blog page:
+ Page Sidebar
Page sidebar not used on the site now, therefore, we do not need to set anything on it.
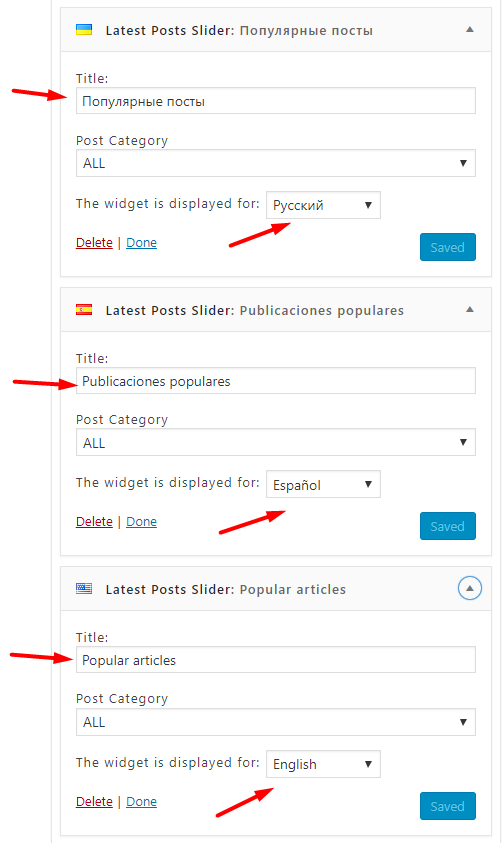
+ Home Page Sidebar
This sidebar viewed only on the front page. Set four types of the widget on the sidebar. And for every widget (except last one) we need to make exactly the same widgets for different language versions. Just drag the same widget on the sidebar, select language on the “The widget is displayed for” field and set the title in the specified language:
So for each language version of the website, a widget configured for this language will be shown.
In this way, we will add two widgets (a total of six – three languages version for each widget). And one widget at the end of the sidebar (Custom HTML widget) to set Instagram shortcode -[instagram-feed]. We do not need to make language versions for this last widget because we haven’t got a title on it and it shows the same in all site versions. Just set “All languages” in the “The widget is displayed for” field.
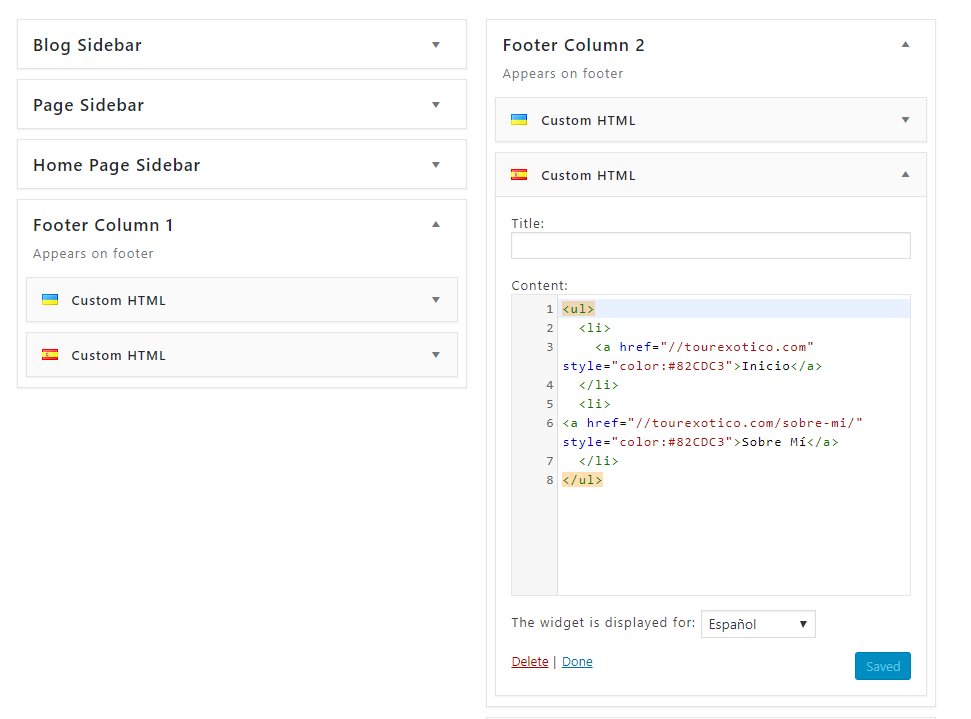
+ Footer
In the footer, we going to use only two columns. We set Custom HTML widgets (for two site versions). On these widgets place some link blocks of our website:
7. Customization and translation homepage widgets
To set theme there is customizer in Appearance – Customize – Theme Settings
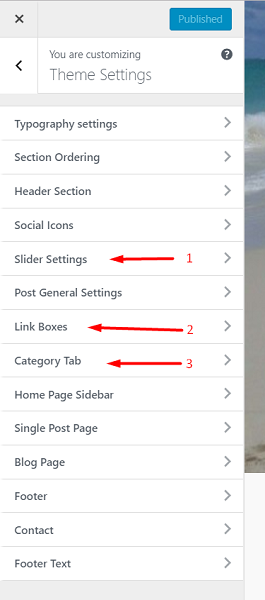
Most of the settings are intuitive. Now we are interested in setting up widgets on the main page, there are three of them, menu items that lead to their setting are shown in the screenshot.
I suppose you figure out how to set them up too. Let me show how to translate these widgets. We can’t create more such widgets for different languages like widgets for the sidebar. There is a way how to do it.I’ll show you slider setting example. The rest settings are translated in the same way.
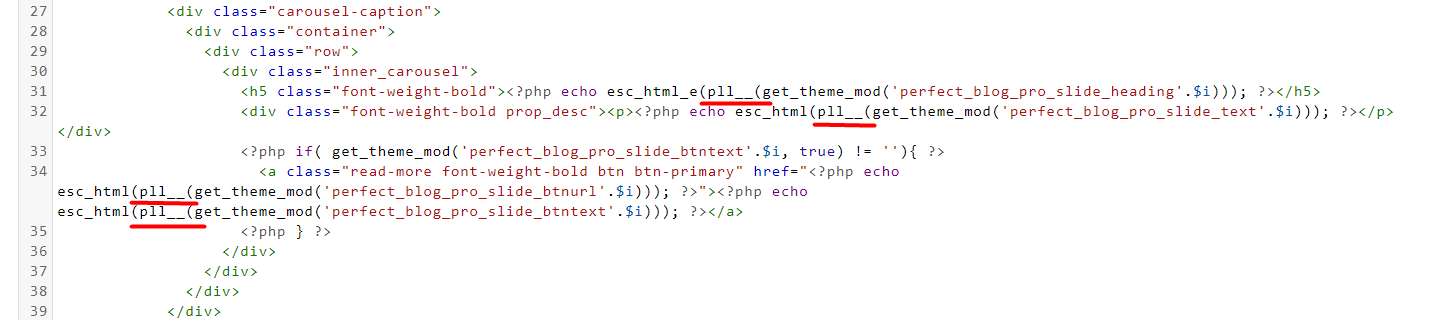
After set slide amount and all the fields, you need to add this code to the functions.php of the child theme:
Do not forget to insert the expression after pll__ in brackets.
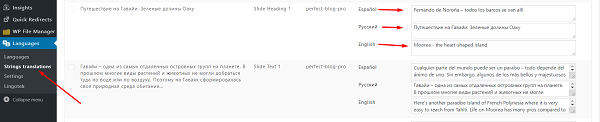
After adding Polylang identifiers and registrations setting in functions.php the values of these settings appear on Polylang panel.
Languages – Strings translations
Where you can now translate the settings you added.
It’s all for now. The theme is installed and configured.
Thank you for your attention!
Watch this video to see the whole process in motion:
About the Author
ByteScout Team of WritersByteScout has a team of professional writers proficient in different technical topics. We select the best writers to cover interesting and trending topics for our readers. We love developers and we hope our articles help you learn about programming and programmers.
What is Vue.js and how is Vue.js framework distinguished from other popular JavaScript frameworks and libraries? To begin, Vue.js tools have different applications that strictly...