Our ByteScout SDK products are sunsetting as we focus on expanding new solutions.
Learn More
Important Update
ByteScout SDK Sunsetting Notice
Our ByteScout SDK products are sunsetting as we focus on our new & improved solutions.Thank you for being part of our journey, and we look forward to supporting you in this next chapter!
JavaScript is synonymous with the web. If you are into web development, then you already know that there are plenty of JavaScript libraries, frameworks, and solutions.
In this tutorial, we are going to explore one more facet of JavaScript, the JavaScript XML which is popularly known as JSX. JSX is mostly used to write React-based applications. However, you are free to use JSX in your vanilla JavaScript app, but it is not necessary.
The first thing that you will notice about JSX is how it looks like HTML. Here, you can declare variables and then use HTML tags in them.
Let’s see an example to get an idea of where we are heading.
const abc = <h1>Welcome to JSX Introduction Tutorial<h1>
As you can see, the code is similar to HTML in many ways. This is because of how JSX works. By using JSX, you can create React element that is rendered to the React DOM.
To get a better idea, let’s explore more about JSX below.
What is JSX?
JSX can be defined as the syntax extension for JavaScript. As mentioned above, JSX is actively used in writing UI code for react app.
So, if you have used a template system or solution before, you can think of JSX similar to it.
JSX also falls under the category of domain-specific language(DSL). And, that’s why you will notice that it is similar to other programming languages including Razor, Twig, Mustache, and so on!
Why should you use JSX?
You may be thinking that you can easily define and embed elements to the React DOM. However, you can already do so using the React library. So, why JSX? Let’s explore.
React lets you create apps where you need to work with both the UI and the rendering logic together. This means that the state of the app keeps changing and you as a developer needs to keep track of it and ensure that the React app renders in all possible scenarios.
React component lets you couple both logic and markup together. For some developers, working with native React can be too much as they might feel that they need a visual differentiator.
JSX solves the problem by providing a visual aid as you can put UI directly into the JavaScript code. Another benefit that JSX brings is that it offers the ability to debug your code better as it gives warning and error messages.
Tell me how to use JSX!
To get started, you can create a file with the .js extension. Many developers prefer using .jsx extension, and it is up to you what you want to decide. The file should be created under the src folder.
Let’s quickly go through an example showing JSX code in full.
import React from "react";
import ReactDOM from "react-dom";
ReactDOM.render(
<div>
<h1>Hello World!</h1>
<p>Let's learn React JS using JSX</p>
</div>,
document.getElementById("root")
);
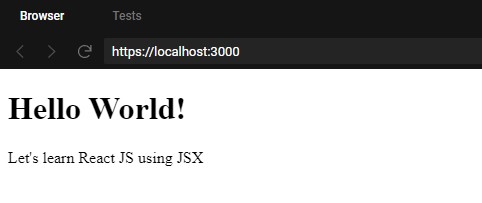
Once done, run the above code, you should get the following output.
The first two lines are used to import the React APIs so that they can be used to render the page. In the code itself, we used the ReactDOM.render function to render the simple div tag of our web page.
Simple, right!
As you can see, in the above code we simply printed the two statements. We can also edit the above code to include a variable and then print it. To do so, we need to sue the following code:
import React from "react";
import ReactDOM from "react-dom";
const welcome = "Hello World";
const message = "Welcome to React JS using JSX";
const element = (
<h1>
{" "}
{welcome} {message}
</h1>
);
ReactDOM.render(element, document.getElementById("root"));
It will give the following output.
Sounds, good, right?
We can also choose to use conditionals as well. To do so, we need to create an element and choose the conditional to showcase the content.
Let’s try to do it in the following example.
import React from "react";
import ReactDOM from "react-dom";
let x = 1;
const element = <h1> { (x == 1) ? 'Hello, Readers!' : 'False!' } </h1>;
ReactDOM.render(
element,
document.getElementById("root")
);
This will output the following:
Hello, Readers!
The above example is simple. All we did is check if the value of x is equal to 1 or not. If it is, then print out, “Hello, Readers!” message, otherwise print, “False!”
Attributes in JSX
Now let’s take a look at how attributes work in JSX.
Attributes are powerful and the good thing is that you can use attributes with HTML elements using JSX similar to how you did use vanilla HTML. However, there is one big difference that you need to know before you can start using attributes in JSX.
Attributes in JSX require you to use camelcase convection. This is different compared to the HTML as you do not need to stick to any convection. So, if you use an attribute named power in HTML, then it needs to be PowerName in JSX.
Let’s see an example to get a better understanding.
import React from "react";
import ReactDOM from "react-dom";
const element = (
<div>
<h1 ClassName="hello">Hello Readers</h1>
<h2 power-sampleForAttribute="2021">
This is a custom attribute that we created
</h2>
</div>
);
ReactDOM.render(element, document.getElementById("root"));
JSX lets you specify the attributes as string literals and expressions. Also, you should know by now that we can stack the elements within the JSX.
Finally, we will discuss how we can wrap children in JSX. Let’s check the example below.
import React from "react";
import ReactDOM from "react-dom";
const element = (
<div>
<h1>We learn things </h1>
<h2>That empowers us</h2>
<h3>to grow an conquer the world </h3>
</div>
);
ReactDOM.render(element, document.getElementById("root"));
The output for the above code is as below.
To comment within the JSX, you need to use /* and */ combination. These can come in handy as you need to comment on your code for future use.
Conclusion
There is a lot more to JSX than the tutorial covers. We manage to cover how it works, why you should use and its benefits. We also saw how the syntax works. Not only we used to print simple message using it, but also use conditionals within it. Then we focused on how attributes work within the JSX and the ways they can be used. Finally, we learned that you could wrap elements in JSX as well.
JSX is an ad-hoc solution to writing React applications. It is not all necessary for the project. However, using JSX will only help you in your project as it will help speed up things! Not only that, but it also lets you sanitize your code, giving you the ability to secure your site against common attacks such as cross-site scripting.
If you are not sure if you need it or not, check out the Why use JSX section in the article.
So, we covered quite a bit about JSX. Are you going to use it in your React app project? Comment below and let us know.
About the Author
ByteScout Team of WritersByteScout has a team of professional writers proficient in different technical topics. We select the best writers to cover interesting and trending topics for our readers. We love developers and we hope our articles help you learn about programming and programmers.
The web development world is incomplete without Javascript as it has evolved from an essential add-on to a robust tool for developers in web development....