Our ByteScout SDK products are sunsetting as we focus on expanding new solutions.
Learn More
Important Update
ByteScout SDK Sunsetting Notice
Our ByteScout SDK products are sunsetting as we focus on our new & improved solutions.Thank you for being part of our journey, and we look forward to supporting you in this next chapter!
Creating your own WordPress theme from scratch can be a great learning curve. And, if you are a learner who wants to get started with WordPress, then it can change your perspective about WordPress.
WordPress is the world’s number one content management system. It grew quickly in the past five years and is still continuing to do so.
In today’s article, we will learn how to develop a WordPress theme just using basic HTML, CSS, and JavaScript.
Before we get started with the step by step process to create a WordPress theme from scratch, we first need to understand learn about the pre-requisite.
To get started, you need to install WordPress locally. There are many ways you can do so, but we recommend using Bitnami if you are using Windows.
For the sake of simplicity, we are going to use Windows.
Also, you can create a WordPress theme in two ways: manual and automated. In the manual method, you need to write code for your theme, and in automated, you can theme builders to create the theme.
Understanding the Theme Directory Structure
It is important to know the theme directory to successfully create a WordPress theme. The layout of a theme contains the following files. index.php → The index.php file is the core of the theme which contains other files including the sidebar, footer, header, and so on. header.php → The header.php file contains the header theme code. sidebar.php → The sidebar.php file contains the sidebar theme code. footer.php → The footer.php file contains the footer theme code. style.css → The style.css file contains the style theme code. bootstrap.css → The core bootstrap.css file that contains a pre-defined CSS file. bootstrap.js → The bootstrap.js offers pre-defined javascript values.
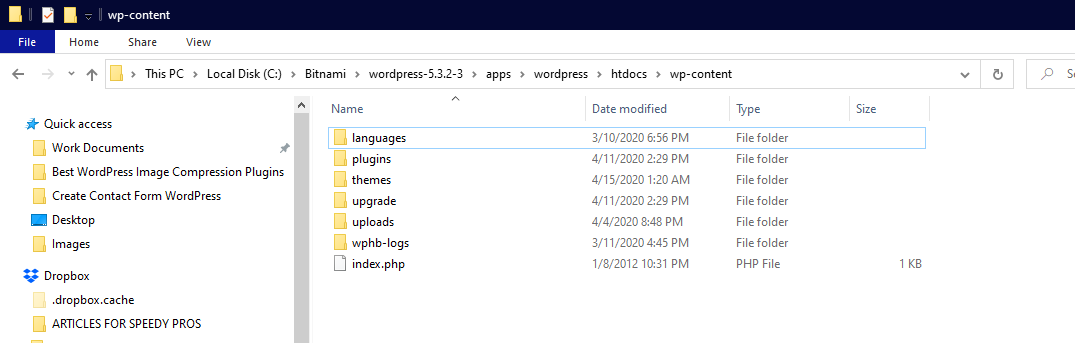
Once you have installed WordPress locally, then all you need to do is work with the wp_content folder.
If you are using Windows, then you will find the files located in C:\Bitnami\wordpress-5.3.2-3\apps\wordpress\htdocs\wp-content
Here the key folder is “htdocs.”
Also, you need to create a new folder within the wp-content > themes.
Let’s name our folder, “mynewtheme”
It contains the WordPress related folders.
You will also need a text editor to edit the files. You can use Visual Code Editor or Sublime text to do so.
How to Create a WordPress Theme From Scratch
We are now ready to create a WordPress theme.
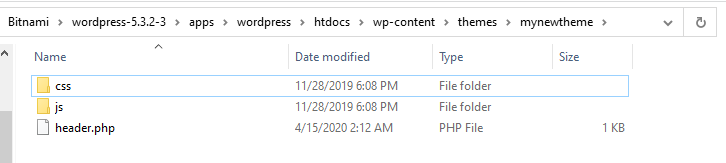
To get started, you need to download Boostrap packages. Once downloaded, you need to put it within the themes > mynewthemes folder.
Header.php
At first, we need to create our header.php file.
Once done, the folder structure should look like as below.
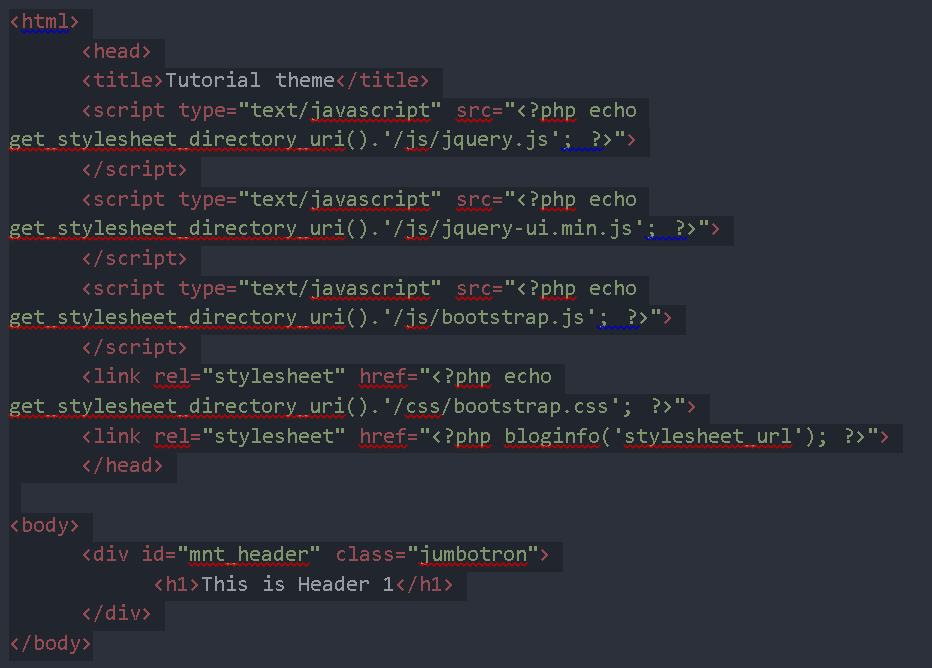
Now, we are ready for insert code in our header.php file.
Let’s go through the code.
Here, the first important line of code is the style files where we linked our Bootstrap CSS and JS files that we downloaded. All of these are done within the <head> element/
Here we used <?php bloginfo(‘stylesheet_url’); ?> to include the spreadsheet. This is a WordPress function that deals with importing files including stylesheets.
For simplicity, we used Bootstrap.
Bootstrap is a popular responsive web design framework that we can use to create our WordPress theme. It will take care of the styling of the theme including the CSS.
The last three lines of code add a div tag.
<div id="mnt_header" class="jumbotron">
            <h1>This is Header 1</h1>
      </div>
Here we used the jumbotron class to define the CSS of the section. Also, we used the “mnt_header” id which will be our main website container. With this id, we can modify the CSS and customize the feel of the site according to our needs.
Index.php
Next, we create the index.php file at the core of our main folder, “mynewtheme.”
In the index.php file, we copy-paste the following code.
<div class=”row”> <?php if (have_posts()) : while (have_posts()) : the_post(); ?> <div class=”col-lg-6 col-sm-6 col-md-6 col-xs-12″> <h1><?php the_title(); ?></h1> <h4>Posted on <?php the_time(‘F jS, Y’) ?></h4> <p><?php the_content(__(‘(more…)’)); ?></p> </div> <?php endwhile; else: ?> <p> <?php _e(‘No Post To Show’); ?></p> <?php endif; ?> </div> </div>
<?php get_sidebar(); ?> </div>
<?php get_footer(); ?>
Let’s go through the code now.
<?php get_header(); ?>
The first line of code imports the header.php file that we created above.
Next, we create more div on our website and give them meaningful ids so that they can be referenced later.
However, the most important code here is the if-else loop where we check for active posts. If there are active posts, they will be published on the site, otherwise, there will be an error message which will read as, “No Post To Show.”
<div class="row">
      <?php if (have_posts()) : while (have_posts()) : the_post(); ?>
            <div class="col-lg-6 col-sm-6 col-md-6 col-xs-12">
                  <h1><?php the_title(); ?></h1>
                  <h4>Posted on <?php the_time('F jS, Y') ?></h4>
                  <p><?php the_content(__('(more...)')); ?></p>
            </div>
      <?php endwhile; else: ?>
                  <p>
                  <?php _e('No Post To Show'); ?></p>
                  <?php endif; ?>
</div>
You can customize the error message as per your liking and requirement.
The last line of interest in the above code is <?php get_sidebar(); ?> where we add the sidebar content and finally the footer content using the <?php get_footer(); ?> code.
Sidebar.php
Our next stop is to code the sidebar.php.
First, you need to create an empty file named sidebar.php and then copy-paste the code in the file itself.
The code is self-explanatory. At first, we pull the categories and then list the post archives.
Footer.php
The last core part of the theme that we need to code is Footer.php. It contains all the code that resides on the footer section of your site. Also, you need to create a separate file and name it “footer.php” and then copy-paste the following code.
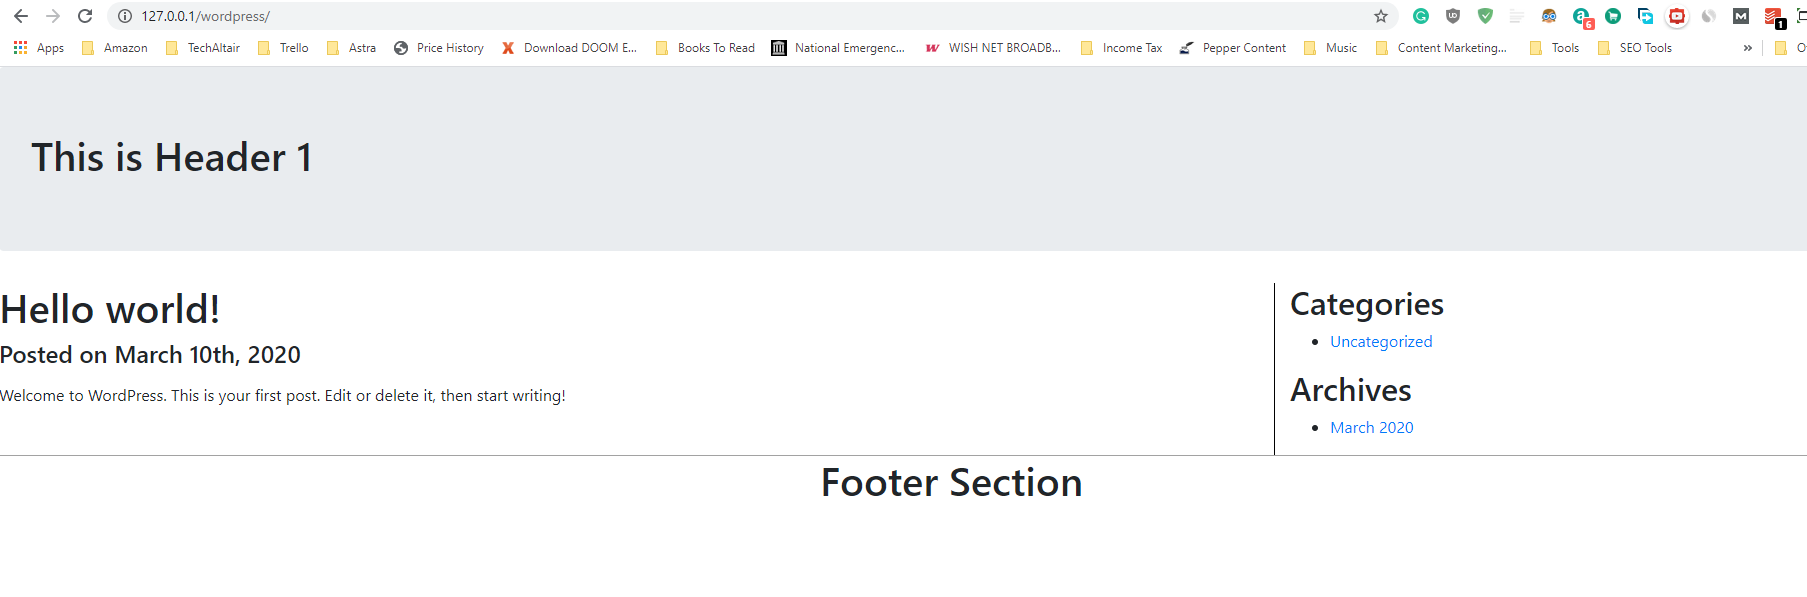
The above CSS is basic CSS code which adds some styling to your page. You can modify it according to your needs and add styling accordingly. You can also add text by adding new posts and then content within it.
Below is the preview of how the theme looks like.
What’s Next?
From here, you can explore more aspects of theme development by checking the WordPress documentation and other online sources that provide a more in-depth introduction to WordPress theme creation from scratch.
Also, if you are not techy, then you can also look at solutions that offer drag-and-drop WordPress theme development. They can save you a lot of time and give you something to start from.
Moreover, you can also take advantage of professional developers. Themes can become complex quickly and it can become hard for you to manage them if you don’t have the technical-aptitude to solve complex problems or tweaking the theme according to your requirement.
So, what do you think about creating a WordPress theme from scratch? Are you going to do it and then convert it to a beautiful looking theme? Comment below and let us know.
About the Author
ByteScout Team of WritersByteScout has a team of professional writers proficient in different technical topics. We select the best writers to cover interesting and trending topics for our readers. We love developers and we hope our articles help you learn about programming and programmers.
Processing is a programming environment for developing visual applications, works of art, and animations. Developed since 2001, designed by Casey Reas and Ben Fry, Processing...
There are various automation tools available to automate the application but very few for the desktop application. If you google then you will find a...