Reporting often contains barcodes within it. ByteScout Barcode SDK provides easy to use and fast barcode generation with support to almost all types of barcodes. In this article we’ll review how to add barcodes when generating RDLC reports using ByteScout Barcode SDK.
In the following guide, we’ll create a local report (RDLC file) which features barcoding capabilities by using Bytescout Barcode SDK.
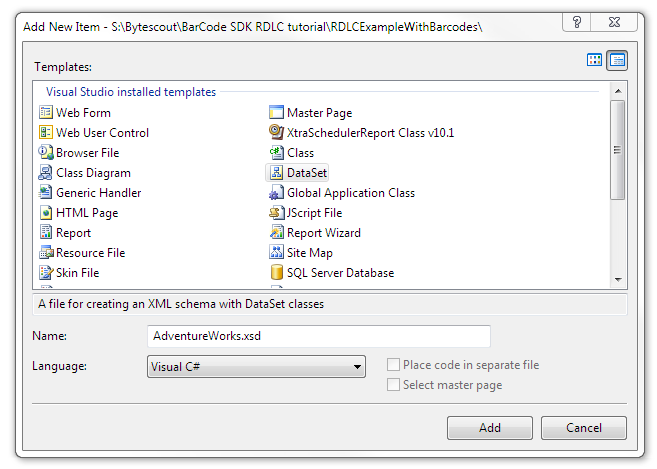 Click the Add button. You will be asked if you want to place the AdventureWorks.xsd file in the App_Code directory. Answer yes.
VS2005: After that, the TableAdapter Configuration Wizard is automatically launched so please follow its steps.
VS2008 and later: Right-click the design surface and select Add > TableAdapter…
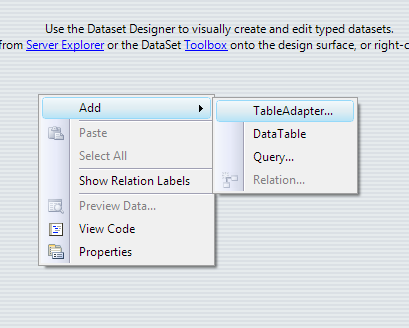
This will also run the TableAdapter Configuration Wizard. Follow its steps.
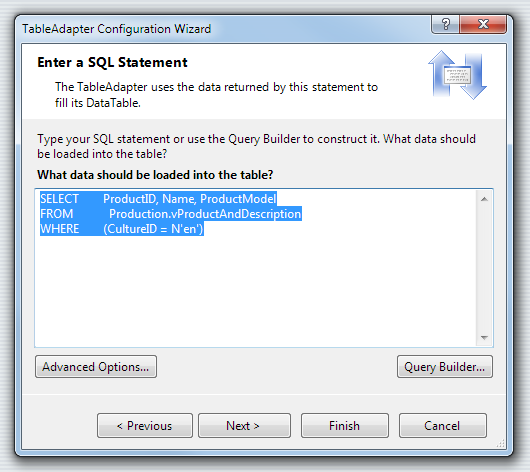
In the first step create a connection to the AdventureWorks SQL Server Database sample and click Next. In the second step, choose “Use SQL statements” and click Next. After that, please enter the following SQL Statement:
SELECT ProductID, Name, ProductModel FROM Production.vProductAndDescription WHERE (CultureID = N’en’)
Click Finish to close the wizard dialog box.
 Save the AdventureWorks.xsd file.
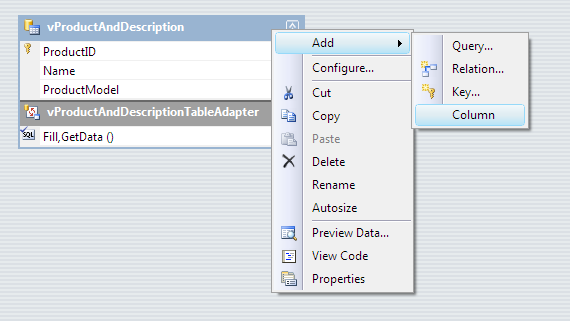
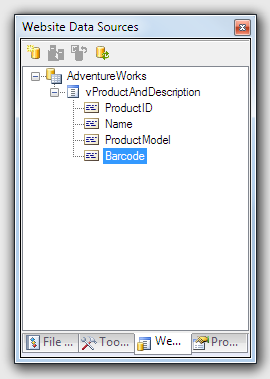
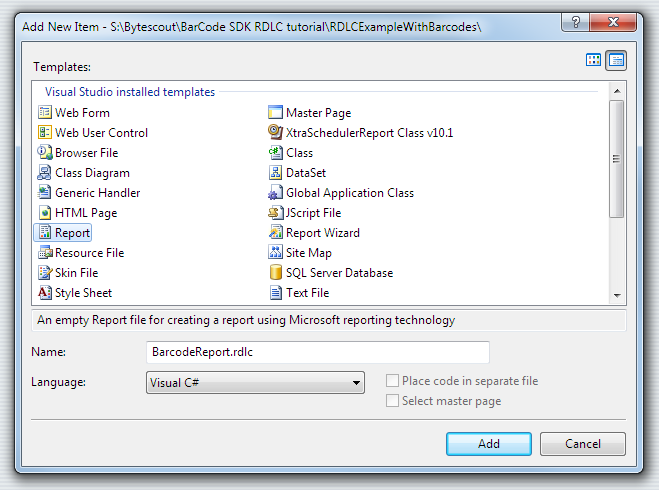 The data source for the report should look like the following figure. NOTE: You can display Data Sources Window by selecting the Data menu and then Show Data Sources (Shift+Alt+D).
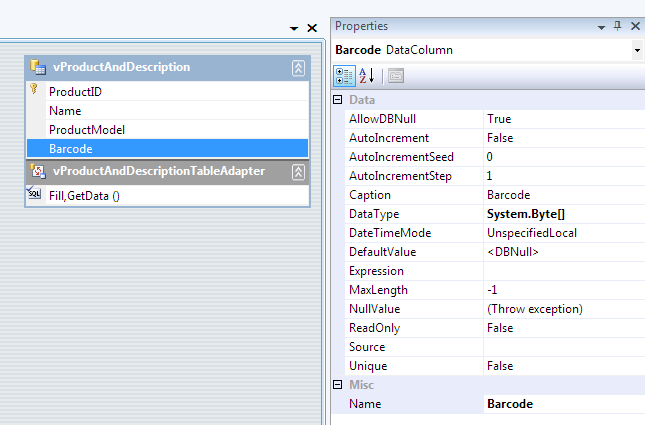
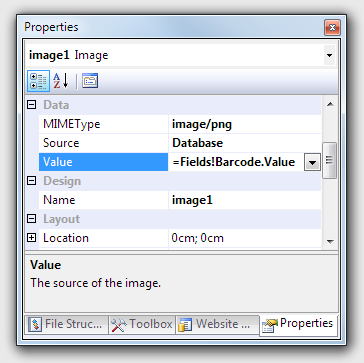
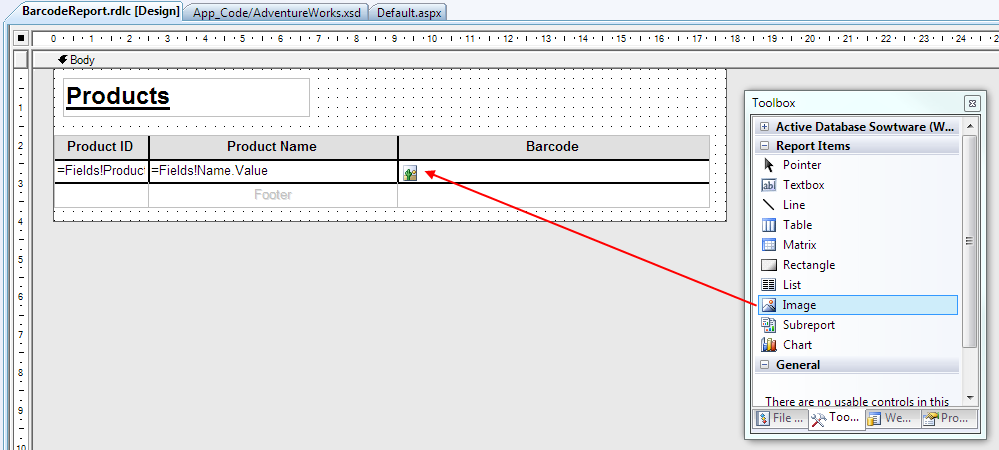 The report features a Table item with 3 columns: Product ID, Product Name, and Barcode. The Barcode column holds an image. Drag & drop an Image item into it and set its properties as is shown in the following figure. Notice that the Value property of the Image item is bound to the Barcode column.
Save the report.
using System;

using Bytescout.BarCode;
using Microsoft.Reporting.WebForms;

public partial class _Default : System.Web.UI.Page
{

    protected void Page_Load(object sender, EventArgs e)
    {

    // Fill the datasource from DB
    AdventureWorksTableAdapters.vProductAndDescriptionTableAdapter ta =
        new AdventureWorksTableAdapters.vProductAndDescriptionTableAdapter();

    AdventureWorks.vProductAndDescriptionDataTable dt =
        new AdventureWorks.vProductAndDescriptionDataTable();
    ta.Fill(dt);

    // Create and setup an instance of Bytescout Barcode SDK
    Barcode bc = new Barcode(SymbologyType.Code128);

    bc.RegistrationName = "demo";
    bc.RegistrationKey = "demo";

        bc.DrawCaption = false;

    // Update DataTable with barcode image
    foreach (AdventureWorks.vProductAndDescriptionRow row in dt.Rows)

    {
        // Set the value to encode
        bc.Value = row.ProductID.ToString();

        // Generate the barcode image and store it into the Barcode Column
        row.Barcode = bc.GetImageBytesPNG();
    }

    // Create Report Data Source
    Microsoft.Reporting.WebForms.ReportDataSource rptDataSource =
        new ReportDataSource("AdventureWorks_vProductAndDescription", dt);

    ReportViewer1.LocalReport.DataSources.Add(rptDataSource);
    ReportViewer1.LocalReport.ReportPath = Server.MapPath("BarcodeReport.rdlc");

    ReportViewer1.LocalReport.Refresh();
    }
}
Visual Basic
Imports Bytescout.BarCode

Partial Class _Default
    Inherits System.Web.UI.Page

    Protected Sub form1_Load(ByVal sender As Object, ByVal e As System.EventArgs) Handles form1.Load

        ' Fill the datasource from DB

        Dim ta As New AdventureWorksTableAdapters.vProductAndDescriptionTableAdapter()
        Dim dt As New AdventureWorks.vProductAndDescriptionDataTable()

        ta.Fill(dt)

        ' Create and setup an instance of Bytescout Barcode SDK
        Dim bc As New Barcode(SymbologyType.Code128)

        bc.RegistrationName = "demo"
        bc.RegistrationKey = "demo"
        bc.DrawCaption = False


        ' Update DataTable with barcode image
        Dim row As AdventureWorks.vProductAndDescriptionRow

        For Each row In dt.Rows
            ' Set the value to encode

            bc.Value = row.ProductID.ToString()
            'Generate the barcode image and store it into the Barcode Column

            row.Barcode = bc.GetImageBytesPNG()
        Next

        'Create Report Data Source

        Dim rptDataSource As New Microsoft.Reporting.WebForms.ReportDataSource("AdventureWorks_vProductAndDescription", dt)

        Me.ReportViewer1.LocalReport.DataSources.Add(rptDataSource)
        Me.ReportViewer1.LocalReport.ReportPath = Server.MapPath("BarcodeReport.rdlc")

        Me.ReportViewer1.LocalReport.Refresh()
    End Sub
End Class
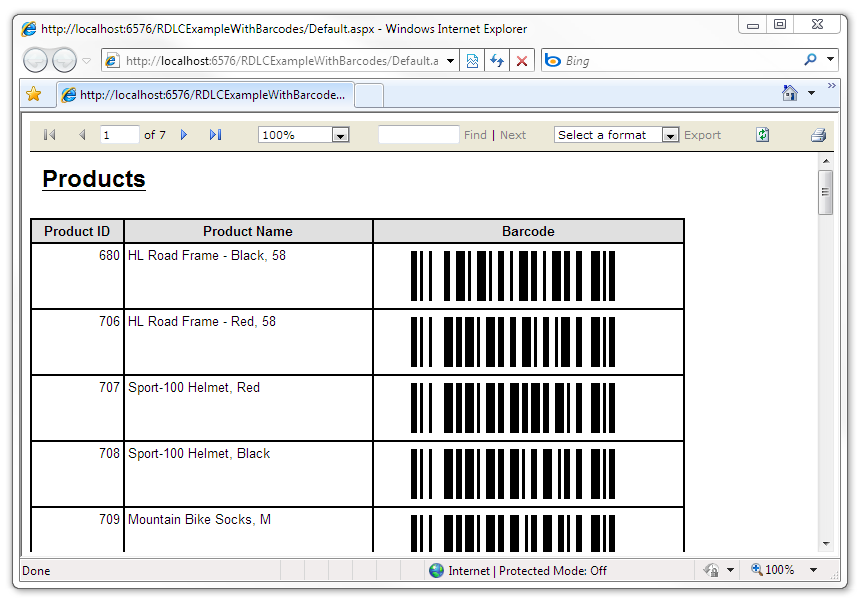 ReportViewer control lets you export the displayed report to Acrobat PDF as well as Microsoft Excel XLS. In both cases, the barcode images are maintained.
Let’s review important code snippets we have used in this program for Barcode Generation.
using Bytescout.BarCode;
Here we’re referencing ByteScout.BarCode namespace. As described earlier this requires “Bytescout.Barcode.dll” to be added in reference.
// Create and setup an instance of Bytescout Barcode SDK
Barcode bc = new Barcode(SymbologyType.Code128);
In this code snippet, we’re creating a Barcode instance named “bc” and associating type “Code128” to it. Supported barcode types can be viewed by exploring Enum “SymbologyType“. There are various ways to allocate barcode types, one such way is to configure the “Symbology” property.
bc.RegistrationName = "demo";
bc.RegistrationKey = "demo";
Here we’re configuring the registration name and key. These names and keys are provided by ByteScout at the time of purchasing the Barcode Barcode SDK license. When using the demo name/key it’ll have a watermark within the generated barcode.
Barcodes often have captions within. This can be turned off by setting the property “DrawCaption” to false as shown below.
bc.DrawCaption = false;
// Set the value to encode
bc.Value = row.ProductID.ToString();
In this code snippet, we’re providing a barcode value that needs to be used in barcode generation.
// Generate the barcode image and store it into the Barcode Column
row.Barcode = bc.GetImageBytesPNG();
Now that all barcode configurations to generate barcodes are completed, In this code snippet, we’re getting the output result image in PNG format.
ByteScout Barcode SDK provides many ways to generate output barcode. Depending our requirement we can use it. Some examples are “GetImage“, “GetImageBytes“, “GetImageBytesEMF“, “GetImageBytesGIF“, “GetImageBytesJPG“, “GetImageBytesTIFF“, “GetImageBytesWMF“, “SaveImage” (file), “SaveImage” (stream) etc.
That’s all guys. This is how easy to generated Barcode with ByteScout Barcode SDK. To get the most out of this program please do practical of this code and try to generate a barcode in your machine.
You’ll need to have SDKs installed on your machine. You can get it from the following location: